Yet another new carriage scratchbuild

Discussion of Rolling Stock related topics should go here
laalratty

Yet another new carriage scratchbuild

Post by laalratty » Sat Apr 17, 2010 9:07 pm

With the completion of my Ffestiniog Number 12/Van 5 I've already started on another scratchbuild. Again this one is Ffestiniog but rather then a vintage vehical, this one is a preservation era one. Indeed quite a modern coach


Image
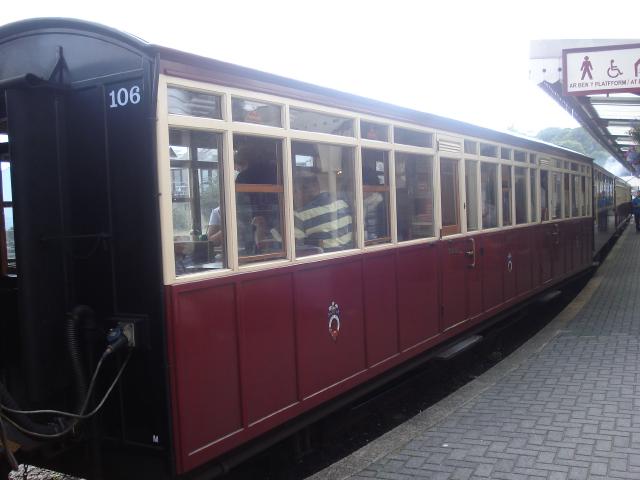
This is "Barn Carr" number 106, a 1960's coach but rebodied very recently and a identical carriage built alongside 107. It is these that my model will be based on.
Image
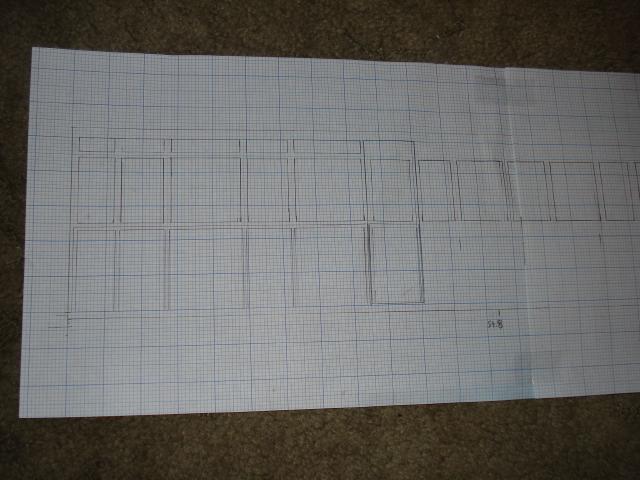
The drawing, incomplete but not needed to be complete because the coach is symmetrical from the centre
Image
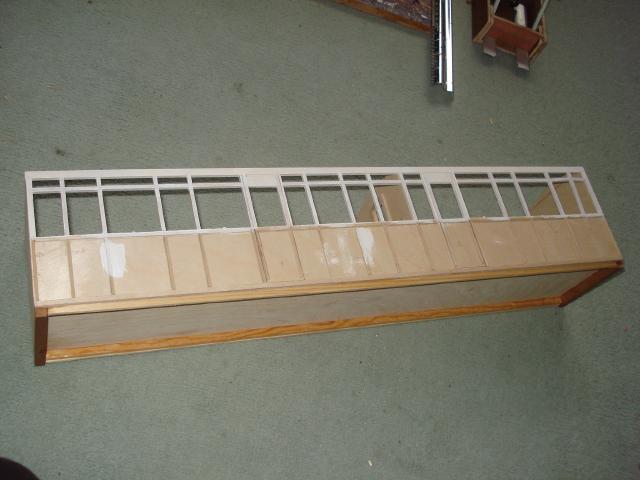
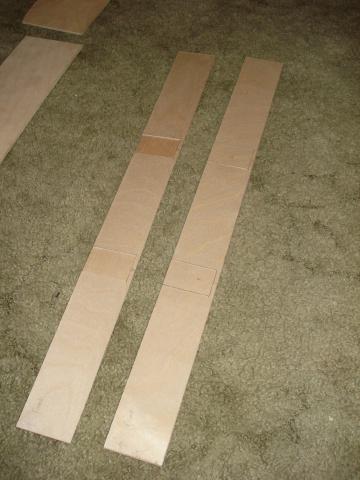
The sides have been done in a new way for me, three 1mm thick sides were cut out and glued together (because I couldn't find any appropriate 3mm ply). The front piece has had doors cut out and the inside one has doors scored out. The window frameing will be built onto the lower sides using stripwood.
As usual I'll keep you all updated with progress.

METHSSNIFFER

Post by METHSSNIFFER » Sat Apr 17, 2010 10:23 pm

You caught the bug as well Ive just started another bogie coach this weekend so Im upto Ive lost count I need to do a stock take but Im getting to where I want to be. Do you not draw straight on to the ply saves some time if you did.

laalratty

Post by laalratty » Sat Apr 17, 2010 10:25 pm

METHSSNIFFER wrote:You caught the bug as well Ive just started another bogie coach this weekend so Im upto Ive lost count I need to do a stock take but Im getting to where I want to be.
I thought I was where I wanted to be a summer or 2 back but then I moved the goalposts and started building carriages again! Luckily my uncle Keith will need some coaches for his railway and so this will keep me busy for a while yet! :D

METHSSNIFFER

Post by METHSSNIFFER » Sat Apr 17, 2010 10:29 pm

You know your coach 12 was this a total rebuild by the FR cos they state its 30 feet long I thought it was the origial van 5 which was 24ft

laalratty

Post by laalratty » Sat Apr 17, 2010 10:41 pm

Number 12 was extended in 1963 ish by adding 1 compartment and making it up to 30 feet. Apparantly Alan Garraway (FfR manager of the time) wished it had been extended to the full 36 feet because of the sucess of the buffet area in the carriage (which was restored very temporerily this Easter)

METHSSNIFFER

Post by METHSSNIFFER » Sat Apr 17, 2010 10:49 pm

Yes I read that as well did they increase its height as well!

laalratty

Post by laalratty » Sat Apr 17, 2010 11:02 pm

I believe the height has never been changed

laalratty

Post by laalratty » Wed Jun 16, 2010 9:22 pm

Wow, it's been 2 months since I posted about this! This is unfortunatly reflective of the time sapping that exams cause. However I had my last exam today, and achieved more today then I have in about the last month. So both sides have been made (no beading fitted yet) and I've cut out the partitions, although they will need doors fitting. I'll try and take some current pics and get them posted, but the carriage does look pretty much like it should, which is always good :lol:

taliesin001

Post by taliesin001 » Wed Jun 16, 2010 9:27 pm

Great news, can't wait for the pics :D

laalratty

Post by laalratty » Thu Jun 17, 2010 9:07 pm

Here are a couple of pics of the Barn

Image
The First side, along with a pic of what its based on. This was taken a few weeks ago...

Image
This is progress as of today, with both sides complete apart from beading, and with the partitions cut out and needing the rectangles cut out for the doors. The doors will be made seperatly. Hopefully this will be finished before the end of summer

LMS-Jools

Post by LMS-Jools » Thu Jun 17, 2010 9:28 pm

Huwwah :D

taliesin001

Post by taliesin001 » Thu Jun 17, 2010 9:29 pm

Very nice! :D It's coming along nicely

Pendo Pilot

Post by Pendo Pilot » Thu Jun 17, 2010 9:32 pm

Crikey that looks good, very nice workmanship there. Look forward to seeing how it comes along.

BTW, stop making them look so good! It's putting my efforts to shame.. :evil: ;)

laalratty

Post by laalratty » Mon Jul 05, 2010 9:09 pm

For some reason this one seems to be taking much longer then my others, even now I'm back to spending a lot of my time on it. Probably something to do with trying to get ever more realism, particualy with the interior

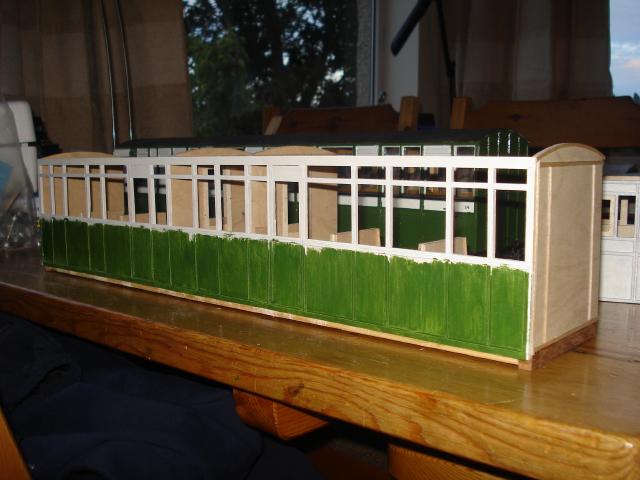
Image
As you can see the beading is now attached on one side, there is quite a lot for a modern general service carriage. I've also started with the wood priming, hoping perhapes by starting it now it will be less tedius to paint the carriage because the priming has already been done!

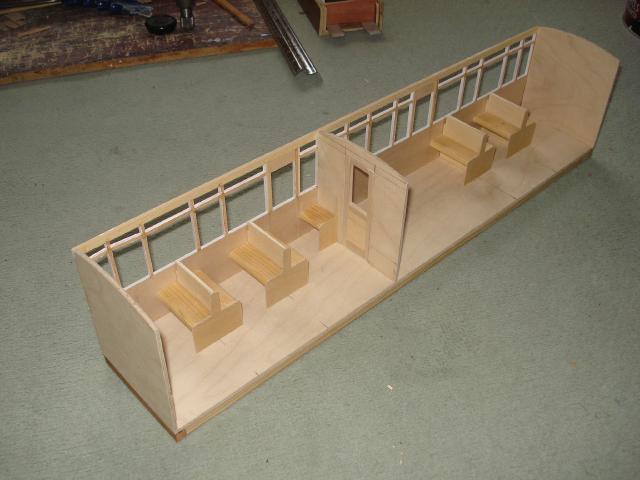
Image
The interior at the moment. Thanks to finding a pic of the interior of 106 during the middle of its rebodying in 2002 I've been able to put more detail on the seats then usual, although I still needs pics of the finished interior, and the first class in particular to achieve the standard I would like. It is slowly coming along though.

taliesin001

Post by taliesin001 » Mon Jul 05, 2010 9:14 pm

Looking very nice! What thickness of wood do you use for the panelling?

laalratty

Post by laalratty » Mon Jul 05, 2010 9:19 pm

1mm, I cut it from from big sheets, one of the more masochistical things I do when scratchbuilding carriages (cutting endless number of 2mm and 4mm wide strips.... :roll: )

SillyBilly

Post by SillyBilly » Mon Jul 05, 2010 9:34 pm

Well I'll try to remember tomorrow.

laalratty

Post by laalratty » Sat Jul 17, 2010 9:40 pm

I've slowly continued on with this, but I've got as far as I can on the interior.

Image
So I've just about finished the exterior panalling and started putting some paint on it, however I know need some more paint (still a bit left in the tin but once it gets old the paint takes and age to dry and harden, increasing the risk of getting dust in the paintwork and ruining the finish). So looking for other stuff to do I've finally put the replacement Brandbright ventalators on the L&B carriage, to finally complete its rebuild into FfR14, only a year after I originally purchased it! :roll:
I've also built this....


Image
This is an IP engineering FfR "Bug box", and is actually my uncle's first carriage. I built it while he watched and hopefully learned how to build wooden carriage kits. It was an ok build, although we did stuggle with the curved ends a bit! My uncle wanted it to put it in a livery to look ok with mine, so we've decided to put it in Colonel Stephen's green, with the red ends as well! :roll: (some people may not know my coaches should have red ends if I was fully replicating the Ffestiniog 1950's livery, however I decided they looked better in green!)

taliesin001

Post by taliesin001 » Sat Jul 17, 2010 10:00 pm

looks like it's coming on well. The bug box looks great, I've built 4 of those now and only just getting the hang of the ends! I tend to glue one edge down first, then work my way around, with a bit of luck they should match up! :D I usually steam the ends and leave to dry curved first.

MoelygestLR

Post by MoelygestLR » Sun Jul 18, 2010 1:50 pm

i dont know what all the fuss is about with the ends!
just use good superglue and they stick and hold their shape easily!

The only problem I am now finding is that I am going to strugle to be able to mount chopper couplings to them with the curved edge. Still need to do some thinking on that one!

Post Reply

Who is online

Users browsing this forum: No registered users and 17 guests