
To recap, this was my Christmas 2013 present to myself.....
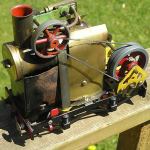
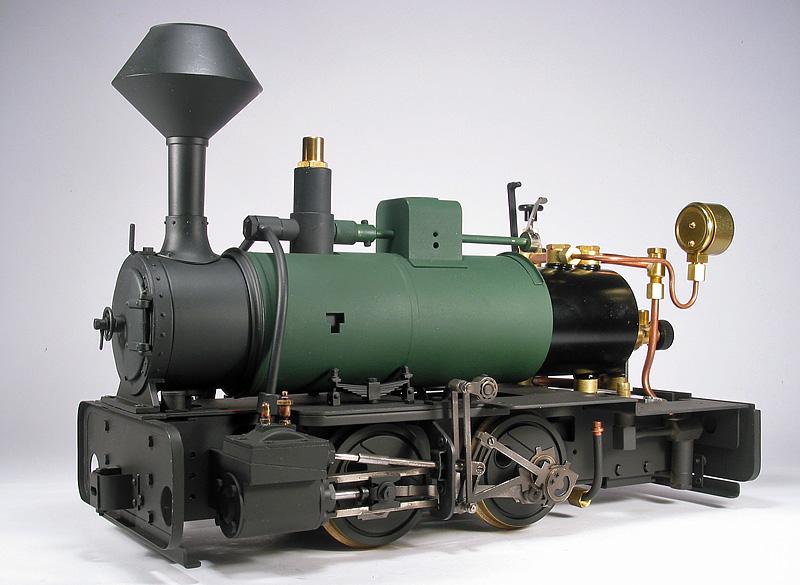
Aster intend the kit to look like this once assembled. It also comes in a version with the green bits in unlined black.
The model is based upon a 2'6" Krauss loco. that ran on one of the smaller Japanese islands and is now preserved on a plinth in a park in the city it once served.
Krauss did good business in Australia from the 1880's until 1914. They must have been solidly built, as many survived in service until the '50s. Details of the loco modelled by Aster aren't listed anywhere I can find, but it seems to be a 7 1/2 ton type IV 30HP model, which was one of the common types used in Aust.
After a bit of research, the model has been assembled and modified as necessary to resemble one of the Mt. Lyell Mining and Railway Co. 7 1/2 ton Krauss locos. These were sold off to various concerns over the years and at least one found it's way into the Victorian timber industry.
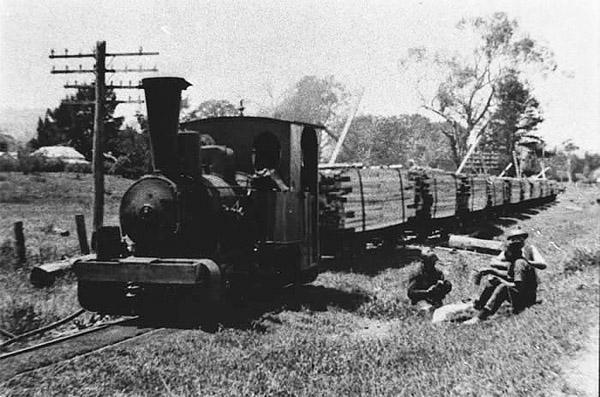
I'm not a fan of the Cheney spark arrestor fitted to the Rubicon Tramway loco. shown above, so I fitted a diamond stack type arrestor of the type fitted to other Krauss locos. running in Aust.
As expected the parts all fitted together without fettling and the instructions were not outstanding, but were adequate. Ignore at your peril, as the assembly sequence needs to be followed closely, or you find yourself having to disassemble things to fit something you missed the first time.
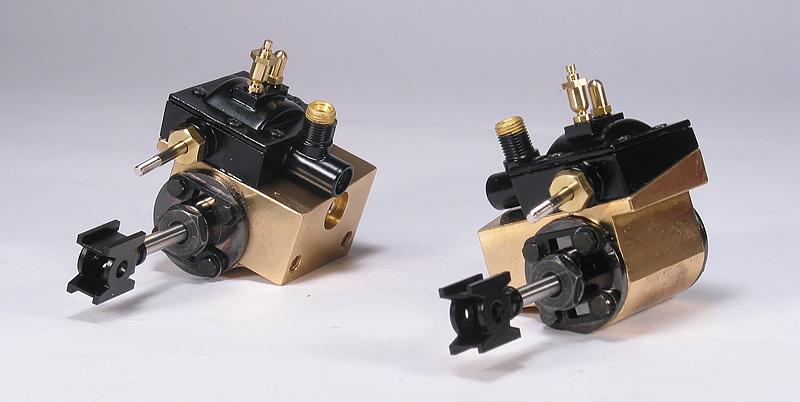
The instructions are in 12 steps. Step one is the cylinders with no issues. Only took a couple of hours, most of that was spent finding the right parts and fasteners in a multitude of little bags.
Next step was the rolling chassis. Again only a couple of hours to this point. This was only the second time I have fitted coupling rods to a chassis and found they rotated smoothly with absolutely no binding and without any fettling. The first time? That was my first loco kit, a Tri-ang CKD Princess kit from 50 years ago.......
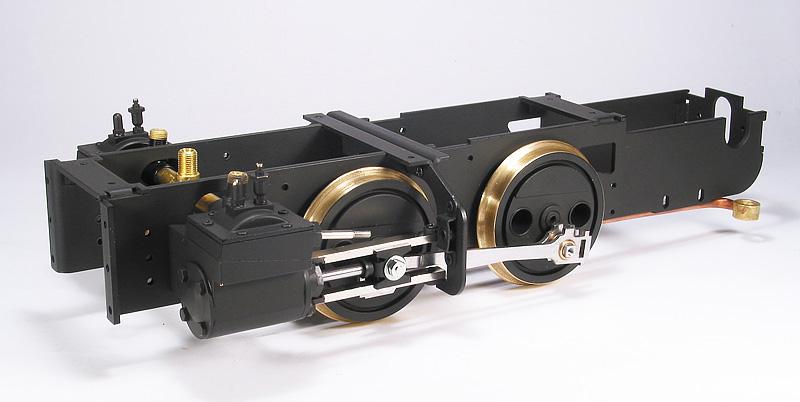
A couple of nights later and the chassis was ready to test run on air. All the parts fitted and the valve gear set up easily. The only minor irritation was that the rods were laser cut stainless steel and while the bearings were perfect, the rods hadn't had the burn marks and sharp edges cleaned up....
Aster supplied a fitting for connecting an air line and the chassis turned over first time. Within a couple of minutes it was running on about 5psi of air.
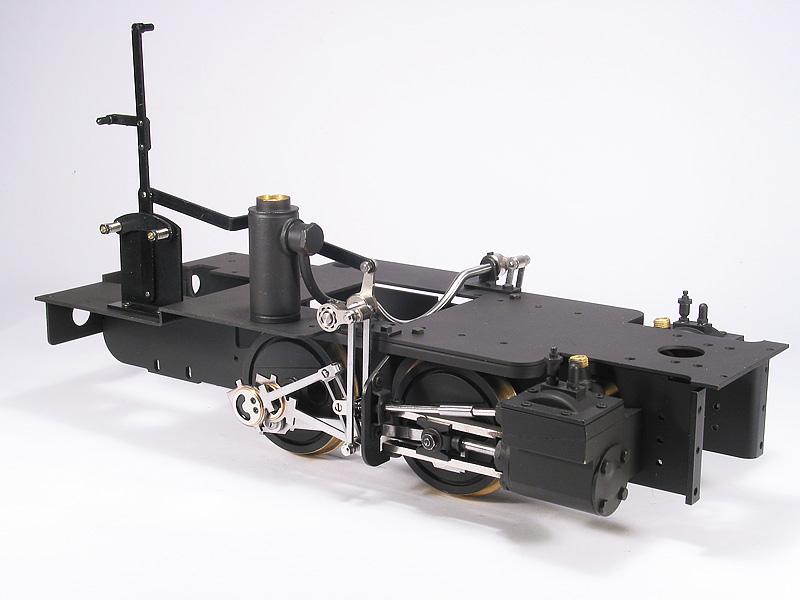
Progress then slowed....
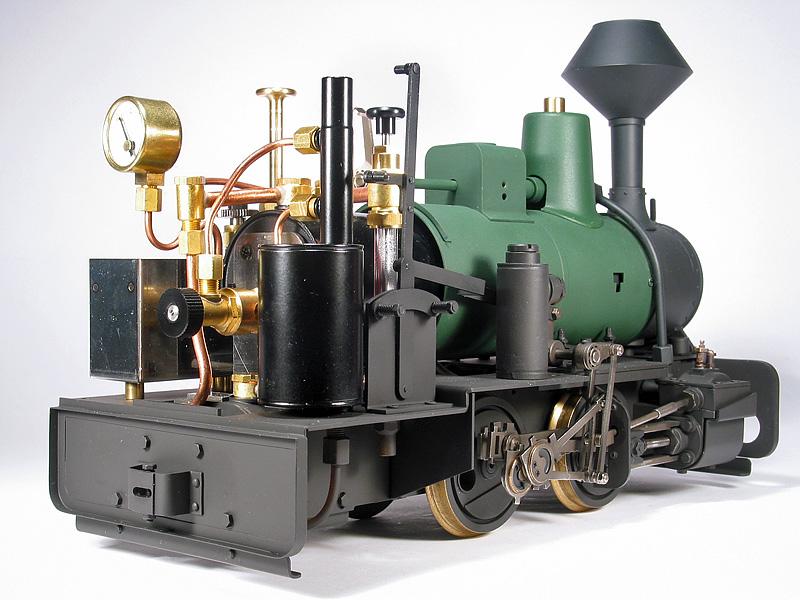
the model came with the Japanese draw gear, but I wanted the type of headstock and coupler typical of the majority of Aust. delivered Krauss locos. So, new headstocks and couplers had to be fabricated and fitted. Along with this, I didn't want the pump bypass valve and aux. gas filler sticking out of the rear headstock, where Aster had placed them. This meant various bits of plumbing had to be redesigned and made to locate the bypass valve in the cab and do away with the aux. gas inlet. I've been painting this one as I go, which also slows progress.

The boiler and burner on this loco are different to common UK practice. The boiler is small with a relatively large flue and basically no smokebox. The burner is a perforated metal tube and is located on the flue centre line. The gas valve is part of the burner jet assembly. These little Krauss locos. had saturated boilers with external steam pipes and the model is the same. Boiler capacity is low and the loco is fitted with an axle pump and water tank to compensate for this. Making the spark arrestor was another time consuming piece of work. It's a simple aluminium turning for the top, but the chimney part had to be made to fit the existing bush in the boiler. I didn't have a suitable metric fine die and couldn't get one locally, so it had to be threaded on the lathe. Only took two attempts to make a thread that fitted properly.......
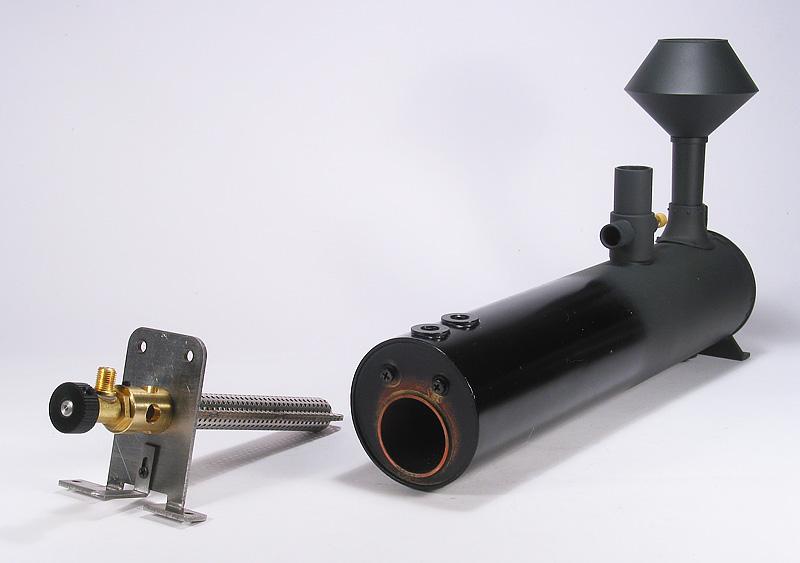
A couple of days later, the boiler was mounted and the steam piping was in place as well. Time for a hydraulic test just to be sure. Voila, no leaks.... This Loctite 515 is magic stuff, even if it does have the colour and consistency of strawberry jam. Normally I use paper gaskets or Form-a-Gasket #2, but Aster kits are designed for what they refer to as 'packing compound' in the instructions.
Another day saw the water and gas piping fitted. This pic is taken from the rear, showing how crowded the cab is. Water tank, hand pump and bypass valve on the left, upper gas tank, gauge glass and lubricator on the right. There's another gas tank between the frames below the burner.
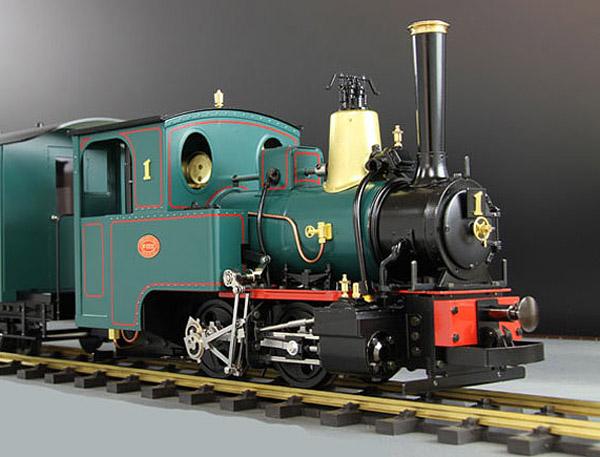
The last step was to fit the cab and various detail bits and pieces. The sun came out today for a change, so the opportunity was taken for the new loco. to have it's portrait taken. The clack valves, etc. came in nice shiny brass, so they were toned down with blackening solution to match the look of the rest of the loco., ie. hard worked and regularly maintained, but no one wastes time on keeping it polished.
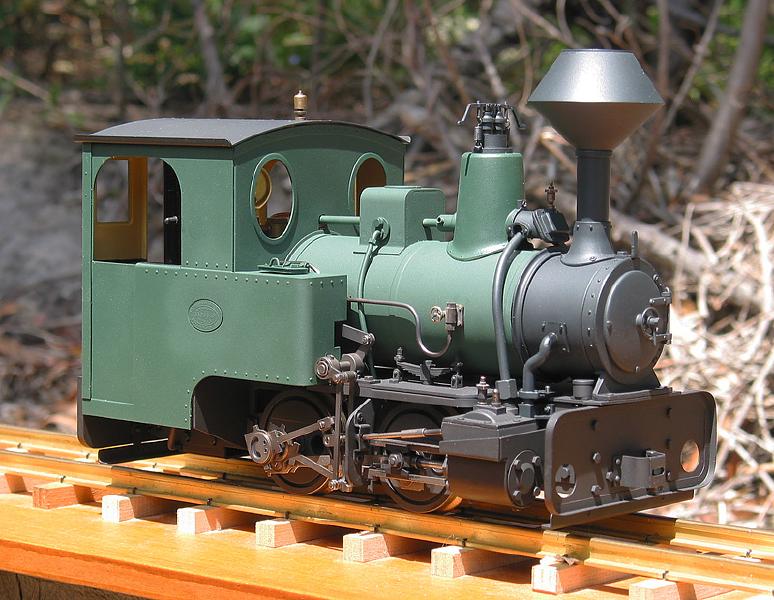
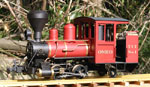
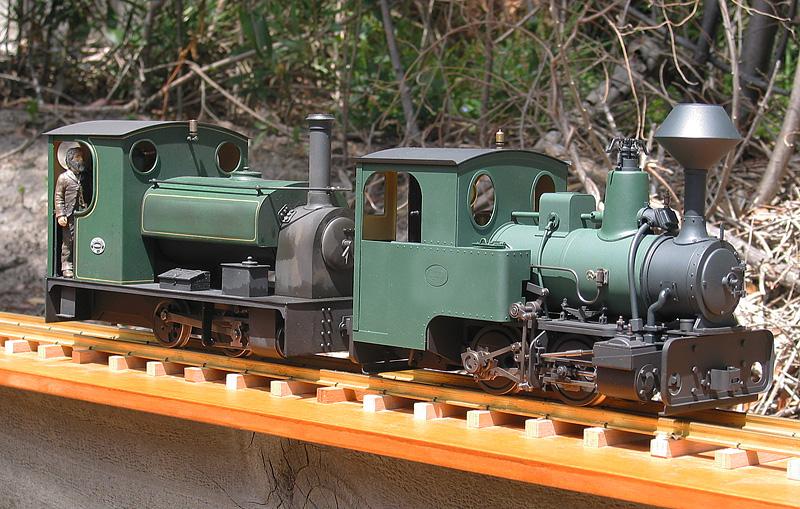
Even though the model is chunky and externally busy with pipework and outside Stephenson gear, it isn't particularly big. This pic shows it with my Hunslet loco to provide a bit of scale. The Hunslet is marginally smaller than the RH Bertie it is based upon and the Krauss is noticeably smaller again.
Conclusions
An interesting build, as the design philosophy is very different to UK practice. I'm still not sure I like it's aesthetics, but they are as typical an Aust. industrial loco as any from UK builders and more common than US industrial locos. here.
I haven't run it yet, but having to manage water as well as everything else will be interesting. I'm told they work best with a good load, as like other small locos. with small cylinders (these are only 10mm dia.) they can be lively when running light. There's a string of log bogies waiting for it.....
All the fittings and fastenings are metric fine which was a bit of a culture shock, especially as I had to make a few new fittings as part of the changes I made and I didn't have taps and dies in those sizes. Interestingly, you get plenty of spare screws, but no spare o-rings.........
If one were to build it as intended, I'd think it would take around 40 hours, as all the bits are there and painted, they all fit together with minimal fettling and the instructions are adequate. It took me longer than that, as I was repainting everything and making new parts that weren't in the kit.
Aster claim the scale is 1:20.3 and I've seen 1:21 mentioned in other places, but Krauss made a range of similar locos of varying size in any case.
The gauge would be the killer for a lot of UK modellers, as it is only available in 45mm gauge. Changing the gauge would require major engineering. Apart from anything else, the frames are laser cut and slotted together, then spot welded.
Regards,
Graeme