My Live Steam Loco's No.10 - Cheddar/GRS Steam Tram

Discussion of Live Steam locomotives should be located here
User avatar
Chris Cairns
Driver
Driver
Posts: 2372
Joined: Mon Oct 29, 2007 7:25 pm
Location: Glasgow, Scotland

My Live Steam Loco's No.10 - Cheddar/GRS Steam Tram

Post by Chris Cairns » Fri Jan 11, 2008 10:33 pm

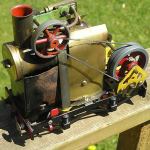
OK, I've been clearing up my steam engine store, and uncovered this boxed loco. Particularly for steamyjim here is my 10th live steam loco, a Cheddar/GRS Steam Tram.

Image

Image

Image

It is fitted with a modified Cheddar Iver boiler and chassis, but I do not like the way the receiver and battery packs are stuck to the side of the boiler (very hot surfaces and electrical items should not go together).

Image

Image

Image

It came with a box wagon as well, and I intend in moving the R/C gear into this wagon. Unfortunately although it appears to have been a kit the wagon has been badly constructed so will need to be attacked with a model knife and rebuilt. Originally I thought it was too small for this tram but it is similar to the Mamod rolling stock so I'll keep it to the same dimensions as shown here.

Image

This will all need repainting, and the plastic part of the skirt around the chassis needs moving slightly as the rear of the cab structure has been resting on the back of the gas burner and has started to bow out under the effect of the heat from these burners. There are some brass fittings to incorporate (window surrounds - although 1 is missing, and 6 lamp irons).

I may look at getting some cowcatchers as well and modelling it like the real thing it is based on - a Y6 tram ( http://www.lner.info/locos/Y/y6.shtml ).

As with the Cheddar Iver this loco is out of gauge for the Mamod points, and I've not worked out how to modify these yet.

Image

If anyone has a copy of 'Garden Rail' Issue 108 this has a review of this loco by Tag Gorton. I would appreciate a copy or high resolution scan of this article. Thank you. (edit: finally obtained a copy of this issue)

I'll get more of my locos up here in due course.

Thanks for looking. I hope you enjoyed it.

Chris Cairns.

(edited to update photobucket image URLs)
Last edited by Chris Cairns on Fri Jun 28, 2013 9:17 pm, edited 1 time in total.

ACLR

Post by ACLR » Sat Jan 12, 2008 7:45 am

:shock: wow Chris you keep me amaized with what you have hidden away.
realy nicetram there mate :D

User avatar
Chris Cairns
Driver
Driver
Posts: 2372
Joined: Mon Oct 29, 2007 7:25 pm
Location: Glasgow, Scotland

Post by Chris Cairns » Sat Jan 12, 2008 11:40 am

Watch out for my Locos No's 5 & 6 coming soon, they are not 'O' Gauge!

steamyjim
Retired Director
Retired Director
Posts: 1210
Joined: Tue Oct 16, 2007 9:19 pm

Post by steamyjim » Sat Jan 12, 2008 3:14 pm

Looks great Chris! I've never had any problems with the RC gear by the boiler on my Iver ;)

Must get round to using the other spare body i have for one :D

SillyBilly

Post by SillyBilly » Tue Jan 15, 2008 11:13 pm

Lovely engine Chris!

Just incase you haven't see this, it's got photos of modified mamod points on www.rvlr.photos.gb.com/p41395020.html .

User avatar
Chris Cairns
Driver
Driver
Posts: 2372
Joined: Mon Oct 29, 2007 7:25 pm
Location: Glasgow, Scotland

Post by Chris Cairns » Wed Jan 16, 2008 12:04 am

Thanks William,

Yes I've seen Peter's photos before. Must ask him how he modified them some time.

User avatar
Chris Cairns
Driver
Driver
Posts: 2372
Joined: Mon Oct 29, 2007 7:25 pm
Location: Glasgow, Scotland

Post by Chris Cairns » Fri Jun 28, 2013 9:08 pm

Having recently refurbished my Cheddar Iver it was time to turn my attention to my Cheddar/GRS steam tram.

I have never run this Tram since I won it on eBay so this will be a prolonged overhaul. It came with a boiler full of coloured water!

Just realised that this is another topic where I need to update the previous photobucket image URLs so I'll get that done soon for your reference (edit: now updated).

So the Cheddar/GRS tram uses a modified Iver chassis, which is shorter in length with different buffer beams.

Image

This is the 32mm version so the shorter chassis frames mean there is no space for the battery box or receiver as fitted on the Iver. So on this model the previous owner had fitted two 2 x AA battery boxes with double sided foam on one side of the boiler, and the receiver was held onto the tram skirt with silicone on the other side of the boiler.

Image

Like my recent Cheddar Iver refurbishment I found both the battery boxes had corroded fittings so I have sourced new ones so that I can use the R/C to run this loco (there is no manual control option as the regulator/reverser control is inside the chassis frames.

Image

I have cleaned and oiled up the motion and cylinders, and fitted some string to the steam inlet pipe as it is exposed.

Image

The previous owner had fitted multi height couplings but they were off centre, so I have reamed out the rear chassis hole and skirt body, and repainted that coupling. Just the front one now to get the same treatment.

Image

I'm still undecided whether to keep the R/C all on-board the Tram, or keep it in the attached box van. For the refurbishment running trials the R/C will be placed in an open wagon.

Chris Cairns.

User avatar
Chris Cairns
Driver
Driver
Posts: 2372
Joined: Mon Oct 29, 2007 7:25 pm
Location: Glasgow, Scotland

Post by Chris Cairns » Sat Jun 29, 2013 11:12 pm

Some more progress.

I've fitted the tram skirt temporarily for running trials. This had the power on/off switch fitted so I've left that in place for now together with the battery harness.

Image

The boiler was specially made for this model and is similar to the Iver boiler.

Image

The steam dome is fitted further forward and there is another insert on the top of the boiler for the fitting of a vacuum relief valve.

Image

I have cleaned up all the fittings on the boiler and resealed them, cleaned out the sight glass tubing and placed a piece of copper wire inside (being 5mm these gauge glass's are susceptible to air bubbles).

Image

I have covered the rest of the exposed steam pipe on either side of the in-line lubricator with string.

Image

I now need to flush out the boiler using a vinegar/water solution, then I can start the running trials.

Chris Cairns.

User avatar
Dr. Bond of the DVLR
Retired Director
Retired Director
Posts: 4533
Joined: Tue Jun 09, 2009 9:43 pm
Location: Suffolk
Contact:

Post by Dr. Bond of the DVLR » Sat Jun 29, 2013 11:39 pm

Very smart - I had no idea how different the tram was to the Iver. I thought the tram was just a drop on addition...
Image
The railway which people forgot
(to build)

Narrow Minded

Post by Narrow Minded » Sat Jun 29, 2013 11:47 pm

That's excellent Chris, I'm no real lover of tram loco's generally - but this one's an exception! :love10:

User avatar
Chris Cairns
Driver
Driver
Posts: 2372
Joined: Mon Oct 29, 2007 7:25 pm
Location: Glasgow, Scotland

Post by Chris Cairns » Sun Jun 30, 2013 12:58 pm

Thanks Guys.

The Tram uses parts from the GRS G64 Y6 LNER Tram which is still available ( http://www.grsuk.com/index.asp?docs/7.asp#_Toc177208570 ). So at a standard gauge scale of 1:22.5 this Tram is actually correctly scaled for narrow gauge on your 45mm railways, and somewhat over-scale for my 32mm track.

The tram skirt is an exact fit to the modified Cheddar chassis, but as Graeme has pointed out in my 'Reheating Resin' topic the body is a little short to fit over the current boiler, etc. However I have found the gas burner is not a flush fit in the flue and by trimming the flue end I'm hoping the body may fit better.

Chris Cairns.

User avatar
Chris Cairns
Driver
Driver
Posts: 2372
Joined: Mon Oct 29, 2007 7:25 pm
Location: Glasgow, Scotland

Post by Chris Cairns » Mon Jul 01, 2013 12:19 am

So just completed a couple of steam runs.

First was on blocks which found 2 steam leaks (easily fixed) and it was a bit noisy running (tram skirt is currently only held on by 2 of the 4 screws, as the 2 front ones need the nuts held using my curved needle pliers through the steps and I want to easily remove the skirt again to paint the wood floor an appropriate colour).

2nd run was on the track with receiver & battery in an attached open wagon. Like other oscillating cylinder locomotives it is capable of some impressive speeds and is a little tricky to run at a scale walking pace. I was using a transmitter with a self-centering throttle control with short control sticks. Next time I'll try the transmitter that came with this locomotive which has the centering springs removed from the throttle control but cannot be fitted with a ratchet.

Whilst it may be possible to fit the receiver between the chassis frames, the battery box(s) would need to be fitted alongside the boiler. Having looked at the boxes that came off the loco these suffered from water contamination, despite have screw on lids, and the plastic has partly melted where the boxes have leaned against the boiler. So I'm convinced having the R/C in an attached wagon is the best option, and use of a servo extension lead would allow the tram to be run in either direction pulling the wagon behind.

Chris Cairns.

User avatar
Chris Cairns
Driver
Driver
Posts: 2372
Joined: Mon Oct 29, 2007 7:25 pm
Location: Glasgow, Scotland

Post by Chris Cairns » Fri Jul 19, 2013 10:58 pm

Just ran this Tram again and learned a few things.

I have been filling up the boiler using a funnel in the steam dome but this seems to cause a problem with air bubbles so ended up overfilling (the copper wire I used in the sight glass tube was thicker than my usual one so that was changed for the 2nd run). There is a baffle plate at the bottom of the steam dome, but I'm not sure if that is fitted to my Iver boiler as well as I have no problems filling up the Iver boiler.

I've been refurbishing my Radio Control equipment and so had previously run this Tram uses different transmitters (they have a centering spring on the throttle channel). So swapped the AA cells over to the tram transmitter to find they did not work. These cells cause problems in some of my equipment as their +ve terminal on the top is not as tall as the standard dry cell AA's. So had to swap one cell for another type to get it working, and a small piece of plastic card behind the problem terminal has now solved the problem.

In my rush to get it running I broke the cardinal R/C rule of functionally checking everything before a run and had lit up the tram. I found the throttle servo was in the wrong channel (my 2 different Acoms 27 MHz 2 channel transmitters have their outputs reversed) so I switched off the receiver, swapped the servo over to the other channel and switched receiver back on. Oops!?! I ended up with the throttle control fully open, and with no manual control of the throttle possible I had to throw a rag over the chimney to contain the huge fountain of exhaust steam and condensate, turn the gas off and wait for the tram to come to a stop. Just as well it was on blocks!

The throttle channel on the tram transmitter had the centering spring removed and the rotary potentiometer had worked free from it's mounting and rotated - now fixed. Putting the receiver & battery in an MSS tender had caused 2 problems - firstly the multi height coupling is too high for the MSS coupling so it was pulling the tender off the track, and the all metal construction was causing a fair amount of glitching on the throttle channel.

So I've done some remedial work on the accompanying R/C box van (one sole bar needed re-positioning) and I'll try a different set of crystals the next time.

Chris Cairns.

User avatar
dougrail
Driver
Driver
Posts: 1535
Joined: Mon Mar 14, 2011 5:11 pm
Location: Salopia; on the edge of Arcadia

Post by dougrail » Sat Jul 20, 2013 1:00 am

Looks like you're slowly getting there with this - good luck with the RC Chris!

Stewart Gethin

Post by Stewart Gethin » Sat Jul 20, 2013 12:26 pm

Hi Chris. Lovely models coming along with you.

I was curious to one of the points above when you were putting your sight glass together and you put copper wire inside. Does this then prevent air bubbles happening in the future?

Thanks,

Stew

User avatar
dougrail
Driver
Driver
Posts: 1535
Joined: Mon Mar 14, 2011 5:11 pm
Location: Salopia; on the edge of Arcadia

Post by dougrail » Sat Jul 20, 2013 1:46 pm

Yes it does Stew - I've done the same to the water sight glass in my Swordbreaker.

Stewart Gethin

Post by Stewart Gethin » Sat Jul 20, 2013 2:45 pm

Thanks Doug, will have to try it in my 5" loco.

Stew

Sir haydn

Post by Sir haydn » Sat Jul 20, 2013 2:58 pm

Dont use copper it will fur up and stain the gauge glass. Use stainless steel rod.

User avatar
Chris Cairns
Driver
Driver
Posts: 2372
Joined: Mon Oct 29, 2007 7:25 pm
Location: Glasgow, Scotland

Post by Chris Cairns » Sat Jul 20, 2013 7:21 pm

I picked up the tip of using a piece of copper wire from elsewhere on-line, and I've not had any problems with it furring up so far. I guess it depends on what water you are putting in your boiler, and if I am not using a locomotive for a while I empty the boiler completely. I use a piece of copper wire out of the 10 amp cable used for lighting circuits.

Even some so-called stainless steel corrodes.

Chris Cairns.

Stewart Gethin

Post by Stewart Gethin » Sat Jul 20, 2013 8:44 pm

Will have to try both overtime. Will probably try copper first as we have ample hanging about the place here.

Will keep the stainless steel in mind though.

Stew

Post Reply

Who is online

Users browsing this forum: No registered users and 45 guests