Page 1 of 2
F & B Ashbury Coaches
Posted: Tue Apr 15, 2025 8:48 am
by philipy
Over on my F & B Loco thread (
viewtopic.php?t=15029&start=40 ) I made a passing reference to drawing up the coaching stock:
I've spent the last couple of weeks drawing up the coaching stock to go with it. 
This is the All Third, but I've also drawn the Brake Third and the 1st/2nd Composite.
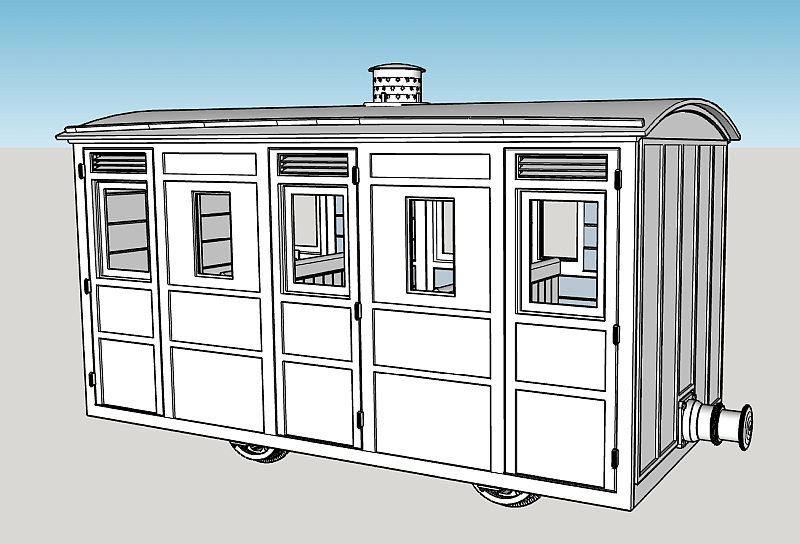
- Screenshot 2025-02-07 16.32.07.jpg (170.13 KiB) Viewed 50507 times
Again, there doesn't seem to be any info on livery apart from the lettering visible on the few photos, or internal fittings. So I'm doing them in the same red as the loco and guessing at internal colours. The 1st compartment is known to have had a carpet and curtains though!
Well, I've just completed the first vehicle. I decided to do the Brake Third initially since that is needed however, and whichever, others I have.
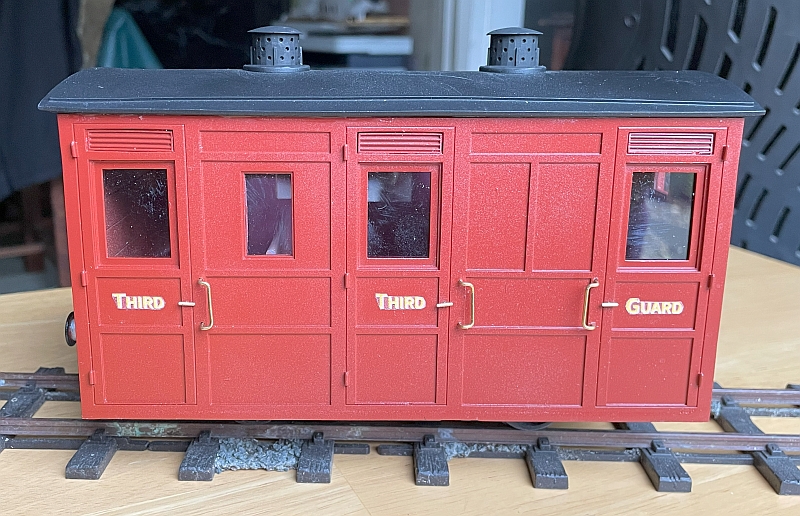
- IMG_1051.jpg (365.79 KiB) Viewed 50507 times
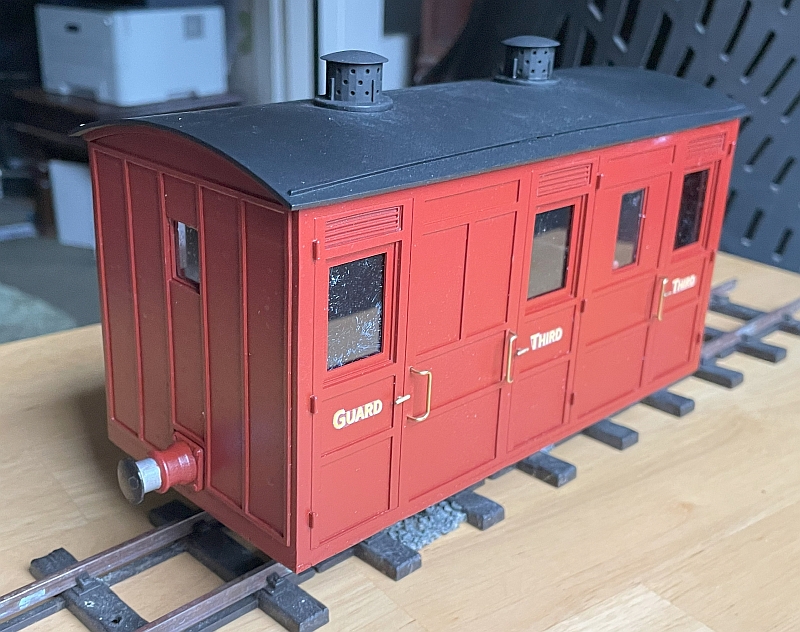
- IMG_1048.jpg (383.28 KiB) Viewed 50507 times
I didn't realise how much resin dust was hidden in internal nooks and crannies and which has now been attracted to the inside of the PETG window glazing!
Re: F & B Ashbury Coaches
Posted: Tue Apr 15, 2025 12:18 pm
by ge_rik
Interesting. Were there wheel arches inside the coaches? Presumably they were under the seats...
Rik
Re: F & B Ashbury Coaches
Posted: Tue Apr 15, 2025 12:33 pm
by philipy
ge_rik wrote: Tue Apr 15, 2025 12:18 pm
Interesting. Were there wheel arches inside the coaches? Presumably they were under the seats...
Yep, exactly that, Rik.
Re: F & B Ashbury Coaches
Posted: Tue Apr 15, 2025 1:52 pm
by GTB
philipy wrote: Tue Apr 15, 2025 8:48 am
I didn't realise how much resin dust was hidden in internal nooks and crannies and which has now been attracted to the inside of the PETG window glazing!
The model has come up well. A short rake should look good behind the Manning-Wardle.
I have to clean out the inside of models at regular intervals as well. Sanding dust, filings, shavings, etc. etc. isn't limited to printed parts........

Did the PETG sheet have protective film on the surfaces that had to be stripped off? I use acrylic sheet for windows and stripping the protective film off leaves a static charge on the acrylic (called the triboelectric effect) that will attract cat hair from the other side of the room.....
Graeme
Re: F & B Ashbury Coaches
Posted: Tue Apr 15, 2025 8:22 pm
by Durley
That looks really nice Philip.
Did you print the floor with the body as one piece?
Re: F & B Ashbury Coaches
Posted: Wed Apr 16, 2025 7:10 am
by philipy
GTB wrote: Tue Apr 15, 2025 1:52 pm
Did the PETG sheet have protective film on the surfaces that had to be stripped off? I use acrylic sheet for windows and stripping the protective film off leaves a static charge on the acrylic (called the triboelectric effect) that will attract cat hair from the other side of the room.....
Graeme, Yes there was film on the PETG. I only used that because it is available in 0.5mm thick sheets and i was trying to squeeze internal framing in as well as the external detail.
Re: F & B Ashbury Coaches
Posted: Wed Apr 16, 2025 7:27 am
by philipy
Durley wrote: Tue Apr 15, 2025 8:22 pm
That looks really nice Philip.
Did you print the floor with the body as one piece?
No, I thought about it, as you know, but decided that just printing the body in one piece was enough of an experiment. So it is actually 3 pieces plus the roof.
I took your idea of holes in the ends to mitigate the suction effect and actually printed four slots in the bottom of the body ends and then added 4 matching tabs to the floor to fill them. It sort of worked but there was still quite a bit of filling to get a decent external finish.
I then made a separate 4 wheel rolling chassis so that I could print that, upside down, flat on the bed as well.
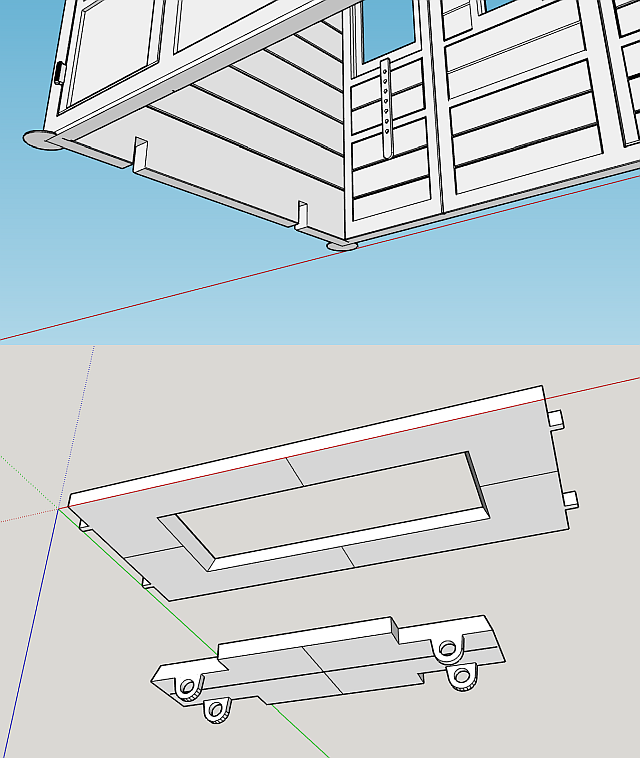
- Screenshot 2025-04-16 06.23.34.png (202.56 KiB) Viewed 50405 times
Overall it worked fairly well, however for the next one I have a cunning plan to print the floor and sides as one piece but leave a 10mm square hole in both ends just above the floor, which will be subsequently covered and filled by the large centre buffer printed with an additional square shank to fit the holes.
Re: F & B Ashbury Coaches
Posted: Wed Apr 16, 2025 10:55 am
by StuartJ
Looking very nice - very crisp!
Is that the same Hycote Red primer as the loco?
Re: F & B Ashbury Coaches
Posted: Wed Apr 16, 2025 11:37 am
by philipy
StuartJ wrote: Wed Apr 16, 2025 10:55 am
Looking very nice - very crisp!
Is that the same Hycote Red primer as the loco?
Thanks.
Yes it is although it has also had a couple of thin coats of satin varnish which has slightly enhanced the redness.
Re: F & B Ashbury Coaches
Posted: Wed Apr 16, 2025 12:57 pm
by Durley
philipy wrote: Wed Apr 16, 2025 7:27 am
Overall it worked fairly well, however for the next one I have a cunning plan to print the floor and sides as one piece but leave a 10mm square hole in both ends just above the floor, which will be subsequently covered and filled by the large centre buffer printed with an additional square shank to fit the holes.
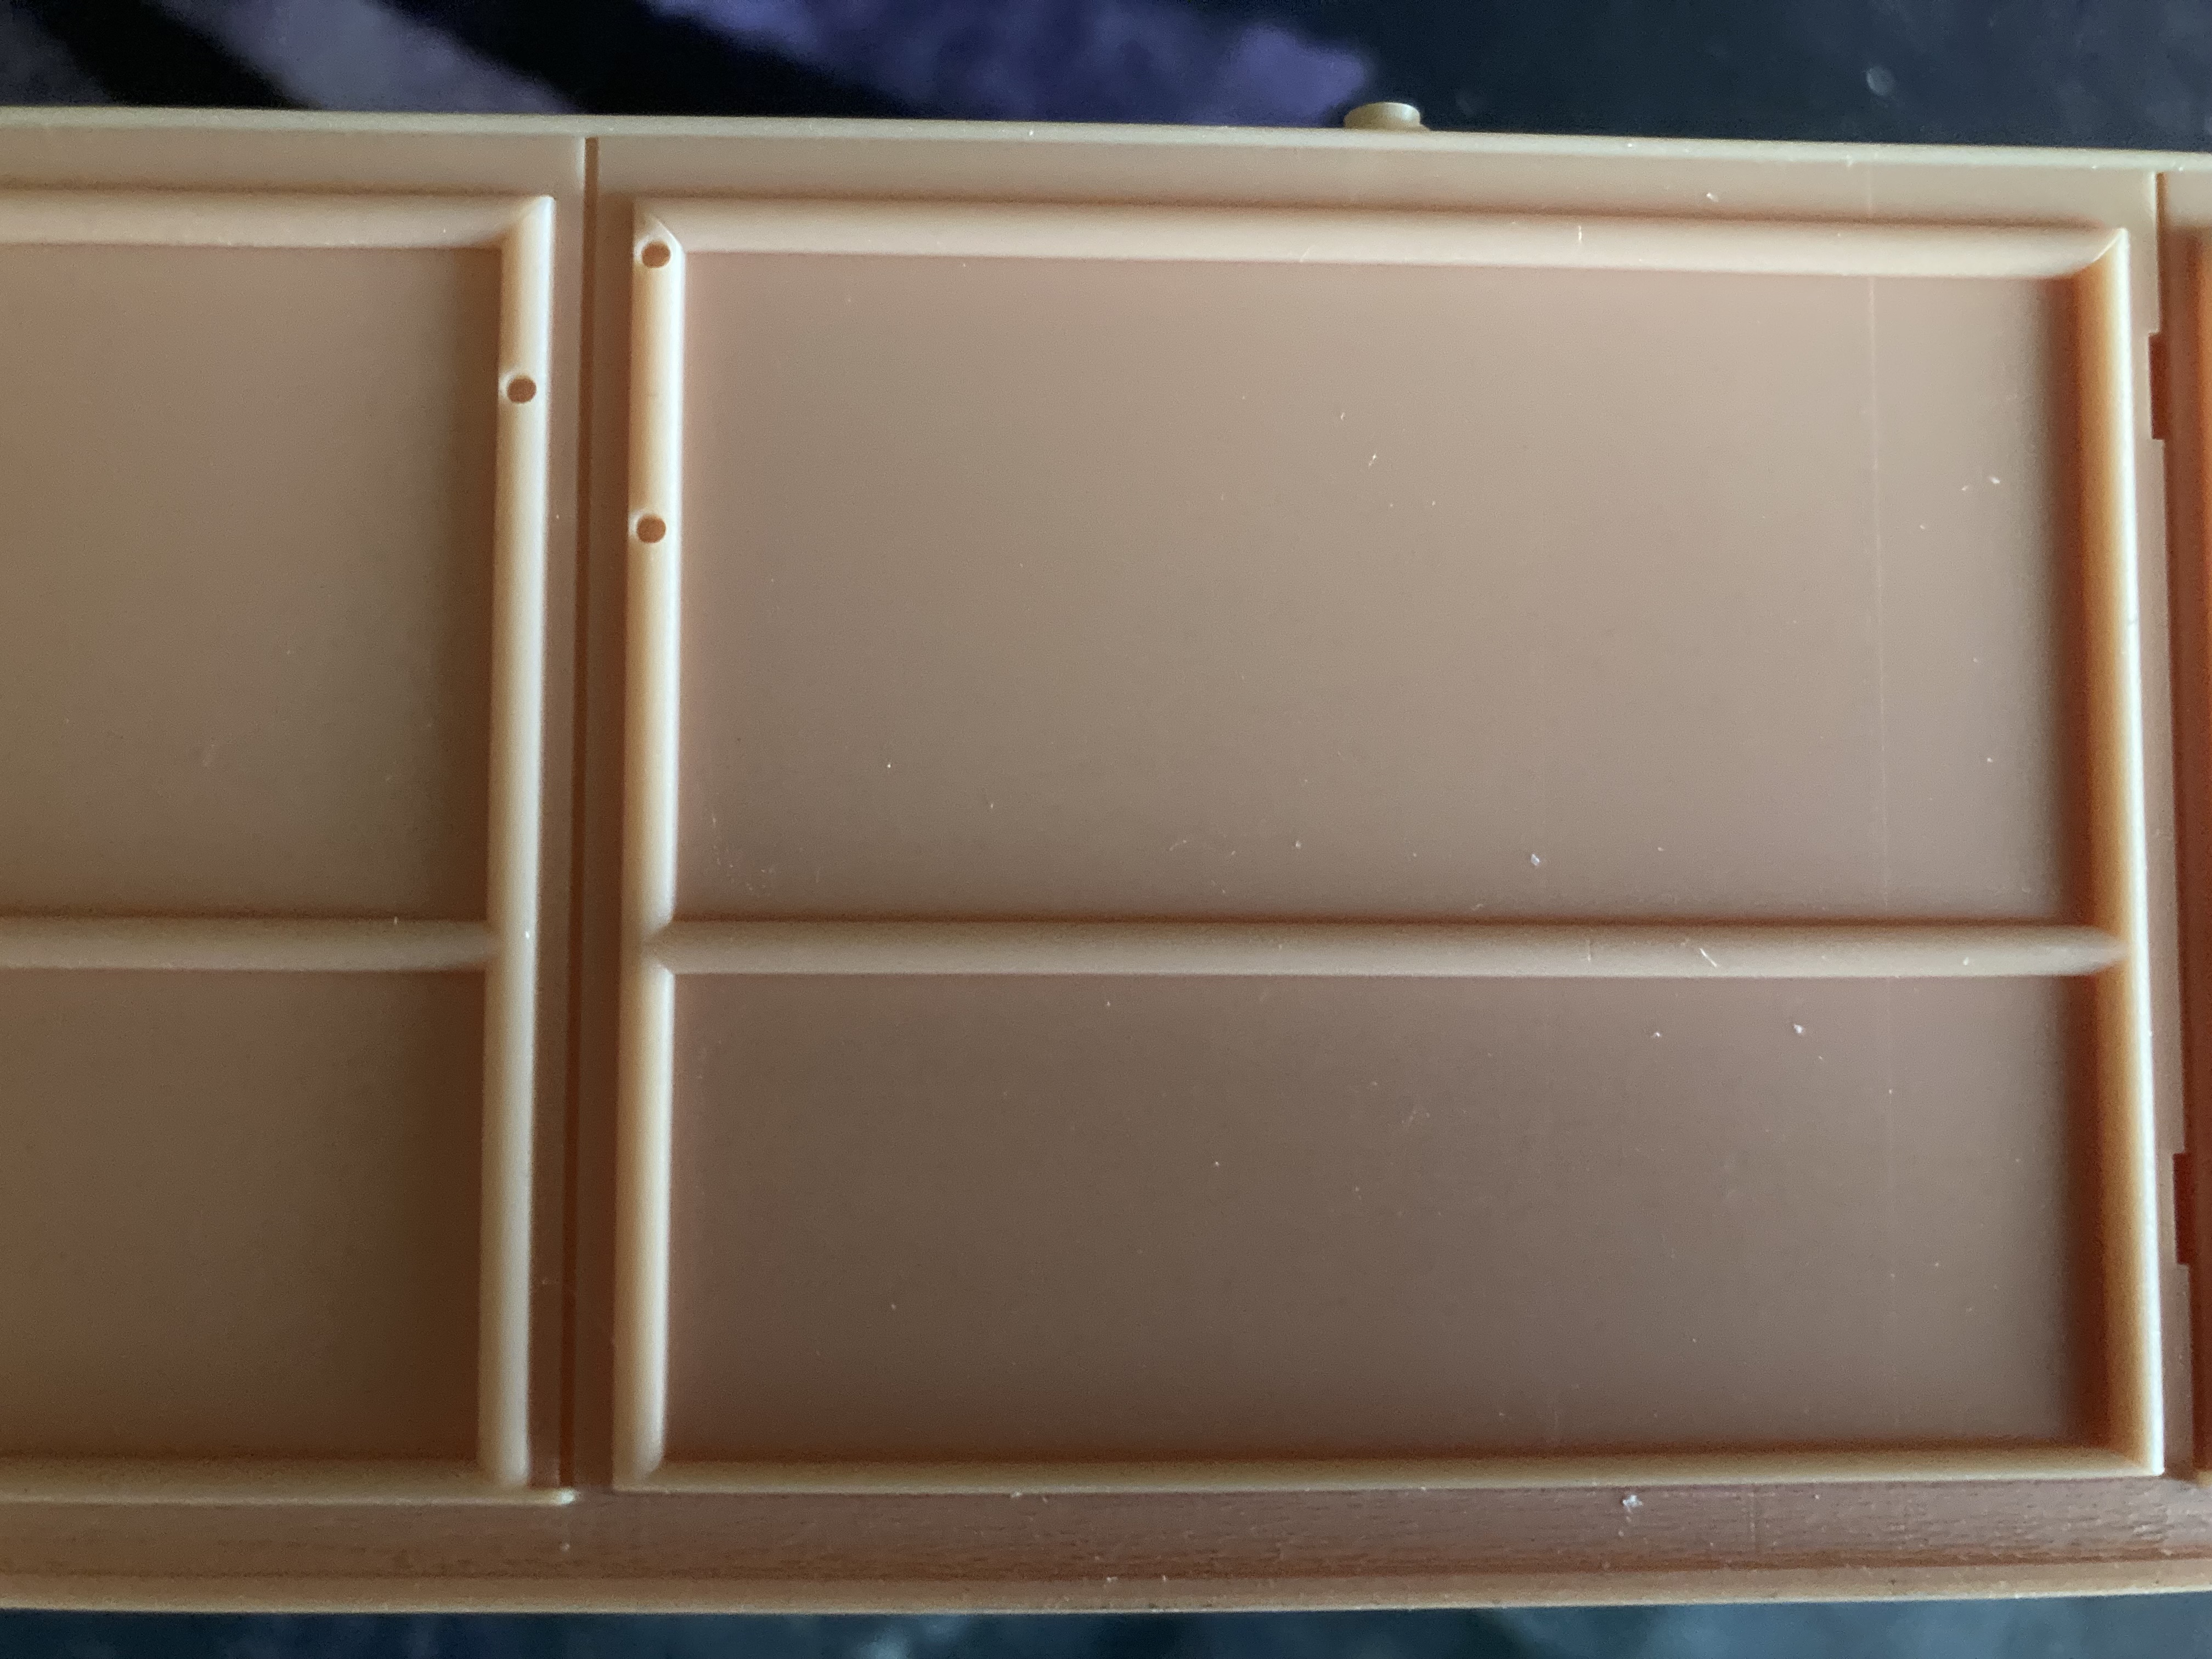
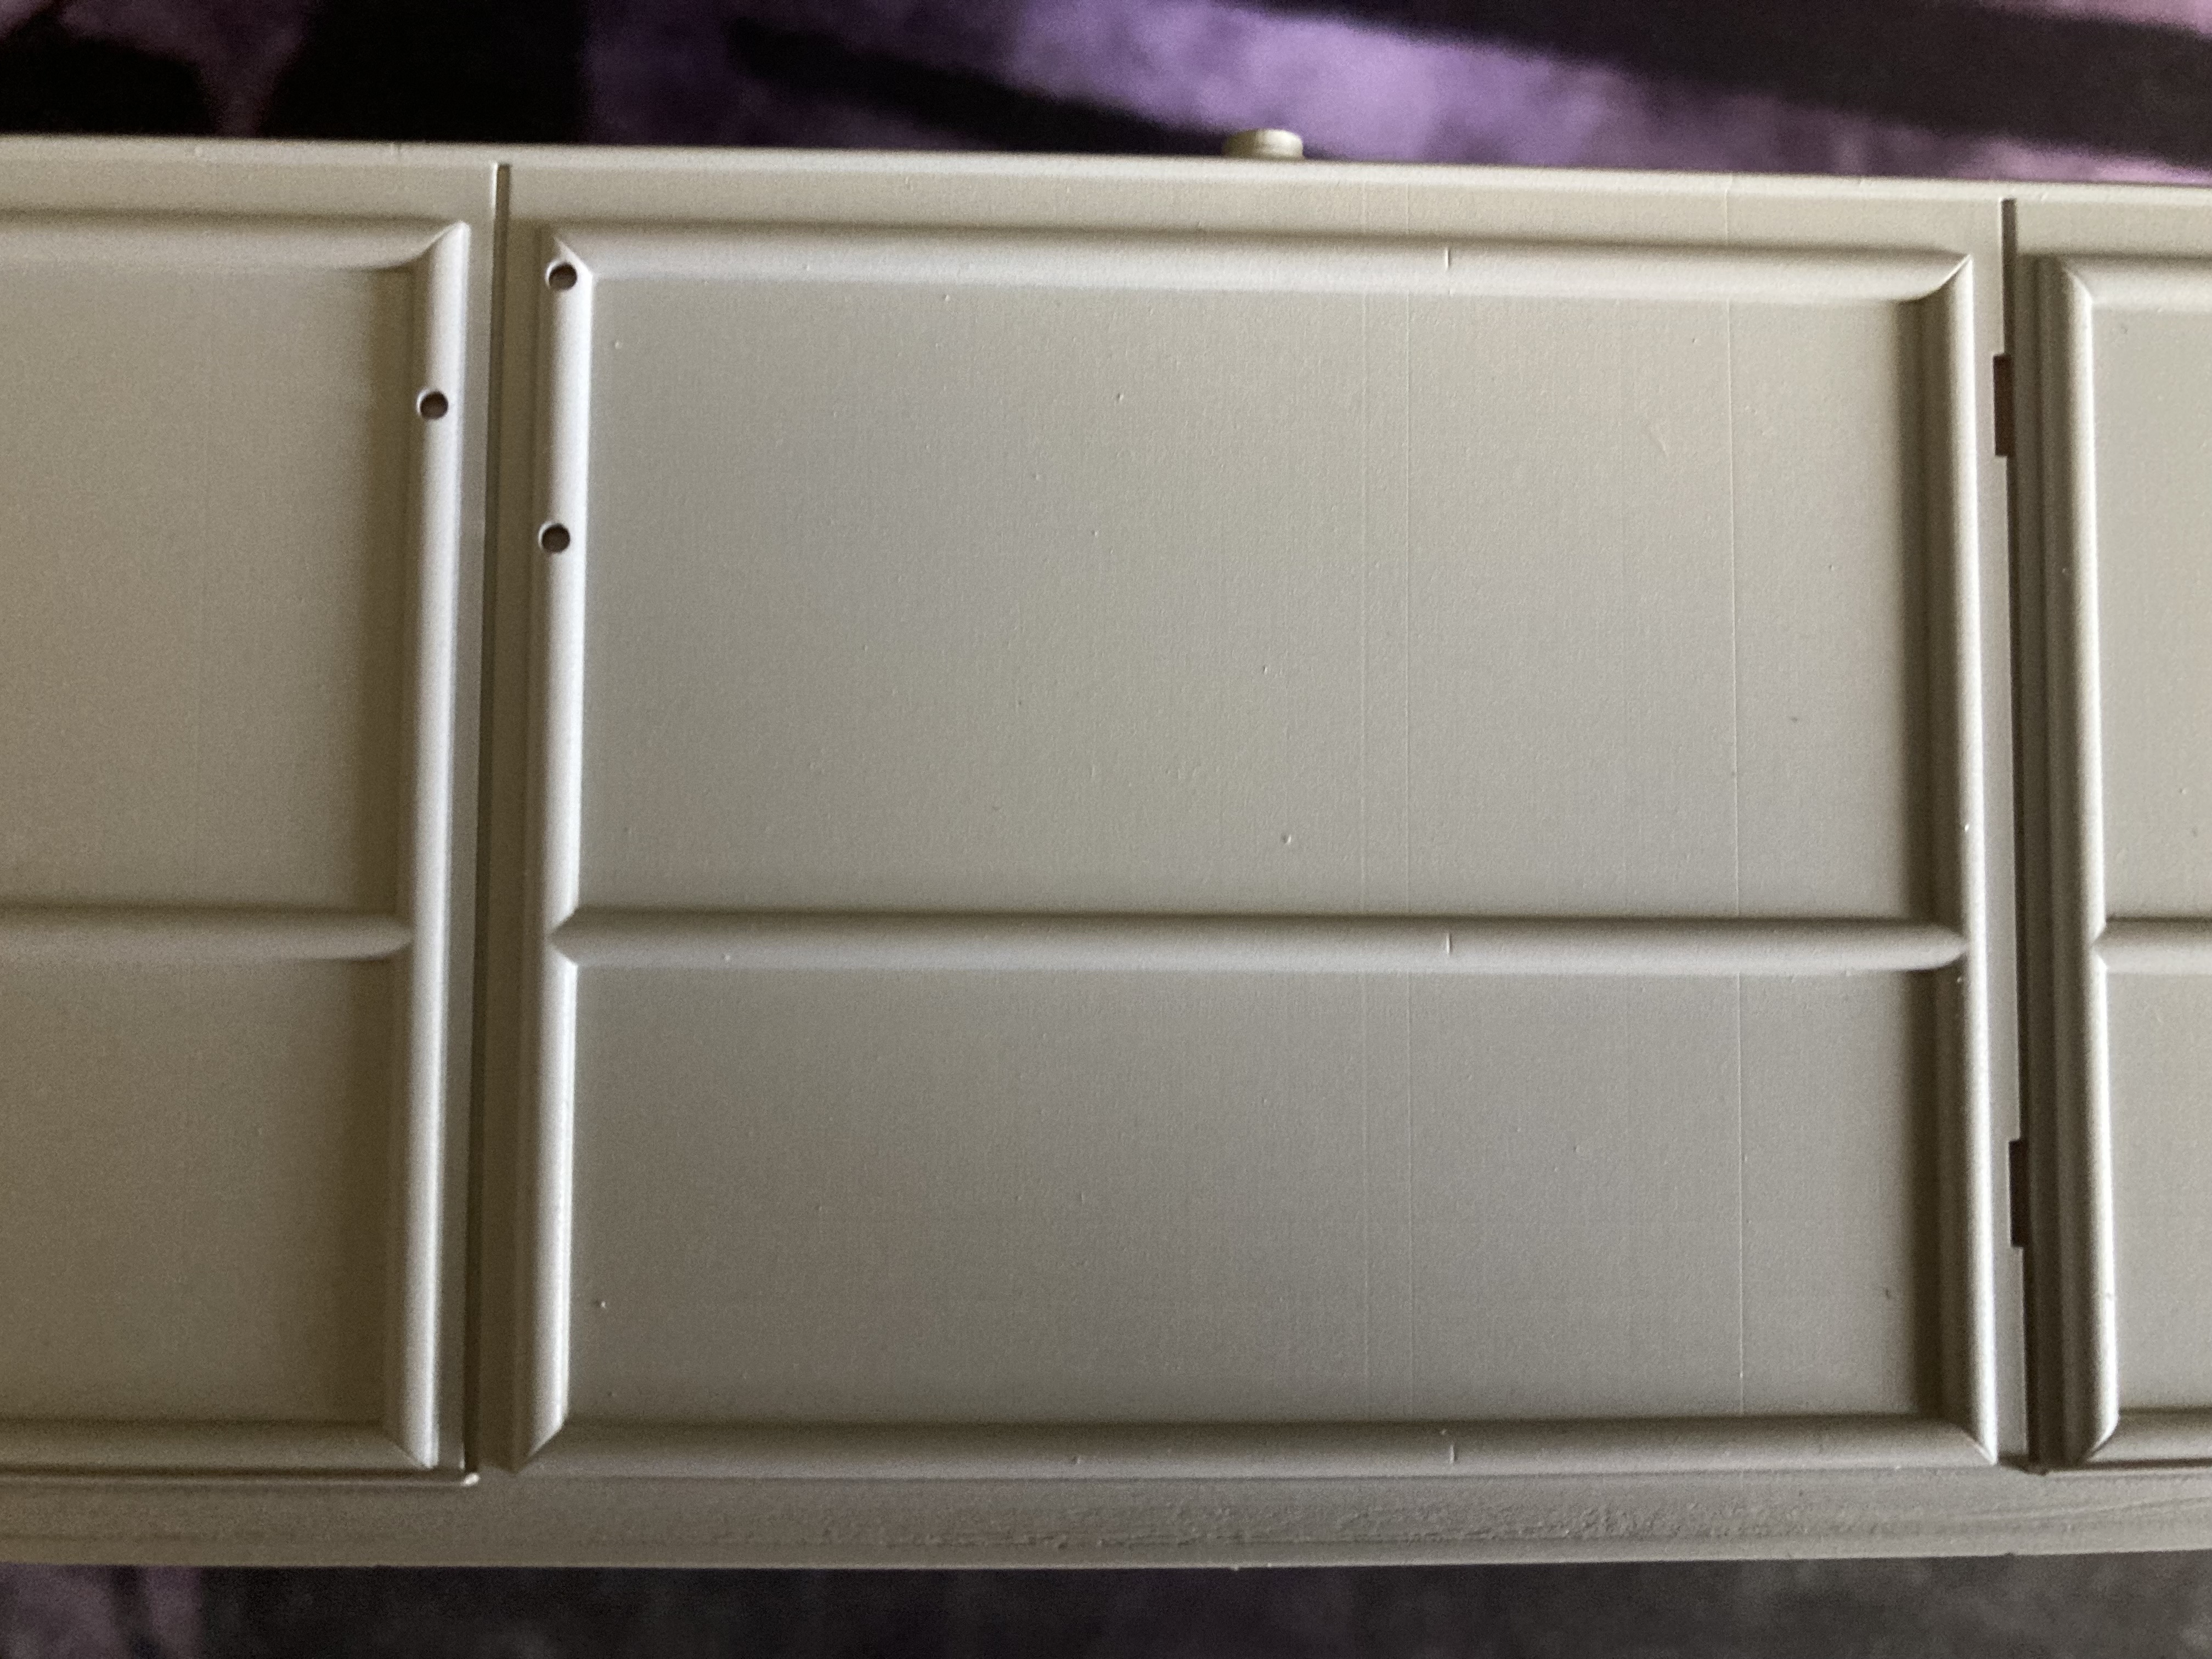
Sharing some experience from my current project to print the GVT third open carriages, I had problems with loss of detail on the sides when printing all in one, body and floor together. I found I lost the beading up to the height of the top of the floor and also had a less smooth finish to the external surface. What I think was happening was the resin was still flowing out from under the model whilst the UV light was on, so external parts of the print were effectively washed away before having chance to cure and adhere to the main body structure. The floor area on these prints took up about 90% of the build plate area so there is a lot of resin that needs to escape as the build plate lowers. I tried increasing the light off delay to the maximum setting on my machine, which helped a bit, but in the end, the solution was to make the floor thinner so it finished printing at a height before any of the beading started.
You can see the difference in the two attached photos, the one in pink resin has the thicker (5mm) floor and the lower beading is very thin. The other photo is a second print with the thinner (3mm) floor and the lower beading has printed properly at its full width.
You may not have the same issue as me as it will depend on the viscosity of the resin, size of the model, print settings (light off delay) and what details are where in the model, but thought I’d mention it as it caused me a few days of frustration and head scratching before I found a solution. I have gone back to a separate floor for my subsequent designs, just including a very thin (0.25mm) false floor that is to help ensure adhesion to the build plate (the false floor is later removed).
- IMG_4930.jpeg (2.78 MiB) Viewed 50375 times
- IMG_4931.jpeg (2.84 MiB) Viewed 50375 times
Re: F & B Ashbury Coaches
Posted: Wed Apr 16, 2025 2:16 pm
by philipy
I have had that sort of problem in the past and not found an answer myself. I was trying to print the footplate and sideframes of a DeWinton as one piece and I kept getting a sideways bulge about 0.75mm thick, along the top of the frames, which reflected the footplate thickness. However, in one of Trevor's threads ( I can't now remember which one, unfortunately) he had a similar problem and solved it by curving the internal angle rather than leaving it as a right angle.
Re: F & B Ashbury Coaches
Posted: Sat May 03, 2025 3:43 pm
by Andrew
Beautiful work!
3D printing doesn't look like 3D printing any more - no lines!
Re: F & B Ashbury Coaches
Posted: Mon Mar 09, 2026 10:55 am
by philipy
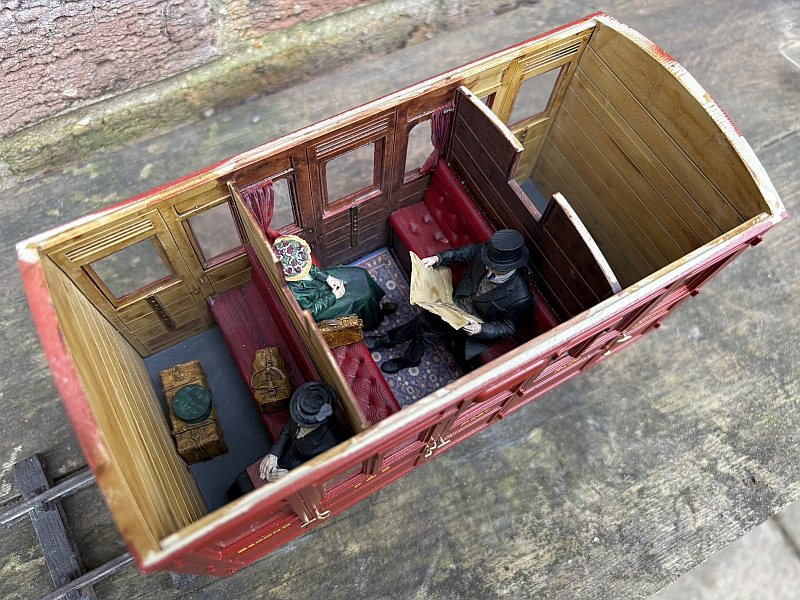
On various other threads i have referred a number of times to aspects of my F & B Composite coach: figures, lettering, etc.
Just to prove it isn't just talk, herewith the finished beastie! ( the roof is still loose to get the internal pictures).
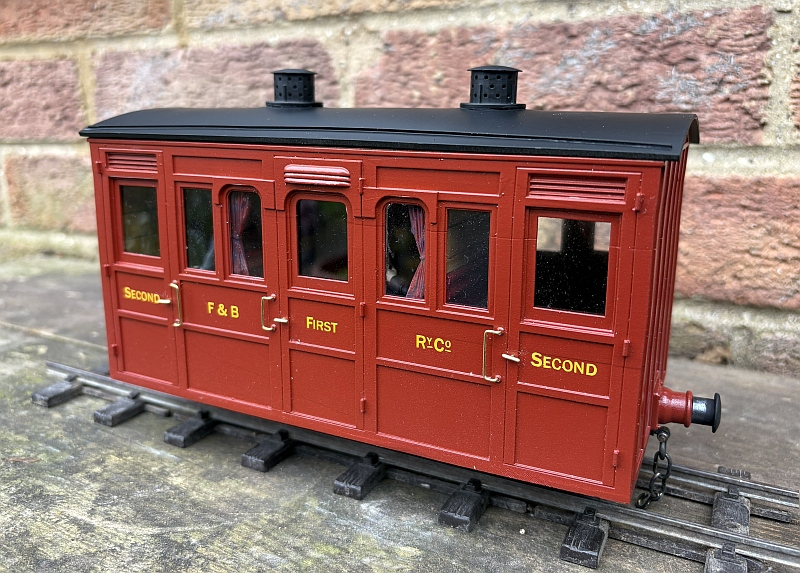
- IMG_0176 s.jpg (412.83 KiB) Viewed 22593 times
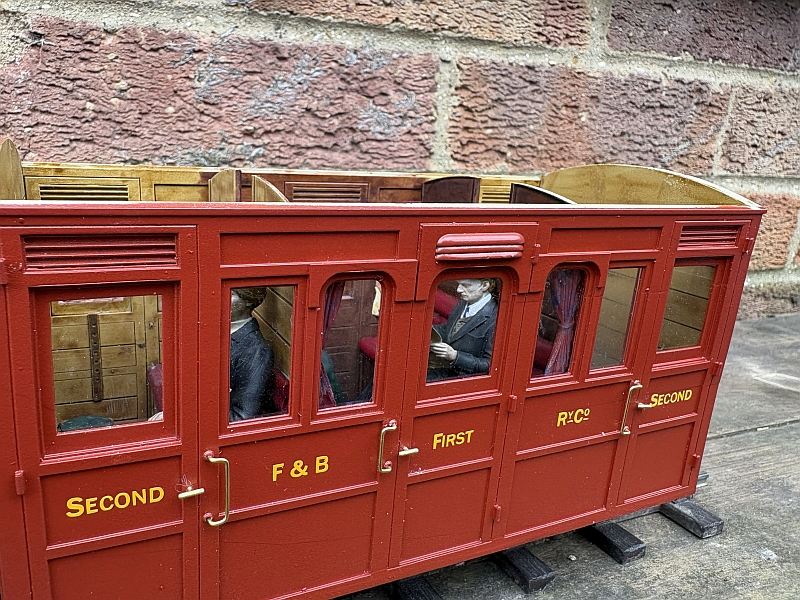
- IMG_0174 s.jpg (468.3 KiB) Viewed 22593 times
- IMG_0172 s.jpg (458.7 KiB) Viewed 22593 times
I guess it's now on with the two All Thirds... but need a lot of Brownie points before I dare go there!
Re: F & B Ashbury Coaches
Posted: Mon Mar 09, 2026 11:42 am
by ge_rik
Corrrr ..... That's lovely
Rik
Re: F & B Ashbury Coaches
Posted: Mon Mar 09, 2026 11:45 am
by LNR
Beautiful finish Philip, and a fitting match to the loco.
Well done.
Grant.
Re: F & B Ashbury Coaches
Posted: Mon Mar 09, 2026 3:49 pm
by Peter Butler
Truly magnificent!
Re: F & B Ashbury Coaches
Posted: Wed Mar 11, 2026 8:19 pm
by tommygander1941
Ooo that's lovely!
Re: F & B Ashbury Coaches
Posted: Wed Mar 11, 2026 8:52 pm
by philipy
Thanks guys.
Re: F & B Ashbury Coaches
Posted: Thu Mar 12, 2026 7:15 am
by Durley
That looks brilliant Philip, it’s almost a shame to have to fit the roof with such a nicely detailed interior. The passengers look great too.
Re: F & B Ashbury Coaches
Posted: Thu Mar 12, 2026 10:43 am
by Lonsdaler
That is a great result for all your effort Philip. How about magnetic fittings for the roof, so that you can display the work you've done internally?