Page 1 of 1
Fitting a new chassis - project step by step
Posted: Sat Feb 04, 2017 7:15 pm
by markoteal
Hi - I love the topics on here that take you through the story of developing a layout or building a loco.
Sooooo I thought I'd do one - it's going to be about fitting my line's original engine with a new chassis.
The Castle Hill Light Railway's original loco is called Lola - for the history of the loco visit
http://chlrailway.blogspot.co.uk/p/locomotive-dept.html


She has already been re-chassied once but I find she lacks adhesion and only being 2WD, find she easily grinds to a halt - i've tried various tyres including mini rubber bands but with no success.
She is RC using a Deltang unit from Peter Spoerer and I want her to work and be relied on to work all trains on the CHLR - so its time for a new chassis.
First job is to separate her from the original chassis (which will be recycled on another project - its the CHLR way!)

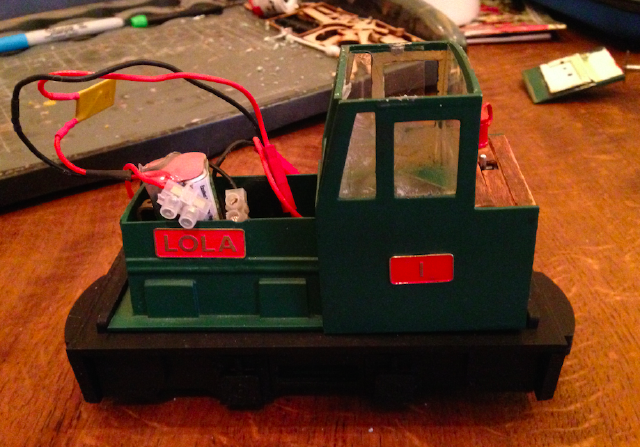
Here she has been separated and blocked up - but thats not the end of the destruction - more posts to follow
Posted: Sat Feb 04, 2017 8:27 pm
by tom_tom_go
Interesting shape, reminds me of a Reliant Robin

What lump are you putting in it instead?
Posted: Sat Feb 04, 2017 9:03 pm
by markoteal
Yes - thats a great description - at the mo , its as powerful as one!
Ah - well I'm a big fan of HGLW locos - (CHLR's Jessie is one of theirs) so when i was looking for a new chassis, I looked at theirs - the challenge was their original one (like in Jessie) would be too short for Lola - but after looking at their site recently, I saw their new Gordon chassis.
A quick email to David and he ran the rule over certain dimensions and the good news was that the chassis would work our virtually perfect - result
Here's a pic of it from the HGLW site-
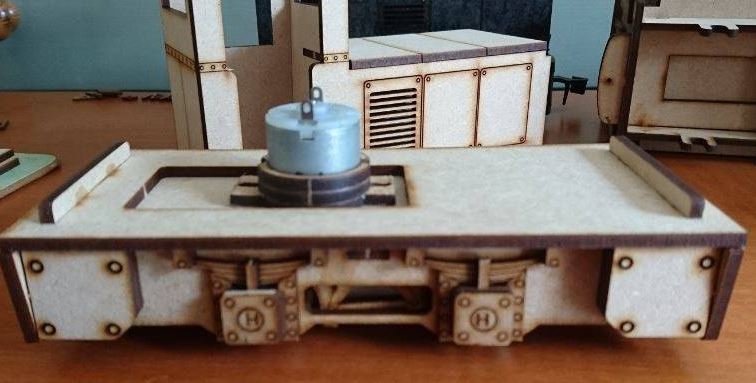
We'll have to see how successful I am at building it!
Posted: Mon Feb 06, 2017 1:47 pm
by markoteal
So the next step was taking all the items below the footplate off - a big gulp and off we went

Having done this I also realised the back would need to come off to be shortened
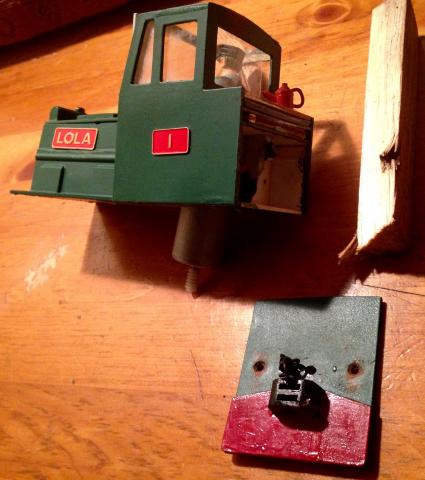
I had hoped to avoid having to go further is dis-assembly but realised that the motor location on the new chassis was going to require a different entry point on the body - so a pencil was used to sketch out the larger hole that was going to be required

The body was then moved to the cutting area of the workshop (kitchen table) where the dremel was careful applied and after some deep breathing a new hole in the base of the body was achieved

So Lola was now ready for the chassis - where was it? (cue East Enders end of episode music)
Posted: Mon Feb 06, 2017 2:55 pm
by Peter Butler
So this is becoming more than just a chassis swap.... well worth the effort though as it is a nice little loco.
I hope it doesn't take on the characteristics of a Springer and run rings around you! Our Springers like to trample all over my line and can be accidentally destructive to things not built to withstand their attention.
Posted: Mon Feb 06, 2017 3:10 pm
by markoteal
How true Peter - if the loco takes on the characteristics of our springer, she doesn't need a chassis to run up the line - she'll bounce along!
And yes, this is becoming a bigger job that I thought - but worth it in the end I hope - have been busy with the chassis this weekend so should be able to report on progress in the next day or so
Posted: Mon Feb 06, 2017 5:41 pm
by tom_tom_go
The new chassis looks well detailed and I guess when painted you would not know it was made of wood.
Posted: Sat Feb 11, 2017 5:00 pm
by markoteal
Ok - here we have the chassis build - I've built a HGLW standard chassis before but knew it wouldn't be long enough for this project so after checking some dimensions with David, opted for the new Gordon chassis
All very exciting when the box appeared through the post

And when you open it up, all the materials are well laid out both in the bag

and out of it bag, its all looking good

So I sorted through everything and Id'd the bits I wouldn't need because of what's already in the body, so the motor, switch and battery box were sent off to the spares box

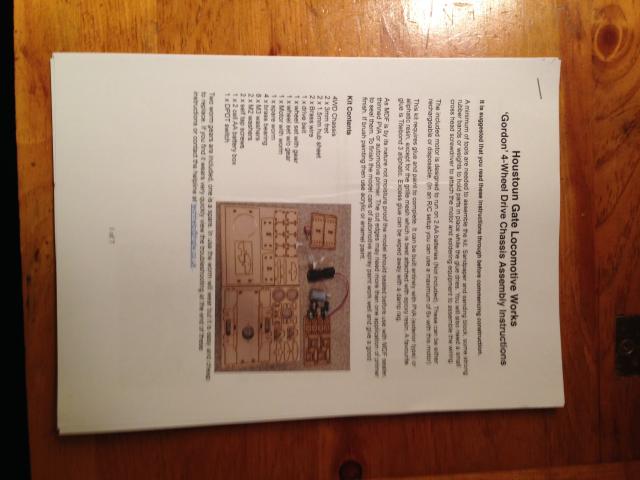
Now when it comes to building the chassis, I'm not going to clog up the forum with build by build photos - its all documented and pictured in the great manual you can download when you get the kit and can be found other website
So after a couple of nights of steady building, you end up with:-


In my next post we'll start to bring all the parts together!
Posted: Sat Feb 18, 2017 8:51 pm
by markoteal
Ok - here's the next instalment - bring together - first fit the running gear as per the instructions

Then fit the motor - all looking good so far
[/img][/code]
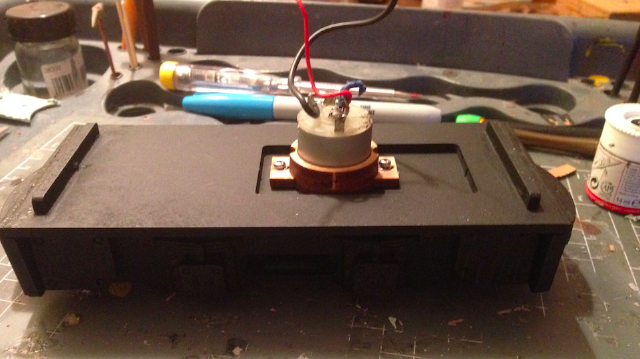
Now the challenge of getting all the working back inside the body with the motor now sitting in a different position

So after much fiddling ( and I mean much), we manage to get it all back in and tested and today Lola made her first in on the line - here she is for her official photographs back on the line.

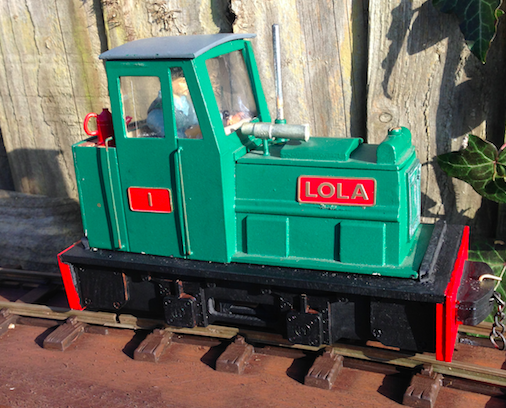
She needs more clutter around the footplate and lamps front & back but I'm pleased with the new chassis - but of course the acid test is 'how does she pull?" - a video is in production to demonstrate - to follow soon
and here is the video
Posted: Mon Feb 20, 2017 8:33 am
by markoteal
OK - its not the longest train in the world but for the CHLR its about a standard load - Lola on the Bird Seed train
<object width="640" height="480"><param name="movie" value="
http://www.youtube.com/v/9ALZSvL1ohY?ve ... ram><param name="allowFullScreen" value="true"></param><param name="allowscriptaccess" value="always"></param><embed src="
http://www.youtube.com/v/9ALZSvL1ohY?ve ... n_US&rel=0" type="application/x-shockwave-flash" width="640" height="480" allowscriptaccess="always" allowfullscreen="true"></embed></object>
And there is plenty of more power to pull on if required - but still nice and controllable
https://www.youtube.com/watch?v=9ALZSvL1ohY
Posted: Mon Feb 20, 2017 10:50 am
by Peter Butler
Lovely..... a good job very well done and a cracking piece of musical choice too.... In my opinion the best thing to have crossed the pond!
Posted: Mon Feb 20, 2017 12:11 pm
by markoteal
Cheers Peter - I do like popping a bit of music on the videos as it avoids everyone hearing my radio 5 broadcast from Saturday afternoon as I was listening to my team Huddersfield take on the mighty Man City!
Posted: Mon Feb 20, 2017 12:17 pm
by LNR
Nice video, the loco certainly moves at a nice scale speed. It's good that your railway has a job to do, looks very business like.
Grant.
Posted: Mon Feb 20, 2017 1:19 pm
by markoteal
Thank you Grant - yes the bird seed trains and woodyard consists keep the CHLR busy throughout the winter.
Now near the top of my 'to-do ' list is to build a loading hopper at the Junction end of the line to load the hoppers and trucks with seed more prototypically rather than the big hand from the sky and likewise, develop a tipping unloading area near Birds Nest station. I've sene a way on the Yorkshire 16mm layout they auto tip Binnie tippers over and back again as part of their mine workings - It involves clever use of brass guiding wire - I'll definitely be having a closer look at Peterborough this year
The birds do appreciate the line's efforts although their deposits that prove they use the feeding station are proving to be a bit challenging - so also on my to do list is a track washing wagon - not seen one of them yet in 16mm.
Posted: Mon Feb 20, 2017 6:35 pm
by James from Devon
What a cracking little loco, lovely slow running too.
It looks much better on the new chassis and glad that you got it running so well.
Really nice job.
Jim
Posted: Fri Mar 03, 2017 9:02 pm
by MDLR
Peter Butler:122967 wrote:Lovely..... a good job very well done and a cracking piece of musical choice too.... In my opinion the best thing to have crossed the pond!
Glad to hear you resisted the urge to use this as a music track...........
https://youtu.be/LemG0cvc4oU
Posted: Fri Mar 17, 2017 9:35 am
by markoteal
Posted: Fri Mar 17, 2017 10:01 am
by Big Jim
Very good. That is a nice little engine you have rebuilt there.
Posted: Sat Mar 18, 2017 10:14 am
by markoteal
Yes, she's settled back into the rosters on the line well - she can now hold her own against the other locos in terms of power and scale speed and will become the timber trains ideal loco.
I took this photo last weekend when she was running timber down to the new station at the new terminus station - pleased I got her to sit in front of the 1:1 background
