Page 4 of 8
Re: Railbus for the PMR
Posted: Sat Dec 16, 2017 9:35 pm
by IrishPeter
RylstonLight wrote: Sat Dec 16, 2017 3:26 pm
I can see what you mean about the 3 lights being a bit “heavy”. But overall the three light configuration does tend to look balanced. Why can’t the two outerlights be white and the central one red though? Tail-lights seem to be singletons and it might give better balance? Just a thought.
I discarded the idea of getting one of these to convert as I couldn’t see how to convert it from its toy dimensions. I forked out on a Swift Sixteen railbus, whilst very good, is in a totally different price bracket.
Your excellent results have made me realise that I was wrong in giving up before even buying a donor model. Well done.
One of the BR railbus types had two whites and a red, but the red was always supplanted by ye olde tail lamp.
Peter in Va
Re: Railbus for the PMR
Posted: Sun Dec 17, 2017 3:59 pm
by Big Jim
A few hours peace and quiet allowed me to have a bash at the doors, These will possibly the most tricky of all things to get right on the build as they need to look original.
I know that some of our more experienced members may have their own methods of cutting out and shaping rounded edged holes but this is how I did it.
first the window hole was marked out and a drill was used to check the radius of the corners on the existing windows.
This radius was then marked inside the marks for the hole and drilled with an ever increasing size of bit turned between the fingers. I allowed a small amount of extra space in case the plastic started to spilt.
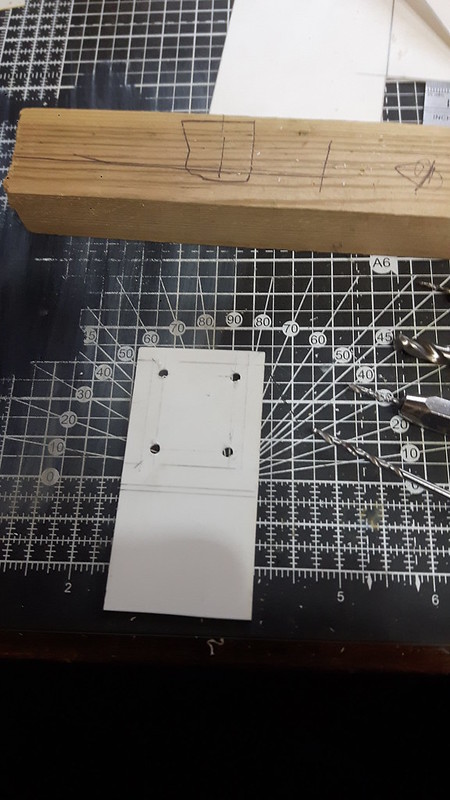
Holes completed
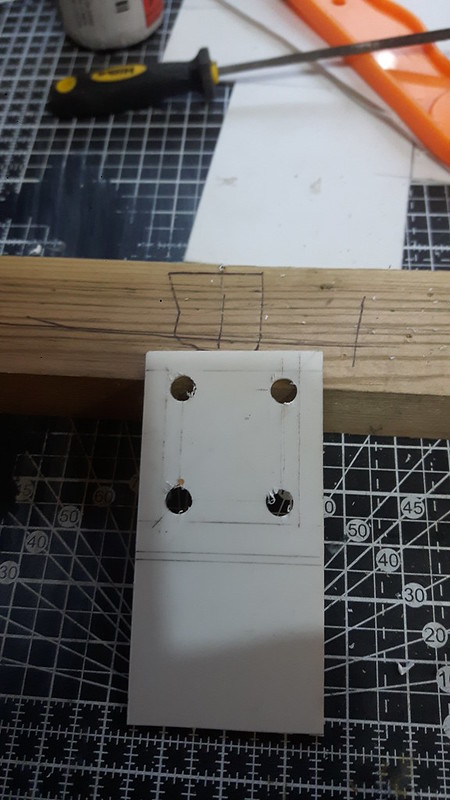
The rest of the plastic was cut away carefully and the hole filed out to size.
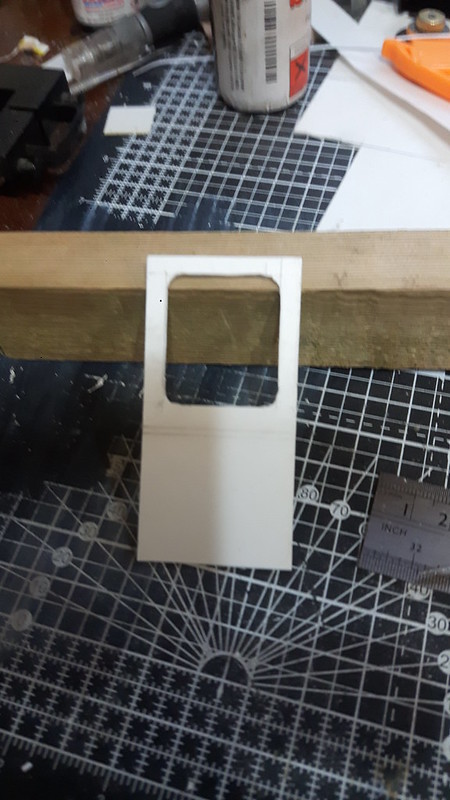
Now the clever bit, using microstrip a frame was made for the hole. This is quite simple to do but you need to be careful not to use too much MEK in the corners as the strip will snap. This will need some tiding up and possibly a little filler to make it look okay.

The new door in place temporarily. It may need doing again of it doesn't tidy up.
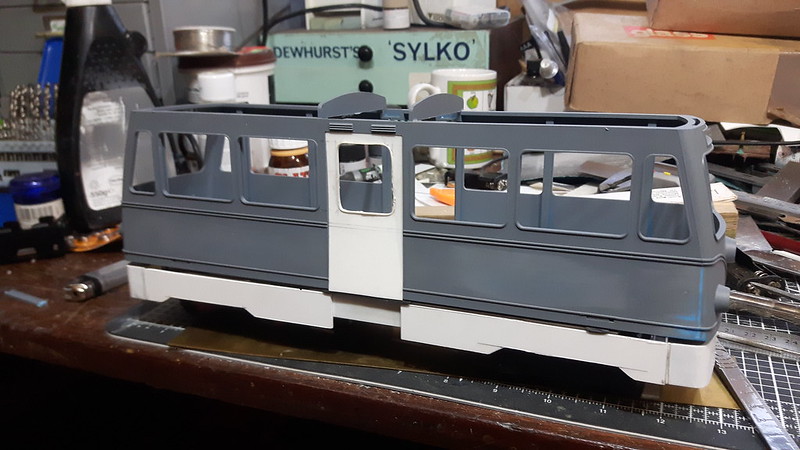
Re: Railbus for the PMR
Posted: Sun Dec 17, 2017 4:09 pm
by ge_rik
Very nice!
Rik
Re: Railbus for the PMR
Posted: Sun Dec 17, 2017 4:12 pm
by steamer68
Hi Jim taking shape nicely nice job.

Re: Railbus for the PMR
Posted: Sun Dec 17, 2017 5:50 pm
by RylstonLight
Something missing . . .
Oh yeah, wheres the customary fingerprint in the Mek? Mine always comes with them!
Looking seriously good.
Re: Railbus for the PMR
Posted: Sun Dec 17, 2017 6:05 pm
by Big Jim
Plenty on the back.
Re: Railbus for the PMR
Posted: Mon Dec 18, 2017 4:17 am
by philipy
Looks good Jim, more or less exatly how I would have done it.
Interestng that you've gone for a single door instead of the original two. Presumably thats because it looks more in scale?
Re: Railbus for the PMR
Posted: Mon Dec 18, 2017 9:02 am
by bazzer42
Plasticard is very forgiving, some fine wet and dry is a useful tool in the armoury. A lot of my plasticard bits need a clean and it works a treat. It really is a nice looking loco, it has a nice shape to the body to my eyes.
Re: Railbus for the PMR
Posted: Mon Dec 18, 2017 10:27 am
by Big Jim
Interestng that you've gone for a single door instead of the original two. Presumably thats because it looks more in scale?
Yes and it is less work in cutting out shaped window holes.
Re: Railbus for the PMR
Posted: Tue Dec 19, 2017 2:10 pm
by Big Jim
Back to the drawing board.
I found that i could not get the windows on the doors to look quite right, they looked fine before they were fitted to the body but the slightest discrepancy stood out like the proverbial sore-thumb when they were in place. Possibly not that noticeable when viewed from a few feet but enough to have me gnashing my teeth when a few inches away.
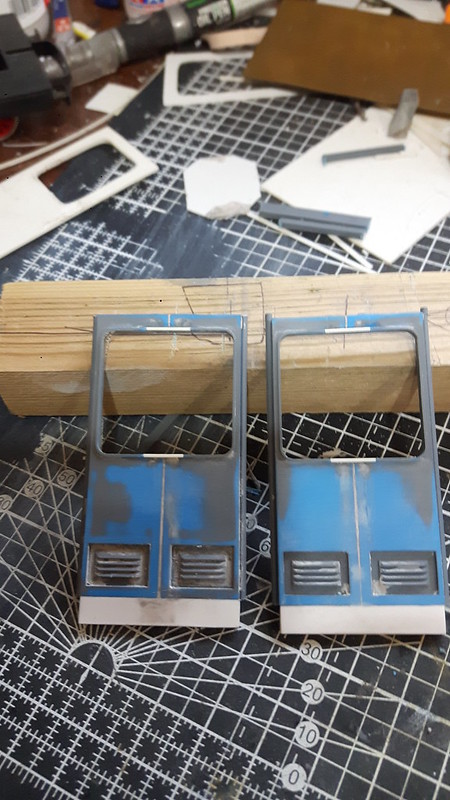
Version II.
I fiddled about with the original doors and after some cutting, filling, filling, sticking and swearing achieved this. I am not sure that the louvres will remain, but I want to get it into primer to see first.
Re: Railbus for the PMR
Posted: Tue Dec 19, 2017 3:34 pm
by Peter Butler
I would keep the louvres personally as they add interest to an increased area side profile and balance against the over-door louvres too. No air-con here so ventilation is good to have.
Re: Railbus for the PMR
Posted: Tue Dec 19, 2017 3:52 pm
by steamer68
Jim its a shame you had to redo the doors but if your not happy then you would know and see the faults. These doors look great Jim with the air vents and louvres.

Re: Railbus for the PMR
Posted: Tue Dec 19, 2017 5:10 pm
by markoteal
I prefer these doors Jim - the louvres add that bit of detail (and draft) for your customers in the barmy welsh heatwaves you get down your part of the country!
Re: Railbus for the PMR
Posted: Thu Dec 21, 2017 5:24 am
by FWLR
Re: Railbus for the PMR
Posted: Thu Dec 21, 2017 9:18 am
by ge_rik
I agree with t'others, would be a shame to lose that louvre detailing. Up to you, though. Your model.
Rik
Re: Railbus for the PMR
Posted: Thu Dec 21, 2017 10:46 am
by philipy
Primer does show up a lot of dodgy detail that you didn't realise was there so it remains to be seen if it's worth it, but with that proviso I say keep the louvres.
Re: Railbus for the PMR
Posted: Thu Dec 21, 2017 12:38 pm
by Big Jim
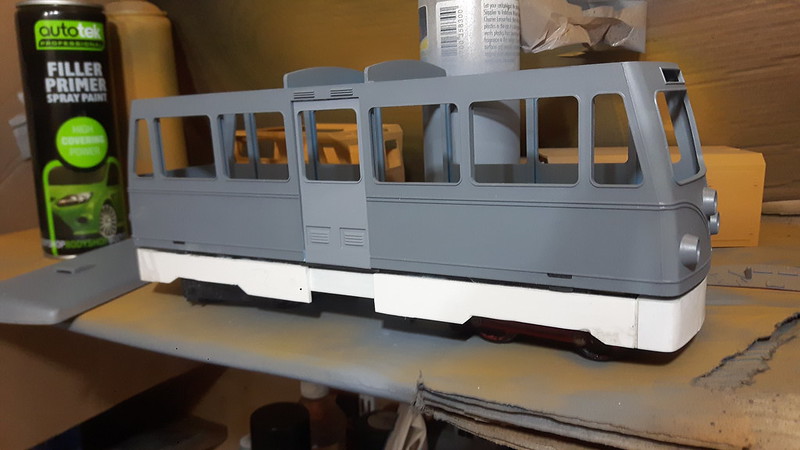
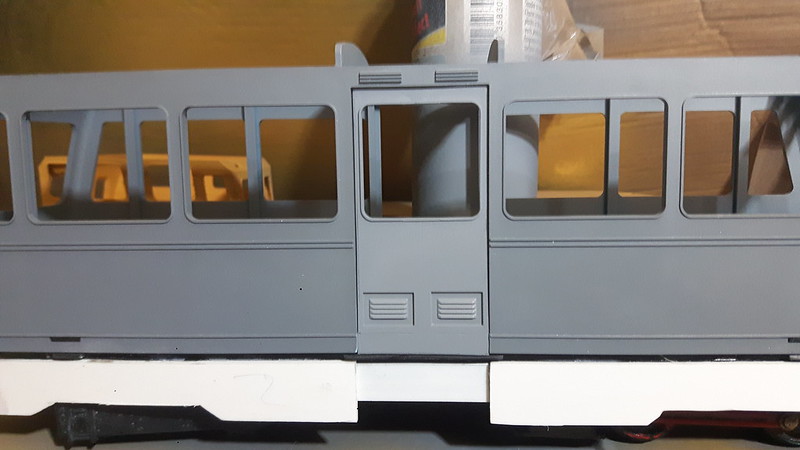
I think they will do.
Re: Railbus for the PMR
Posted: Thu Dec 21, 2017 12:50 pm
by steamer68
Jim they look great nice job on the doors.
Re: Railbus for the PMR
Posted: Thu Dec 21, 2017 12:58 pm
by IrishPeter
Looks absolutely cracking, Jim! You are really cheering up a vehicle I had dismissed as a toy a long time ago.
Peter in Va
Re: Railbus for the PMR
Posted: Thu Dec 21, 2017 1:07 pm
by Big Jim
Thanks for the kind words. There is a lot to go into this to make it look the part. As I mentioned at the beginning there is an easy way and a hard way to convert one of the these.
If I can find one, I will change the trailing bogie for another Big Big part as this is the only bit I am not really happy with.
Nearly done on the body work, then its on to the electrics. 3 AA batteries should fit underneath and a Deltang RX will get stuffed under there as well. LED's fore and aft, plus lighting in side the body.
