Page 21 of 187
Posted: Sat Mar 28, 2015 8:56 am
by KNO3
Nice. How did you make all those signs (Lipton's etc), did you print them?
Posted: Sat Mar 28, 2015 10:15 am
by Peter Butler
The signs were cut from a sheet of gift wrapping paper which I bought many years ago. I have no idea whether it is still available now.
Posted: Sat Mar 28, 2015 5:57 pm
by jim@NAL
I do like the antiques shop peter and the signs are a good find il
Posted: Sat Mar 28, 2015 8:22 pm
by Big Jim
Nice work Peter.
I wonder if you can still buy ex-lax?
Posted: Sat Mar 28, 2015 9:41 pm
by Peter Butler
Big Jim:109563 wrote:
I wonder if you can still buy ex-lax?
I don't know Jim but those of us (of a certain age) will remember it well!
Posted: Sat Mar 28, 2015 9:57 pm
by Big Jim
You should find an advert for Kaolin and Morph!
Posted: Tue Mar 31, 2015 9:38 pm
by Peter Butler
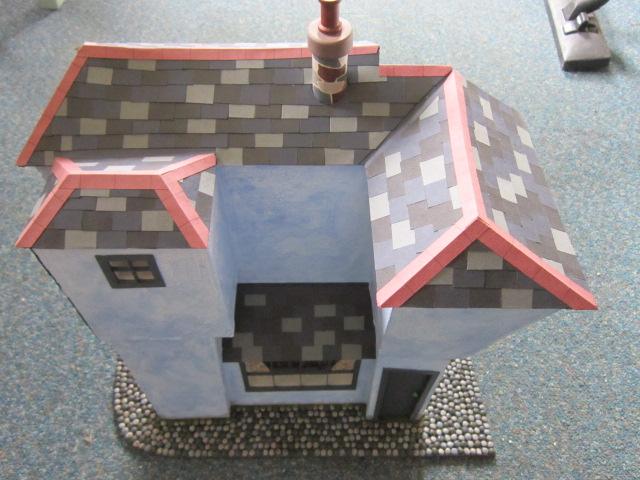
You might have noticed that I was careful not to show the roof on the antique shop building, mainly because I hadn't done it then!
The 'slates' are cut from sheets of art paper in three colours and laid individually, trying not to have too many of a similar colour too close to each other. At the moment they look too fresh but I will brush weathering powder on them which will tone them down.
The chimney is a block of wood with various colours painted to represent stone. Chimney pot is a wooden bobbin from 'The Works'.

Posted: Thu Apr 02, 2015 12:25 pm
by kandnwlr
Looking forward to finding out what this one ends up looking like

Posted: Wed Apr 29, 2015 9:34 pm
by Peter Butler
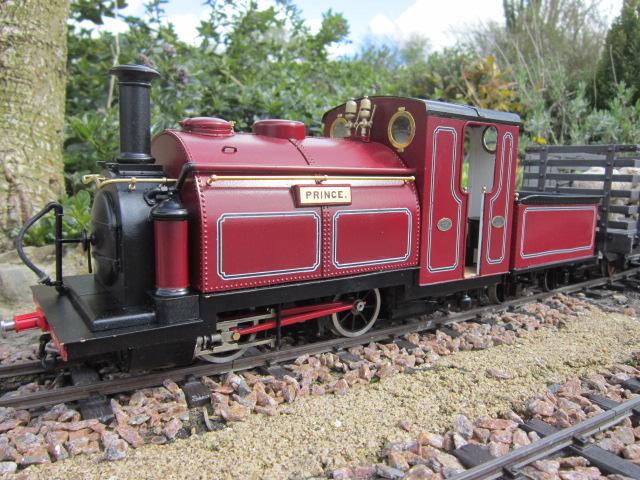
A very welcome visitor to the B.U.R.P.S. today was a newly built Slater's 'Prince'. This little locomotive is quite a substantial piece of engineering. The bodywork is not at all flimsy although detailed parts in the cab are!
The running was extremely smooth with RC and the pulling power quite impressive.

Posted: Wed Apr 29, 2015 10:02 pm
by Big Jim
Nice looking loco that Peter and nice to see your line in the sunshine.
How is the Fairlie coming on?
Posted: Wed Apr 29, 2015 10:14 pm
by Peter Butler
My double Fairlie is still in its box although I have sourced the wheels, motors and gearboxes etc.... I have been busy with other projects recently but hope to make a start soon!
It would be wonderful to se the two locomotives together.
Posted: Thu Apr 30, 2015 6:42 pm
by kandnwlr
We want the Double Fairlie ....

Posted: Thu May 07, 2015 11:22 pm
by Peter Butler
Lots of other work at home and our annual Club exhibition now behind us, time to concentrate on railway improvements!
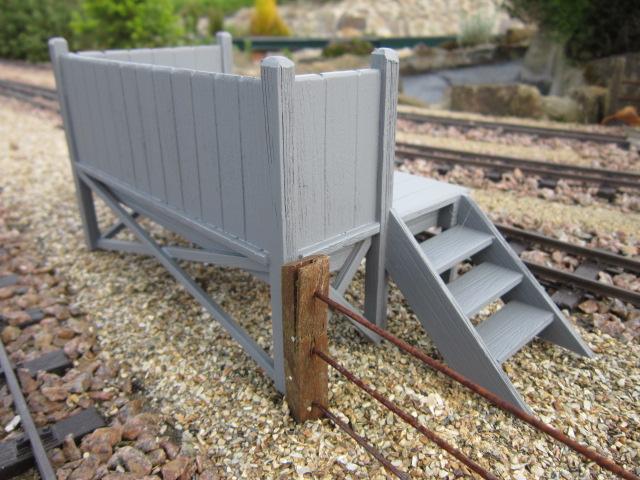
One thing I have been meaning to make for quite a while is a coaling stage. Not much use having a steam loco without a food source.
I sat down yesterday and cut out the parts from Plasticard (of course) and laminated sheets together for extra strength. The deck is on legs with cross bracing and the back and sides are scribed to represent planking. There are steps for access from ground level.
[img]tp://gallery.myff.org/gallery/1880015/IMG_2813.JPG[/img]

That took about two hours and I am pleased with the sturdy look it has. Today (dry weather!) I was able to give a spray coat of primer


Posted: Fri May 08, 2015 6:53 am
by philipy
That looks very nice Peter. Nice coat of black grot and pile of coal and it will really be the bizz.
Posted: Fri May 08, 2015 2:17 pm
by Peter Butler
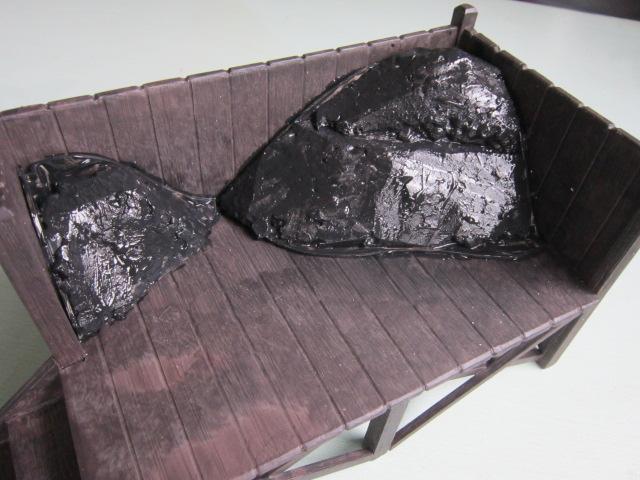
Thanks Philip, paint and grot has now been applied..... dark brown and black acrylic. Also, I have made a start on the coal heaps.


I know they look more like icebergs at the moment but all will revealed.

Each unit is made of Plasticard sides and base with polystyrene shaped and stuck with silicone to form a lump representing a coal heap. This is painted black and will finally be covered with real coal.
Posted: Fri May 08, 2015 2:25 pm
by Big Al
I like the look of that, another fine model showing the great versatility of plasticard. I have yet to start making scenery items for my line, I was pleased to see my line made it through the winter OK and has not got too overgrown.
Posted: Fri May 08, 2015 8:18 pm
by Chris Cairns
That is brilliant Peter.
What do you use to scribe the wood effect on the planks?
Chris Cairns
Posted: Fri May 08, 2015 9:28 pm
by Peter Butler
Thank you Chris, for the planks I first use a razor saw which I push along in the grain direction a few times followed by a Stanley knife blade point to deepen some of the scores. Afterwards a rough sandpaper to remove the flakes and bits of loose plastic.
When this is painted the grooves tend to hold more paint and leave a two-tone effect which can be enhanced further with colour washes.
I'm hoping a spray matt varnish will give some weather protection.
The coal will be sprinkled on and given a coat of SBR to seal it in place. This seems to work well on my ballast.
Posted: Sat May 09, 2015 7:16 am
by philipy
Peter Butler:110691 wrote:
The coal will be sprinkled on and given a coat of SBR to seal it in place. This seems to work well on my ballast.
Phew! I read down the thread from the top, looked at the pictures on the way down and panicked at the thought, "Noooo! Peter surely cant be satisfied with black painted polystyrene for coal, especially being in Wales!"
I'm glad and relieved to find that there is a finishing layer still to be applied.

Posted: Sat May 09, 2015 10:33 am
by Peter Butler
Wales.... the home of uneconomic coal and slate production!
Even living here I couldn't afford to put Welsh coal on a domestic fire.
My railway will have to be satisfied with Chinese coal and hope the (gas fired) loco will be happy with it!
As an aside.... the new Tea Room at the top of Snowdon had to be roofed with Chinese slate because local slate was too expensive. The National Parks Authority had to allow this despite their normal planning insistence.
![[img]tp://gallery.myff.org/gallery/1880015/IMG_2813.JPG[/img]](./myff/1880015/IMG_2813.JPG)