Page 3 of 3
Posted: Wed Aug 26, 2015 4:35 pm
by Lonsdaler
Peter Butler:113007 wrote:
As for the slate roof, I used High Impact Polystyrene from Homecrafts.co.uk (just enter that and it should show up). I buy all of my sheet material from them as it is much cheaper in large sheets, 915x610mm, and available in black, white and many colours, in 1, 1.5, amd 2mm thicknesses. Delivery is very reasonably priced, well packed and fast!
One 1mm black sheet should be big enough to cover your roof and would cost only £3.25 (+p&p).
I hope this helps.
Damn! That's good value. Bookmarked for future reference
Maple - very nice engine shed - care to explain how you got the stone effect? please?

Posted: Wed Aug 26, 2015 11:12 pm
by Maple
the stone effect is exterior filler, engrave with a dremel type multi tool. you can carve while still green but i prefer to do it when dry, to get a better edge. i got the idea from 'the art of garden railways, reaching for realism' by ian stock;
Peter do you cut that into to individual slate or mount in rows?
Posted: Thu Aug 27, 2015 10:16 am
by Lonsdaler
Maple:113015 wrote:the stone effect is exterior filler, engrave with a dremel type multi tool. you can carve while still green but i prefer to do it when dry, to get a better edge. i got the idea from 'the art of garden railways, reaching for realism' by ian stock;
Peter do you cut that into to individual slate or mount in rows?
That gives a very realistic effect, especially for random stone walling. Thanks for sharing
Posted: Thu Aug 27, 2015 10:38 am
by Peter Butler
Maple:113015 wrote:
Peter do you cut that into to individual slate or mount in rows?
Hi Maple, for a full description and photographs of the process go to my thread here in 'Railways an Layouts, ' select... 'Time to build a railway....' and go to page 32.
It's all there and shows how simple but effective it can be.
Your stonework should hold up to the weather conditions using that material. I would have had concerns if you had been using clay!
Posted: Fri Aug 28, 2015 8:54 am
by Maple
I am hoping it will hold up with a good covering of wet rot hardner. I have ordered your roofing material and i will let you know how it goes. Love the detail on your line by the way peter
Posted: Sun May 15, 2016 11:43 pm
by Maple
Now that summer is nearly here and i am doing more again. I have fired up something i made a long time ago to keep notes of what im doing for others. Its great as you can save drafts aswell, and publish when ready. It is great for those with to many projects on the go at once....
http://amberwoodworks.weebly.com/
Posted: Mon May 16, 2016 9:39 pm
by Andrew
Nice! There's some really characterful stuff going on there, I love the shed scene...
Cheers,
Andrew.
Re: Amberwood light Railway
Posted: Tue Sep 05, 2017 1:51 pm
by Maple
a few updates.
http://amberwoodworks.weebly.com/
i find weebly a little easier to use so have been putting bits on there, if people want photos on i can post.
please just ask and let me know you think
Re: Amberwood light Railway
Posted: Tue Sep 05, 2017 2:37 pm
by tom_tom_go
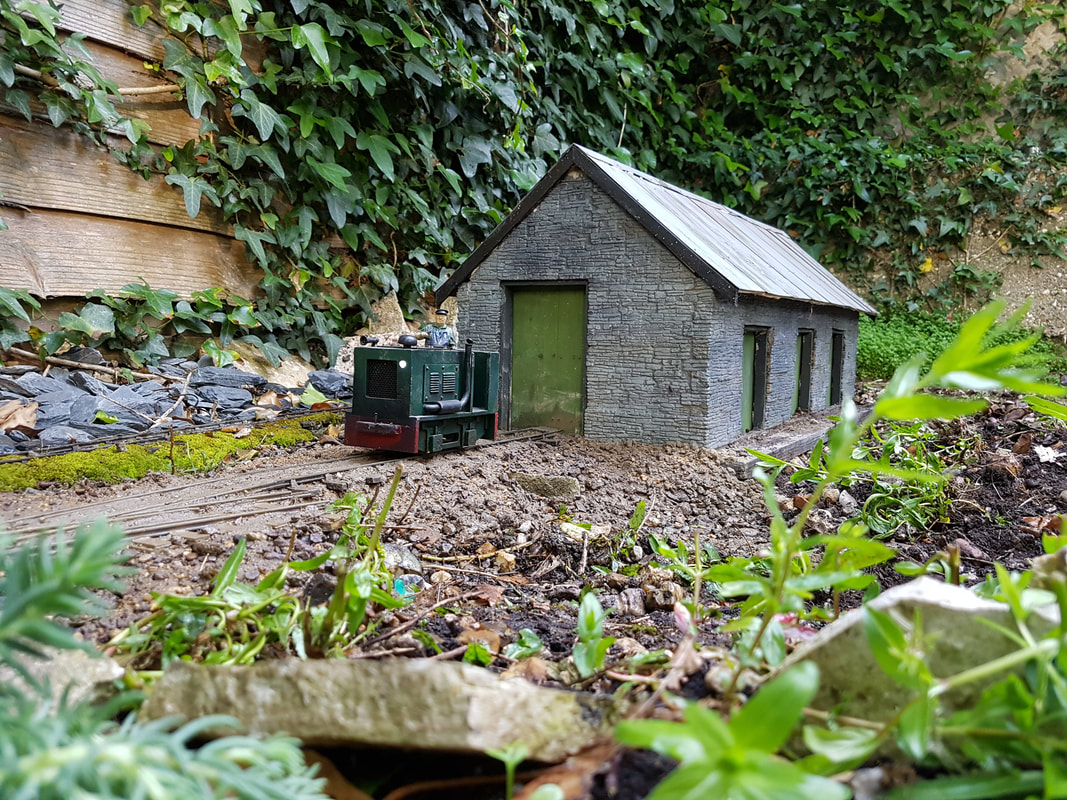
I like the goods shed you have made:
Re: Amberwood light Railway
Posted: Tue Sep 05, 2017 9:35 pm
by Maple
It is very heavy, being made of jigstones its wall are solid concrete, it took about 3 months to cast all the blocks......
Re: Amberwood light Railway
Posted: Wed Sep 06, 2017 7:45 am
by bazzer42
Love the ground level shots and the moss. I agree with Tom that is a lovely building, 3 months well spent to my eyes.
Re: Amberwood light Railway
Posted: Wed Sep 06, 2017 9:16 am
by LNR
I agree with Bazzer, that building could easily be taken for real. Incredible job, lots of patience too I imagine. I like the low angle shots too.
Grant.
Re: Amberwood light Railway
Posted: Wed Sep 06, 2017 11:02 am
by Big Jim
Same around here with bodge and botch. But I was given to understand that originally a Bodger was someone who made legs for chairs and tables on a pole lathe.
Re: Amberwood light Railway
Posted: Wed Sep 06, 2017 11:57 am
by markoteal
Great shed!