Page 2 of 3
Posted: Fri Mar 25, 2016 8:11 pm
by River Lin
Posted: Wed Apr 06, 2016 8:07 pm
by River Lin
Hi all.
Frank the driver showing how the new coach is coming along. Doors painted, handles fitted and hung in place.

The Swift Sixteen door handles have a shift about 6/7 mm long which slots through a 2mm hole in the door and extends about 2mm beyond the back of the door. A small plate of thin brass is then made about 8mm long and 5mm wide with a 2mm hole towards one end for the handle shaft to pass through. This plate is then soft soldered to the shaft and filed flat when cool. I employed a piece of card here to stop me accidentally scratching the door paintwork. I then painted the latch black.
After carefully refitting the door and checking the operation of the latch I repeated the above on the other 3 doors.
This is a view of the front and back of the door

Posted: Wed Apr 06, 2016 8:41 pm
by laalratty
Very nice work, and I love the working door latches, not something I think I'd be brave enough to try!
Posted: Thu Apr 07, 2016 10:21 am
by River Lin
Now on to the removable roof.
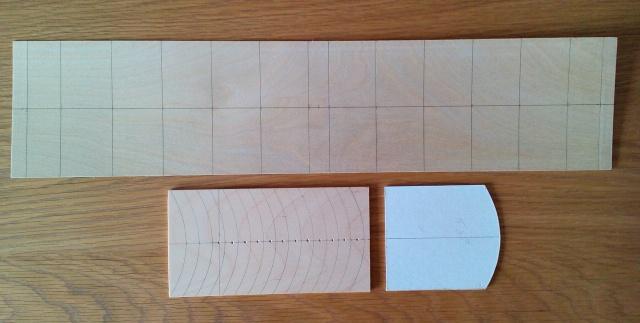
I have cut a piece of 0.8mm ply to the size of the coach allowing 5mm extra at each end and 15mm extra in width to allow for the curve of the roof and to give a small overhang.
I have marked for 14 roof trusses ( always allow plenty to give strength to the roof) with the two outer ones being an exact measurement for the internal length of the coach.
I have then marked a line down the centre of the roof to allow for accurate centering of the trusses - see below.
I then cut a piece of ply the exact width of the inside of the coach to mark the roof trusses on to. ( Actually I had a piece ready from when I cut the ends and central partition.)
I drew a line down the middle to allow for accurate lining up on the roof when gluing the trusses and then used my card template that I used for marking the coach ends to Mark 14 roof trusses 10mm wide.
The last action was to mark and centre punch for drilling holes in the trusses for lighting wiring.

Posted: Thu Apr 07, 2016 11:26 am
by River Lin
A clearer photo.
Posted: Thu Apr 07, 2016 6:30 pm
by Andrew
Wow, those doors are amazing!
Andrew.
Posted: Thu Apr 07, 2016 6:57 pm
by Soar Valley Light
Hi David,
I agree with Andrew, this whole vehicle is amazing. You clearly possess some very good practical skills. This will be a fantastic vehicle to run on your railway.
All the best,
Andrew
Posted: Fri Apr 08, 2016 4:43 pm
by River Lin

14 roof joists cut and sanded. The end ones without wiring holes and the ones next to these with some of the wood removed so that they wont show through the open doors.

David.
Posted: Sat Apr 09, 2016 5:43 am
by robc_wa
River Lin:117253 wrote:
14 roof joists cut and sanded. The end ones without wiring holes and the ones next to these with some of the wood removed so that they wont show through the open doors.
.
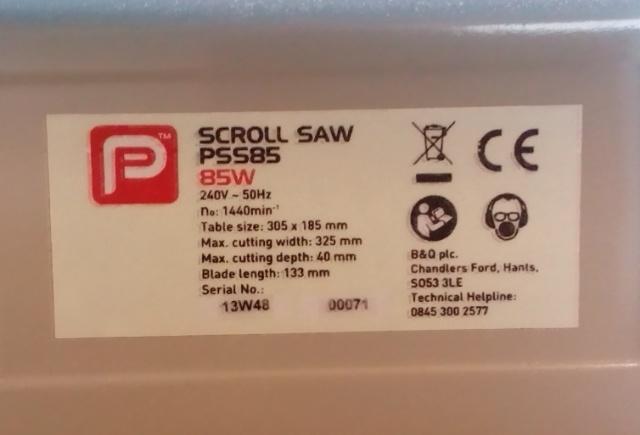
David, what make is that jolly handy looking scroll saw?
Regards
Rob
Posted: Sun Apr 10, 2016 5:30 pm
by River Lin
Hi Rob.
The saw was on the special offer stand in my local B&Q one day last summef at 29 pounds so i had to have it. It is their own brand ipresume and is not a high class machine but suits me fine. I think it is only 59 pounds full price

.
I clamp it down to hold it firmly and it doesn`t have an air pump to clear saw dust but i saw on the interweb where a man had rigged up a fish tank blower snd a length of piping and it worked a treat.
I had a problem with the plastic blade tensioner on the front top of the arm coming loose but i replaced it with a standard nut and adjust with a small spanner.
Overall then not the best saw i could buy but forthe money it does a good job.
David.
Posted: Sun Apr 10, 2016 6:01 pm
by River Lin
Hi all.
Spent time today gluing the roof spars onto the underside of the roof.
I have explained how i do this in a previous thread but in short i use the horizontal pipe slots that are machined into the jaws of my Workmate work bench to hold and curve the roof board while i glue on the spars.
I slide in the roof and slowly close the jaws, letting the roof curve gently downwards. I use the card roof template mentioned previously to get the curve i need to the roof. It is then a simple job to glue each spar onto the lines previously drawn onto the roof board.
4 things to remember-
1. Ensure the two end spars are positioned just inside the two end lines otherwise the roof might not fit on the coach.
2. Line up the centreline on each spar with that on the roof, for the same reason.
3. Use enough glue, especially at the ends of each spar to ensure the roof keeps its correct curve when the pressure of the workmate is released.
4. Leave the glue long enough to set and cure throughly, i suggest overnight.(not that i have ever had a roof try to flatten out again due to my impatience. Oh no.)

Can't wait till tomorrow to try it. Egg on my face if it doesn't fit.

Posted: Mon Apr 11, 2016 4:12 am
by LNR
Good to see someone using enough beams to maintain a constant camber through out the roof, rather than at the ends and the middle.
Also more beams/glue = less load on each beam to hold the camber.
Grant.
Posted: Mon Apr 11, 2016 10:07 am
by River Lin
Hi Grant.
Yep that's my reasoning. When I get the time later I'll post a photo of how it looks now after 24 hours of glue hardening.
David.
Posted: Mon Apr 11, 2016 5:19 pm
by River Lin
Hi all.
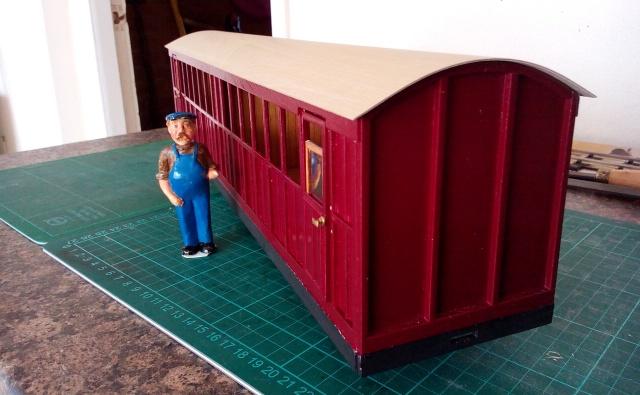
Roof fits. Now to cover it with ' canvas' before painting.
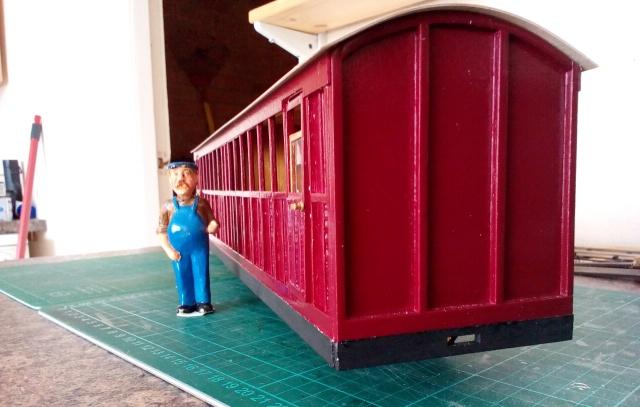
Photo below shows why i like to fit plenty of roof spars. I am pleased with the way the roof edge seems flat and fits nicely against the cant rail.
David.
Posted: Tue Apr 12, 2016 9:44 pm
by Andrew
That's looking really good, and you're right, the roof does fit very nicely indeed. Some of my earlier carriages could really do with their roofs taking off and lots of trusses adding - some roofs aren't terribly flush with the cant rail, and others have a noticeable dip in the middle...
Coincidentally, this evening I almost finished my WHR Summer Car, cutting the glazing and sliding it into place - tomorrow night I need to do the roof, never a prospect I relish... Recognising the need for more support mid roof I'd cut 6 trusses (I added them to the design for the laser cut stuff I did recently) but then found I'd miscalculated the depth so had to double them up to give only three - I think it'll work, but we'll see...
Anyway, your Cleminson's coming together beautifully, I look forward to seeing photos of it in action...
All the best,
Andrew.
Posted: Wed Apr 13, 2016 11:33 am
by River Lin
Love to see your summer car Andrew. Home built I presume :-)
By coincidence I have started glazing this morning. I cut a long strip the correct height then cut off to width allowing about a mm extra using an old paper trimmer. It is then just a matter of trimming to width with a sharp knife.

I use Glue'n'Glaze from The Signal Box in Anstey to attach my window panes. It dries virtually invisible and does not fog the plastic like some glues do. Incidentally I save plastic lids from Christmas gift sets to use as glazing as it is usually crystal clear whereas some specific glazing sheets I have bought in the past are softer and have a slight milkiness to them if you know what I mean.
D.
Posted: Wed Apr 13, 2016 5:59 pm
by Andrew
Yes, the Summer Car's a scratchbuild - I'm just about to tackle the roof now, photos tomorrow I hope.
I might have to try some of your Glue and Glaze, sounds useful. I currently use a Wilco general adhesive that goes stringy but then peels off, not bad but yours might be better... No glue in the current carriage, the design lent itself to leaving slots in the sides for glazing to slide into...
Cheers,
Andrew.
Posted: Fri May 06, 2016 8:12 pm
by River Lin
Hi all.
Latest update. Only 9 days left until it's commission date on the Disney Bridge Railway a week on Sunday.
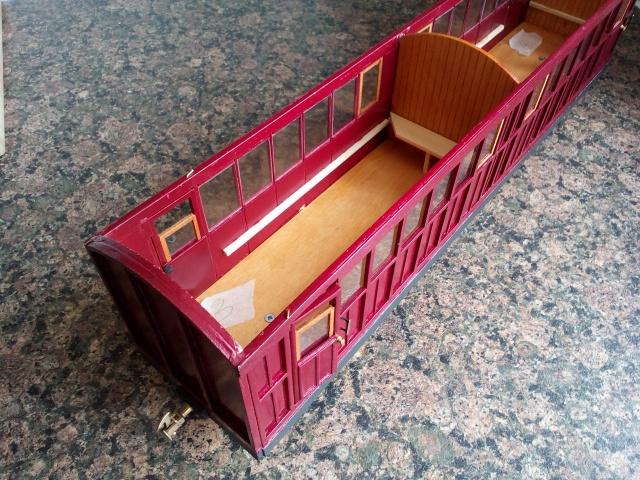
Windows in. Individual panes in their own rebates.
Slaters chopper couplings fitted to match my other stock (height adjusted).
Roof covering added and painted cream.
Seating made. Pine bench seats to fit longitudanaly around the two areas.
Seating brackets fitted around the compartments.
To do.
Fitting seating.
NORTH WALES NARROW GAUGE name boards.
Paint touch ups.
Brake hoses fitted if they arrive in time.
Not sure about door steps. They were added later in life.
Final fettling.
Final update hopefully during next week.
Davit
Posted: Fri May 06, 2016 9:56 pm
by Soar Valley Light
Hi David,
What magnificent work! I look forward to the update and some more pictures.
Andrew
Posted: Sat May 07, 2016 12:29 am
by LNR
Beautiful work David, the opening doors should make for some lovely platform photos with a door open and a passenger or two milling about.
Grant.
