A 'January Loco'

A place for discussing battery-electric locomotives, whether they're diesel, steam or even electric outline
Post Reply
User avatar
Peter Butler
Driver
Driver
Posts: 5713
Joined: Sun Sep 09, 2012 10:33 pm
Location: West Wales

A 'January Loco'

Post by Peter Butler » Sat Jan 25, 2014 11:52 pm

Following on from the build of my Christmas Loco, I embarked on a new project for January.....
The loco was purchased second hand (again!) fully built but not to my liking. However, it was complete apart from battery pack so gave another opportunity to stamp my mark on it.
Firstly, stripped to its component parts and all paint removed. Assembly of the chassis, motor and gears and tested as a running chassis...
Image
The body shell reassembled with some additions... footplate alongside the bonnet with rivet detail and mesh applied. Also, chassis rail full length either side, again with rivets...
Image
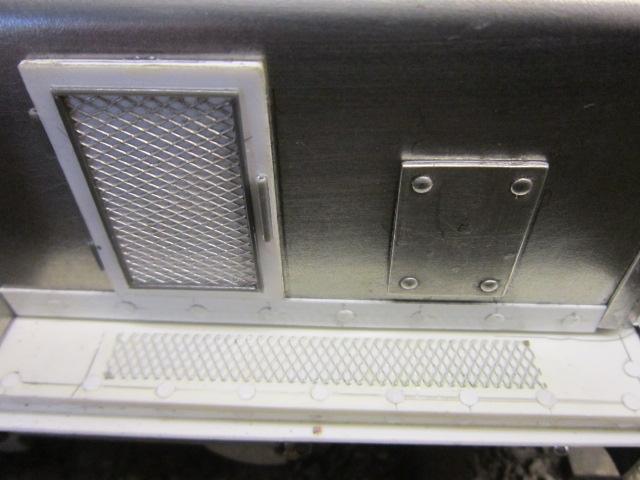
New grille and inspection doors to bonnet sides....
Image

Image
A step for the driver, again with mesh for grip...

Image
A coat of primer...

Image
And back together again...
Image

steamie1

Post by steamie1 » Sun Jan 26, 2014 10:42 am

Looking Fabulous!

bazzer42

Post by bazzer42 » Sun Jan 26, 2014 11:45 am

That does look good and the background makes me think an indoor layout would be good in this weather.

User avatar
Peter Butler
Driver
Driver
Posts: 5713
Joined: Sun Sep 09, 2012 10:33 pm
Location: West Wales

Post by Peter Butler » Sun Jan 26, 2014 4:28 pm

Moving on......
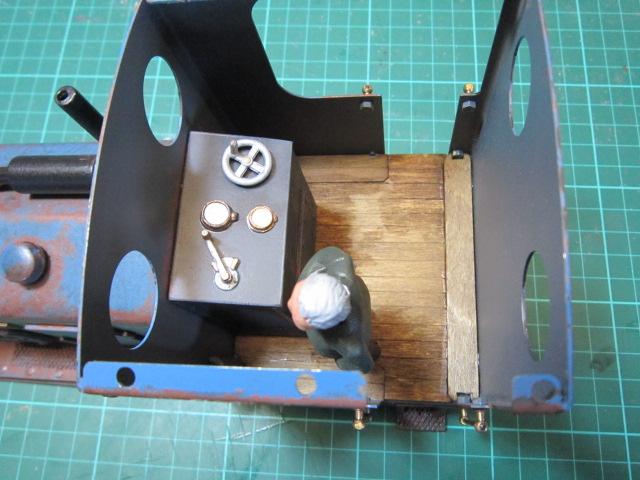
Cab interior is looking more business like but I doubt it would satisfy the purists..

Image
Wooden cab floor...
Image
The roof on these kits is usually attached with 6 screws which destroy the image. I countersunk the holes and pushed countersunk head bolts in and superglued them in place. On the top a thin plasticard sheet covers the screw heads and a rain strip finishes the job...
Image

Image
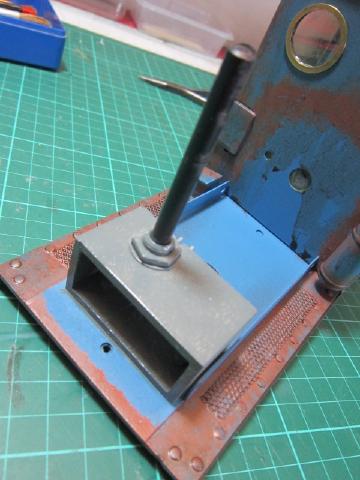
I am trying out manual operation with speed control fixed to the chassis and sticking up through the bonnet. This allows the bonnet to lift off without electrical disconnection and also keeps it in place during running...
Image
Getting near the end now... The story goes that 'Emma' was bought in by the B.U.R.P.S. (Brockhampton and Umbridge Railway Preservation Society) in a sorry state and, although operational, must wait her turn for complete overhaul and repaint until funds allow! Until that time she will look like this...

Image
Image
'Emma' is a dirty girl!!!!

laalratty

Post by laalratty » Sun Jan 26, 2014 8:35 pm

Nice job you've made of that

User avatar
Dannypenguin
Trainee Driver
Trainee Driver
Posts: 632
Joined: Tue Feb 26, 2013 9:57 am
Location: Forest of Dean, UK
Contact:

Post by Dannypenguin » Sun Jan 26, 2014 8:49 pm

Very nice :)
Dan

Visit the PFLR website - http://poultonfarmlightrailway.webs.com/
Dean Forest Railway Society website - http://dfrsociety.org/

steamyjim
Retired Director
Retired Director
Posts: 1210
Joined: Tue Oct 16, 2007 9:19 pm

Post by steamyjim » Sun Jan 26, 2014 9:59 pm

Lovely build! Your weathering is fantastic. :D
Check out my steam and engineering youtube channel at...

https://www.youtube.com/channel/UC8vX4P ... _PnvhldjjA

User avatar
KjellAn
Trainee Fireman
Trainee Fireman
Posts: 228
Joined: Sun Nov 07, 2010 9:46 pm
Location: Norway, Sarpsborg
Contact:

Post by KjellAn » Mon Jan 27, 2014 6:29 am

A very nice weathering. :)
Could you tell a little about how the weathering was done. I'm about to do some weathering on my new RH Little John.
Kjell Anderdal :)

Livesteam 16mm on my line - the Pine Hill Railway (PHRy)

steamie1

Post by steamie1 » Mon Jan 27, 2014 8:45 am

Ditto!

Big Jim

Post by Big Jim » Wed Jan 29, 2014 10:29 am

Nice job Peter. What was the kit the loco was based on?

Post Reply

Who is online

Users browsing this forum: No registered users and 10 guests