
With the rolling stock situation under control on the TVT and with progress on the scratchbuilt loco. still very slow, late last year I decided it was time to do something about adding a mainline loco. to the roster.
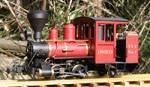
I managed to reserve one of the 2013 batch of SR&RL #24 models from Roundhouse and it was delivered at the end of May. Three days to travel more than halfway around the world, then it takes the local delivery contractor three days to deliver it from an airport that is only an hour and a half drive from my place....

SR&RL #24 is a fairly standard Baldwin design from the second decade of the 20th century. It is about the same size as the VR NA class, so suitable for service on a minor Aust. tramway.
This photo. shows the loco on it's delivery run on the TVT on a sunny late autumn day, running as a BONA (VR telegraphic code for an engine with van attached).

The model was then tested and run in on the bench using a rolling road. Running time from cold is about 27 minutes with the small gas tank, but the larger boiler takes longer to reach working pressure than smaller Roundhouse locos. In service I'll be refilling the gas tank when the boiler is up to pressure, which brings the running time up to about 35 minutes without the water getting low.
The model needed some cosmetic changes to make it more like an Aust. 3' gauge loco. and less like a 2' gauge Maine loco. Plus various modifications to Roundhouse features I don't like, including doing something about the high gloss finish.
List of modifications -
- replace visible cheese head screws with hex head type. I use reduced head screws to improve appearance and BA hex head screws are available with the next size down head. eg. 6BA with a 7BA head, 8BA with a 9BA head and 10BA with a 12BA head. The countersunk screws used in the cranks were replaced with 4BA countersunk hex socket screws, which makes a considerable improvement in appearance.
- replace the reverser reach rod with something that looks more railway like and less like something off a model aeroplane. I seriously considered moving it to the correct side as well, but decided that was too big a job, requiring major modifications to the cab floor.
- fit dummy motion brackets and trunnion supports to the slidebar to disguise the Roundhouse expansion link arrangement. I'd have liked to add the double slidebar as well, but clearances were too tight.
- fit turned covers to the cylinder ends to make them look more like a Baldwin cylinder and less like a Roundhouse one.
- fit Accucraft choppers, which are the TVT standard.
- replace wooden cowcatcher with a scratchbuilt Aust. bar type.
- replace electric headlight with a scratchbuilt kerosene type and add scratchbuilt VR pattern marker lamps to the front apron.
- increase size of front apron and fit scratchbuilt VR type jacks.
- add fixing brackets to the headstock braces where they meet the front apron.
- rearrange Westinghouse air pump piping and fit a pump governor to pump.
- fit air brake hoses and fittings to front and rear headstocks.
- modify cab roof to lift off, instead of hinging forward, to make filling the gas tank easier.
- remove the bracing on the front of the cab. This was only fitted to #24 late in it's life when the wooden cab started showing it's age.
- add dummy safety valves and a new whistle to the steam dome.
- add the missing handrails to the cab.
- fit new coaming at the rear of the tender to make it a standard Baldwin type, as the cut down rear of the model tender is specific to SR&RL locos.
- fit VR style fire iron brackets and fire irons to the fireman's side of the tender.
- fit a tender handbrake.
- fit lamp irons to rear of tender for tail light/tail disc when running light.
- modify drawbar to decrease the large gap between cab and tender.
These two photos show the modified loco. before it entered the paint shop. The above list of modifications show up reasonably well as they are mostly unpainted brass at this stage. These pics. were taken on a cold grey winter day about a month ago, when I gave up waiting for a sunny day.


Then it was into the paint shop to do something about the high gloss finish. Even Puffing Billy don't manage that sort of finish on the black NAs and this model is supposed to represent a hard worked Aust. loco. from a time just before the Great Depression.
The model was completely stripped down to components and degreased before painting. All painting was done with an airbrush. Unpainted brass was given a coat of black etch primer and the parts put in the oven at 100C for an hour or so. The topcoat was applied in two thin coats, with a couple of hours in the oven between coats. Gloss clear was applied where the lettering was to be applied and suitable decals were printed and applied. The lettering was sealed with a coat of satin clear, applied to the tender sides and back and the cab.
The parts were painted in one of four shades of black, depending on where they were on the loco.
Faded black was mixed from 3 parts Humbrol satin black #85 to 1 part satin extra dark sea grey #123 and was used on those bits that would be regularly cleaned such as tender sides, boiler cleading/fittings and cab sides.
The smoke box was painted with Revell matt anthracite #9.
Running gear, chassis, bogies, cab roof, etc. which are exposed to brake dust and never cleaned were painted rusty black mixed from 2 parts faded black with 1 part Humbrol matt red brown #160, with Humbrol matt red brown #100 added until it looked right.
A few parts like lamps were painted with Humbrol statin black #85. Rusty black was then used to blend the different areas together.
This is the final result. The paint job is based on how the last few VR NA class that survived into the era of colour photography looked in the '50s. In particular, it is based on photos. of 14A at Colac after it was spruced up for fan trips to provide backup to the increasingly unreliable garratts, which by then were totally worn out.
Spring has more or less sprung around here (the wattle is starting to bloom) and the sun has appeared more regularly, making photography possible. The model is actually a bit darker than it appears in photos., as the flat finish diffuses the sunlight making the colour appear lighter.


TVT Story
By WW1, the existing TVT mainline locos. were struggling to maintain the service. After the Armistice, the Aust. economy was growing again and the area where the TVT is located was opened up for soldier settlement, which meant an increased population. The Victorian timber industry was booming, which further increased the pressure on the TVT, which had opened up previously unexploited forests.
The VR narrow gauge lines were under the same pressure and eventually it responded by introducing the G class Garratts in '25. The TVT engineer would also have liked a Garratt, but delivery time and cost ruled out that option.
The VR weren't interested in selling any NAs and in any case the TVT was twice the length of the VR lines, so a tender engine would be more suitable. Australian private builders were expensive, slow to deliver and had no suitable design on the books, so TVT management turned again to Baldwin. Two tender locos. out of the Baldwin catalog were delivered, the design being much the same as an NA, but with more modern valve gear.
While not particularly large by Aust. standards, they were twice the power of anything on the TVT, so someone decided to name them after mountains and No. 6 was named Bogong after the tallest mountain in Victoria. They mostly spent their time on goods trains, so were painted plain black from the start.
The traffic manager was a lot happier, as the doubling in power meant the number of trains needing to be run and the number of crews needed to run them was halved. The locos. had pretty much paid for themselves after a few years.
The crews were less impressed, as they now had more engine to prepare, more coal to shovel and less overtime, so generally referred to them as the 'big black b......s'.
Regards,
Graeme