A place for the discussion of garden railways and any garden style/scale portable and/or indoor layouts
-
Chris
Post
by Chris » Sat Aug 23, 2008 8:57 pm
Not sure this really counts as a garden railway. More just a way of setting up a more permanent loop of track.
Anyway, work has started, just under half the bricks have been mortared down. Then I will test the track with my lollipop tram. Then I will cover it all in a layer of mortar and gravel and then lay the track back down.
It is mamod track because that is what I have got. I am using bricks as I had some kicking about in the garden and I scrounged some more from a neighbour. So far I have spent about £10.


Sorry for photo quality. I had my mobile phone in my pocket and it was starting to get dark.
-
mhlr
- Retired Director

- Posts: 4336
- Joined: Sun Oct 21, 2007 8:16 pm
- Location: Shropshire, England
Post
by mhlr » Sat Aug 23, 2008 9:28 pm
Looks like a ideal basis for adding to when you want, a good design. Will be great once you've got it looking proper

-
ACLR
Post
by ACLR » Sat Aug 23, 2008 10:01 pm
looking good Chris
-
alan2525
Post
by alan2525 » Sat Aug 23, 2008 11:49 pm
That's good, it's just a loop now but plenty of potential for expanding too! Make sure you take a fair bit of care to get it as level as possible, it'll certainly pay off in the long run and just being able to leave a steam loco happily run around at a controlled speed is the best part of garden railways!
-
MuzTrem
Post
by MuzTrem » Sun Aug 24, 2008 9:32 am
Chris wrote:So far I have spent about £10.
Wow - who said garden railways are an expensive hobby!

Anyway, looks good, and even if it is small at least it will allow you to get something running, which is always vital for maintaining enthusiasm.
-
Chris
Post
by Chris » Sun Aug 24, 2008 10:36 am
MuzTrem wrote:Chris wrote:So far I have spent about £10.
Wow - who said garden railways are an expensive hobby!
Anyway, looks good, and even if it is small at least it will allow you to get something running, which is always vital for maintaining enthusiasm.
The £10 doesn't include the track that I bought in several batches on ebay.
Think I will need another couple of bags of sand, and some gravel, so total (excluding track), will be about £20.
Currently I just use the track on some bark, which works ok, but it gets in the way if I leave it out.
-
Chris
Post
by Chris » Sun Aug 24, 2008 10:39 am
alan2525 wrote:That's good, it's just a loop now but plenty of potential for expanding too! Make sure you take a fair bit of care to get it as level as possible, it'll certainly pay off in the long run and just being able to leave a steam loco happily run around at a controlled speed is the best part of garden railways!
Yep, I'm trying to level as well as possible, and check with a couple of bricks back. My mamods run well, and my bertie shouldn't have too many problems. It is rather nice when it pauses to build up a bit more steam before chuffing off again. The whole lot will be covered with more sand/gravel/cement so more accurate leveling can be done then as well. What I don't want it a mamod running away down a slope!
Weather is rubbish at the moment, but hopefully get more done later today and tomorrow.
Anyway, will see how it all goes. At some point I will extend, but might wait until I can afford some peco track. But hey I might move house before then.
-
Chris
Post
by Chris » Sun Aug 24, 2008 6:21 pm
Today's progress...
I finished mortaring down the last bricks and everything is pretty level (bit worrying when you brick in a loop whether the last one is going to be 10 inches higher than the first!).
One problem with mamod track though is that it is not at all flexible. And in a few places one rail is off the side of the brick. This will be solved by building embankments from concrete.
Anyway, I'm very happy. I think it is going well.
Hopefully get a bit more done tomorrow, then I have a hectic week of work to look forward to so progress will halt for a while.


-
ACLR
Post
by ACLR » Sun Aug 24, 2008 8:17 pm
looks great Chris
I had the same problem with mamod track its not very forgiving.
and as you say you can bank the edges with concrete.
will give you a permanent track to run on now which you can build on
-
Chris
Post
by Chris » Sun Aug 24, 2008 8:45 pm
ACLR wrote:looks great Chris
I had the same problem with mamod track its not very forgiving.
and as you say you can bank the edges with concrete.
will give you a permanent track to run on now which you can build on
Thanks for the encouragement. The main aim is to get a permanent track and to spend as little as possible!
Going to have to buy some more sand and gravel tomorrow though.

Ran my lollypop railcar around it, which has very little power, and it ran around with no problems, so I think it should be good for the steam when it is all finished.
-
pauly
- Driver

- Posts: 1989
- Joined: Tue Aug 12, 2008 9:18 pm
Post
by pauly » Sun Aug 24, 2008 9:02 pm
Id still go round with a spirit level mate my battery engine ran fine round mine to so I thought it would be OK for steam BIG mistake.
A steam propelled life-style.
-
Chris
Post
by Chris » Sun Aug 24, 2008 10:57 pm
pauly wrote:Id still go round with a spirit level mate my battery engine ran fine round mine to so I thought it would be OK for steam BIG mistake.
Yep, used a level all the way round and the end met with the start so can't be too far out.
-
ACLR
Post
by ACLR » Mon Aug 25, 2008 8:25 am
I a have a small gradient in one section of the track but my mss seems to pull it ok most times with 8 trucks but occassionly I get a bit of wheel spin

reminds me I will have to do another picture for my avitar as marvin has had a few mods since that last pic

-
Chris
Post
by Chris » Mon Aug 25, 2008 8:26 pm
Finished!
Well, ok, so I haven't finished, but I have nearly finished. Today I built out the areas where the track wasn't completely on a brick, filled in the gaps between the bricks, then covered the whole lot in a layer of concrete and pushed gravel into it. Then after a bit of a wait I laid the track down on top. There isn't actually anything holding the track in place, so I might have to sort that out. Also I will build up some of the sides a bit more (got loads of sand and cement left so may as well).
Tested again with the lollypop tram, but can't test with steam until the concrete has cured for longer, and probably won't have time until next weekend now.
Again, sorry for the pics, it is late.


-
ACLR
Post
by ACLR » Mon Aug 25, 2008 8:30 pm
cant wait to see your steamer running around that track mate looking good
-
pauly
- Driver
- Posts: 1989
- Joined: Tue Aug 12, 2008 9:18 pm
Post
by pauly » Mon Aug 25, 2008 8:51 pm
we need pics of your lollypop railcar too
A steam propelled life-style.
-
Chris
Post
by Chris » Mon Aug 25, 2008 8:59 pm
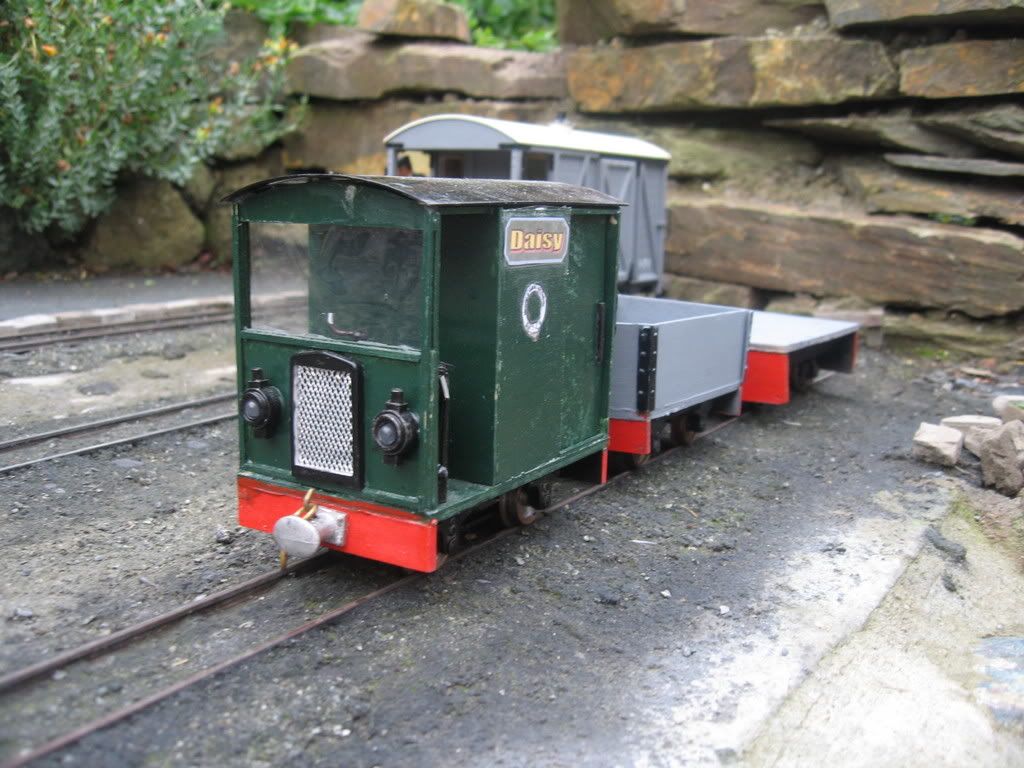
pauly wrote:we need pics of your lollypop railcar too
I bought it on ebay so I can't take any credit for building it. Bought with the intention of having something safe for my toddler. Have to keep hold of here when the steam locos are out.
It has the pulling power of a mosquito with one wing!
-
pauly
- Driver
- Posts: 1989
- Joined: Tue Aug 12, 2008 9:18 pm
Post
by pauly » Mon Aug 25, 2008 9:32 pm
I love mine

A steam propelled life-style.
-
mhlr
- Retired Director
- Posts: 4336
- Joined: Sun Oct 21, 2007 8:16 pm
- Location: Shropshire, England
Post
by mhlr » Mon Aug 25, 2008 9:37 pm
Me too!!!!! It pulls like a, erm, a train!!! Will pull anything until traction is lost!
-
made-in-england
- Trainee Driver

- Posts: 826
- Joined: Tue May 13, 2008 4:22 pm
Post
by made-in-england » Mon Aug 25, 2008 9:45 pm
Lollypop railcar owners club me thinks!
Passengers are reminded not to tease the engines
Who is online
Users browsing this forum: No registered users and 9 guests