I'm in the process of putting the finishing touches on a Roundhouse "Billy" with the four-wheel tender. It was a sheer pleasure to assemble, not only because the parts all fit utterly perfectly, but now I have a nice model which as far as I'm concerned basically guarantees that I will someday have some kind of railway (as soon as I have some land)
I took pictures along the way, and if anyone is interested I can post some assembly pictures. For people who have never built a kit locomotive before, it might serve to encourage them, or at least some people may find it interesting. I'm quite proud of it, I've never assembled anything like this before.
Building a Roundhouse kit
-
Keith S
- Driver

- Posts: 1666
- Joined: Thu Feb 24, 2011 11:44 pm
- Location: Canada
-
Keith S
- Driver
- Posts: 1666
- Joined: Thu Feb 24, 2011 11:44 pm
- Location: Canada
(..encouraged, he goes ahead to post countless pictures.) Please ignore the date at the bottom of the pictures.. Every time I put batteries in the camera, it resets the clock, and I can't be bothered to reset it.
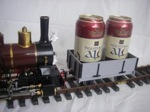
I ordered four kits: Chassis, Boiler, Body, and Tender. THe tender is not really for the "Billy", but I thought it might look nice with one.

The first box I opened was "Boiler", and I found the boiler and fittings all loosely assembled, for ease of packaging.
I piled all the parts together to see how big it would be.

I ordered four kits: Chassis, Boiler, Body, and Tender. THe tender is not really for the "Billy", but I thought it might look nice with one.
The first box I opened was "Boiler", and I found the boiler and fittings all loosely assembled, for ease of packaging.
I piled all the parts together to see how big it would be.
Last edited by Keith S on Thu Mar 03, 2011 11:10 pm, edited 1 time in total.
-
Keith S
- Driver
- Posts: 1666
- Joined: Thu Feb 24, 2011 11:44 pm
- Location: Canada
First step: assemble and paint frame. I decided to paint the insides red, as I like how that looks.

Next was to install the wheels, and mount the cylinders. I painted the insides of the wheels first.

Then I attached the connecting rods and the coupling rods. This took a bit of care, because the rod bearings need to be dressed with a needle file until the wheels turn freely. You don't want any sticky spots, nor do you want excessive play in the rods.

I didn't have to have the footplate and boiler on at this time, I just liked to admire my handiwork with a boiler on it
At this point the valves are installed as well.

Next was to install the wheels, and mount the cylinders. I painted the insides of the wheels first.
Then I attached the connecting rods and the coupling rods. This took a bit of care, because the rod bearings need to be dressed with a needle file until the wheels turn freely. You don't want any sticky spots, nor do you want excessive play in the rods.
I didn't have to have the footplate and boiler on at this time, I just liked to admire my handiwork with a boiler on it
At this point the valves are installed as well.
Last edited by Keith S on Thu Mar 03, 2011 10:20 pm, edited 1 time in total.
-
taliesin001
-
Keith S
- Driver
- Posts: 1666
- Joined: Thu Feb 24, 2011 11:44 pm
- Location: Canada
Here is the next step: the valve gear. Despite all the tiny screws that love to roll away and hide in the carpet, this is actually pretty easy. The instructions are very clear. They show how to roughly set up valve timing, and then how to fine tune it once the boiler is on. The boiler in these pictures is just sitting there, because I liked looking at it with the boiler on.

I painted the boiler at this point. I decided it should be black, because even though there is a boiler jacket, I didn't know how much would be visible. None, it turns out, except from underneath.
Next was the reverse lever. This was also easy, the nuts you see on the quadrant are to position the lever for forward, reverse and neutral. Since the "simplified" walschaert's valve gear has no provision for variable cut-off, these nuts are locked down once the best position for the lever in each direction is ascertained by test running.

Here is the pipework between the cylinders. The superheater attaches to a "T" fitting, which attaches to the intake stubs with compression fittings. The superheater itself goes down the boiler flue. It's stainless steel to withstand the heat.

I painted the boiler at this point. I decided it should be black, because even though there is a boiler jacket, I didn't know how much would be visible. None, it turns out, except from underneath.
Next was the reverse lever. This was also easy, the nuts you see on the quadrant are to position the lever for forward, reverse and neutral. Since the "simplified" walschaert's valve gear has no provision for variable cut-off, these nuts are locked down once the best position for the lever in each direction is ascertained by test running.
Here is the pipework between the cylinders. The superheater attaches to a "T" fitting, which attaches to the intake stubs with compression fittings. The superheater itself goes down the boiler flue. It's stainless steel to withstand the heat.
-
Keith S
- Driver
- Posts: 1666
- Joined: Thu Feb 24, 2011 11:44 pm
- Location: Canada
Next step was to solder together the body panels. A lot of the bending, but not all, is done at the factory. It is very easy because the sheets consist of two panels bonded together. wherever there is a fold, the line of the fold is etched into one layer. When the fold is made this etched line closes up. You can almost use your hands for this but I used a steel edge to make sure it was all straight. It's just soft soldered and is straightforward. This, and the tender body, was the only soldering to do in the whole kit. Everything else is silver soldered at the factory.

Next is the cab plumbing. All the fittings come pre soldered, but the pipes need to be bent by the builder. THey are annealed, so it's no harder than tying a knot. The lubricator was trickiest, there need to be some creative bends to get everything to mate up properly.

Next is the cab plumbing. All the fittings come pre soldered, but the pipes need to be bent by the builder. THey are annealed, so it's no harder than tying a knot. The lubricator was trickiest, there need to be some creative bends to get everything to mate up properly.
-
Keith S
- Driver
- Posts: 1666
- Joined: Thu Feb 24, 2011 11:44 pm
- Location: Canada
Now the next thing to do is probably continue building, but I don't know anyone who would be able to resist a steam test at this point.

Surprisingly,(to me) it ran pretty well just with the "rough set-up" as described in the manual. Later, I would adjust the valve travel so that it ran as smoothly as possible in both directions. This can be done without taking off the valve chest covers, by running the engine as slowly as possible, and observing the rods where it "sticks". Then the valve can be adjusted to open earlier or later by turning the spindle where it enters the steam chest.
Surprisingly,(to me) it ran pretty well just with the "rough set-up" as described in the manual. Later, I would adjust the valve travel so that it ran as smoothly as possible in both directions. This can be done without taking off the valve chest covers, by running the engine as slowly as possible, and observing the rods where it "sticks". Then the valve can be adjusted to open earlier or later by turning the spindle where it enters the steam chest.
-
Keith S
- Driver
- Posts: 1666
- Joined: Thu Feb 24, 2011 11:44 pm
- Location: Canada
Next step was painting the assembled parts. Let me digress on the subject of painting. I hate it. I always have trouble with painted parts. I always try to touch them to see if they are dry before they are actually dry.
Also, I live in a remote area and no store here has etching primer. Eventually I settled for etching the parts in muriatic acid, then painting them with normal paint.

The tender and cab went fairly well, but for some reason the boiler jacket took me three tries. I kept putting the paint on too thick, and then trying to touch it after the can said it would be dry, but wasn't. I finally in frustration with myself, packed the engine and the parts inside a box.

The purpose of the box was to prevent me from touching the !@#$ thing before it was dry. It stayed in quarantine for a week.

When the week was over, I unpacked the box.

Also, I live in a remote area and no store here has etching primer. Eventually I settled for etching the parts in muriatic acid, then painting them with normal paint.
The tender and cab went fairly well, but for some reason the boiler jacket took me three tries. I kept putting the paint on too thick, and then trying to touch it after the can said it would be dry, but wasn't. I finally in frustration with myself, packed the engine and the parts inside a box.
The purpose of the box was to prevent me from touching the !@#$ thing before it was dry. It stayed in quarantine for a week.
When the week was over, I unpacked the box.
-
Keith S
- Driver
- Posts: 1666
- Joined: Thu Feb 24, 2011 11:44 pm
- Location: Canada
Here is the engine with the painted parts. This actually took a while, because the boiler has to be removed to put the jacket on, and I painted the part that goes inside the cab black. Also, the brass bands must be filed smooth, polished and bent to shape. So about a day's work.

At this point the boiler inspector came by to approve the final assembly of the steam plumbing. He can see himself in the paint. I take this as a compliment.

Then, I ordered some "jewellery" from "Chuffed2bits".

This included a summerland chuff pipe. I wasn't sure about a chuff pipe, but now I'm glad I put it in. It doesn't affect the engine, other than making it difficult to light from the chimney. It will light through the drain hole under the smokebox however, and it doesn't obstruct exhaust in the chimney so all is well. It really makes the engine sound great though.

At this point the boiler inspector came by to approve the final assembly of the steam plumbing. He can see himself in the paint. I take this as a compliment.
Then, I ordered some "jewellery" from "Chuffed2bits".
This included a summerland chuff pipe. I wasn't sure about a chuff pipe, but now I'm glad I put it in. It doesn't affect the engine, other than making it difficult to light from the chimney. It will light through the drain hole under the smokebox however, and it doesn't obstruct exhaust in the chimney so all is well. It really makes the engine sound great though.
-
Keith S
- Driver
- Posts: 1666
- Joined: Thu Feb 24, 2011 11:44 pm
- Location: Canada
So, not much else to report. I wasn't going to bake the enamel paint in the oven, but then I noticed the boiler jacket was "baking" itself anyway, and the paint was changing its finish slightly. It lost a bit of its gloss, and became "harder" looking. The fresh unbaked paint on the cab and tender looked a bit thick and rubbery by comparison, so I took off the cab and baked it along with the tender in the oven. At this point I also painted the cab cream on the inside. Once the locomotive was all back together I touched up some scratches in the paint and installed the little details such as marker lanterns and roscoe lubricators, and painted the "coal" in the tender. I painted this matte black, and then picked out some of the facets of individual coal pieces with gloss, to make it look a little "sparkly" like real coal.


This isn't quite the end, though. I think the best time to have painted the cylinders would have been back when I was building the frame, and certainly before I ran the engine. Now I imagine the cylinders are hopelessly impregnated with oil, and would be hard to clean, etch, and paint in situ. So I have ordered a pair of cylinder covers from Roundhouse, which I will paint and then snap on.
I really enjoyed building this locomotive. I'm not sure how much money I really saved, considering all the paint I had to buy, but I would guess probably 400 pounds or so, and it kept me out of mischief for a good four months. I lost a little sleep with huge quandaries like what colour to paint it and so on, but overall it was very satisfying to build. Just challenging enough to hold my attention, but not so difficult as to cause any frustration (except the painting, how I hate painting )
)
I just wish I had somewhere to run it.
This isn't quite the end, though. I think the best time to have painted the cylinders would have been back when I was building the frame, and certainly before I ran the engine. Now I imagine the cylinders are hopelessly impregnated with oil, and would be hard to clean, etch, and paint in situ. So I have ordered a pair of cylinder covers from Roundhouse, which I will paint and then snap on.
I really enjoyed building this locomotive. I'm not sure how much money I really saved, considering all the paint I had to buy, but I would guess probably 400 pounds or so, and it kept me out of mischief for a good four months. I lost a little sleep with huge quandaries like what colour to paint it and so on, but overall it was very satisfying to build. Just challenging enough to hold my attention, but not so difficult as to cause any frustration (except the painting, how I hate painting
I just wish I had somewhere to run it.
-
Keith S
- Driver
- Posts: 1666
- Joined: Thu Feb 24, 2011 11:44 pm
- Location: Canada
Oh yes, and I forgot to mention, there is one modification I plan on doing, if you look at the tender you will see the spring details above the bearing journals. THese are white metal castings, and I have determined that they exactly match the little "spring" outlines in the locomotive frame. I have ordered another set of these springs, and I will be fixing them over top of the spring silhouettes on the locomotive to make them look more "springy". I feel quite clever for thinking of this, we'll see if it works. I'll report back when the parts get here.
-
Sir Clothem Cap

- Driver
- Posts: 1707
- Joined: Sun Sep 26, 2010 8:45 pm
- Location: Hampshire
- Contact:
-
andysleigh

- Driver
- Posts: 1362
- Joined: Thu Oct 18, 2007 6:21 pm
- Location: Guildford
- Contact:


-
ninge
Fantastic work  and a really entertaining read too! I actually lol'd at the part with the paint - I too suffered from fingerprints in not-quite-dry-yet paint when I was doing mine and it was definitely the hardest part of the job for me too.
I chose the simpler route of buying a ready to run engine for my first one and then doing it up, but your thread has got me really excited about taking it to the next level and building a kit for my next loco - hear's hoping that all is well and Project victory is ready soon!
I chose the simpler route of buying a ready to run engine for my first one and then doing it up, but your thread has got me really excited about taking it to the next level and building a kit for my next loco - hear's hoping that all is well and Project victory is ready soon!
-
Keith S
- Driver
- Posts: 1666
- Joined: Thu Feb 24, 2011 11:44 pm
- Location: Canada
Two last little projects, and I guess the locomotive is now "finished", although I have some little items to clear up, like painting the heads of brass screws, but I think I'll save that for sometime when I'm bored; they don't bother me that much.
The cylinder covers and little springy bits came in the post this week, so I've been working on them. The covers were easy, etch, paint and snap on. I do wish I had painted the front of the cylinder block first, but I was thinking that it would be difficult considering the oily seal on the end cap, so I left it alone. It looks good enough for me.
The springs are from the "William" tender kit. I suppose this engine could be called a "Billiam". I noticed when building the tender the spring details were about the same shape and size as the little spring silhouettes cut into the locomotive frame. I thought as long as the silhouettes are there, they could use a bit of detail, so I ordered another set of springs.
This little Huslet shows the spring detail I thought would look nice on my engine.

It's not exactly the sam frame arrangement on "billy", but I was hoping to add some detail to better represent springs than the frame silhouettes on the kit.
It turns out they are not exactly the same shape as the loco frame sihouettes, however, after a bit of mangling I got them to match up pretty well. They are not perfect, but viewed from a few feet away they appear to fit tolerably well, and they give that plain area above the cranks a bit of detail to look at.


They do not fit as well as I'd hoped, but considering how small they are and where they are mounted, they dress up the frame a little but otherwise don't really catch the eye unduly. I am pleased with the result and recommend it if you don't like the dummy spring silhouettes on your roundhouse engine frame.
I suppose the engine is more or less finished; there are name plates I haven't ordered yet but otherwise there are no parts left in the boxes other than spares, and she's ready for the road. On a sunny day I'll take some "ex-works" pictures to put in the "steam locomotives" forum.
Roundhouse delivers a very high-quality set of kits, and the instructions are very good. This was a technically easy project, challenging due to its complexity but there were no hidden puzzles or parts that didn't fit, and every step was explained very well in good english. I highly recommend this project to anyone who likes to build kits.
The cylinder covers and little springy bits came in the post this week, so I've been working on them. The covers were easy, etch, paint and snap on. I do wish I had painted the front of the cylinder block first, but I was thinking that it would be difficult considering the oily seal on the end cap, so I left it alone. It looks good enough for me.
The springs are from the "William" tender kit. I suppose this engine could be called a "Billiam". I noticed when building the tender the spring details were about the same shape and size as the little spring silhouettes cut into the locomotive frame. I thought as long as the silhouettes are there, they could use a bit of detail, so I ordered another set of springs.
This little Huslet shows the spring detail I thought would look nice on my engine.
It's not exactly the sam frame arrangement on "billy", but I was hoping to add some detail to better represent springs than the frame silhouettes on the kit.
It turns out they are not exactly the same shape as the loco frame sihouettes, however, after a bit of mangling I got them to match up pretty well. They are not perfect, but viewed from a few feet away they appear to fit tolerably well, and they give that plain area above the cranks a bit of detail to look at.
They do not fit as well as I'd hoped, but considering how small they are and where they are mounted, they dress up the frame a little but otherwise don't really catch the eye unduly. I am pleased with the result and recommend it if you don't like the dummy spring silhouettes on your roundhouse engine frame.
I suppose the engine is more or less finished; there are name plates I haven't ordered yet but otherwise there are no parts left in the boxes other than spares, and she's ready for the road. On a sunny day I'll take some "ex-works" pictures to put in the "steam locomotives" forum.
Roundhouse delivers a very high-quality set of kits, and the instructions are very good. This was a technically easy project, challenging due to its complexity but there were no hidden puzzles or parts that didn't fit, and every step was explained very well in good english. I highly recommend this project to anyone who likes to build kits.
Who is online
Users browsing this forum: No registered users and 1 guest