The scrappy Mamod wagon 'Rusty'

Discussion of Rolling Stock related topics should go here
User avatar
ace
Fireman
Fireman
Posts: 294
Joined: Sun Jul 14, 2013 9:03 am

The scrappy Mamod wagon 'Rusty'

Post by ace » Sat Nov 09, 2013 9:15 pm

Hi Guys,

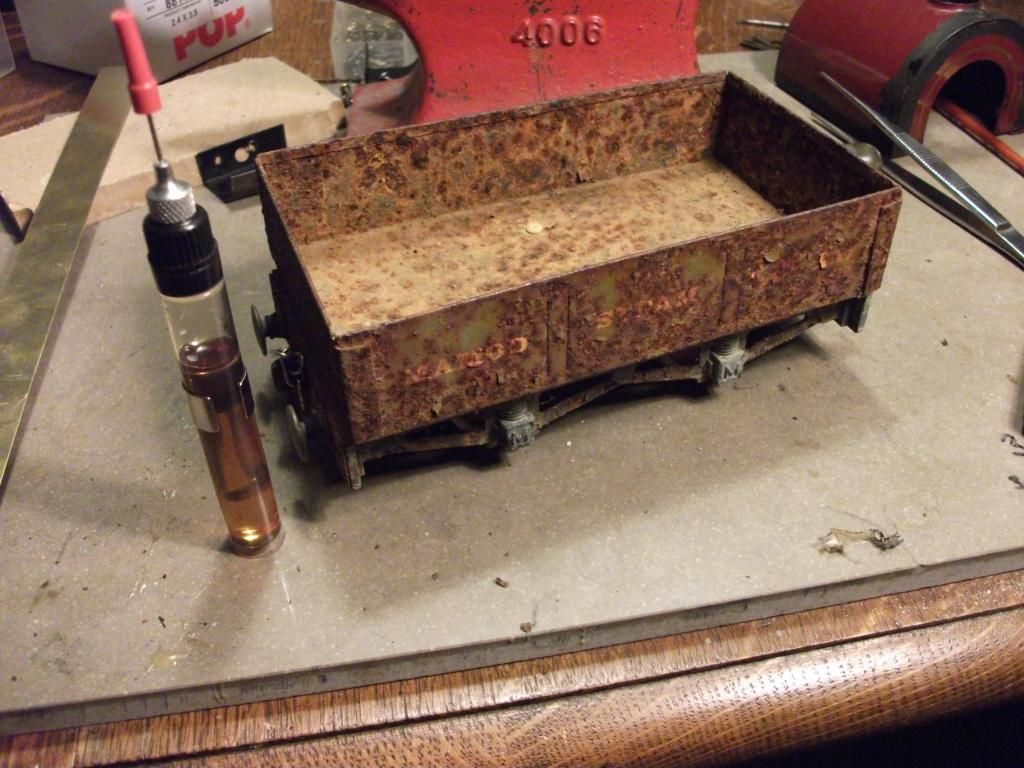
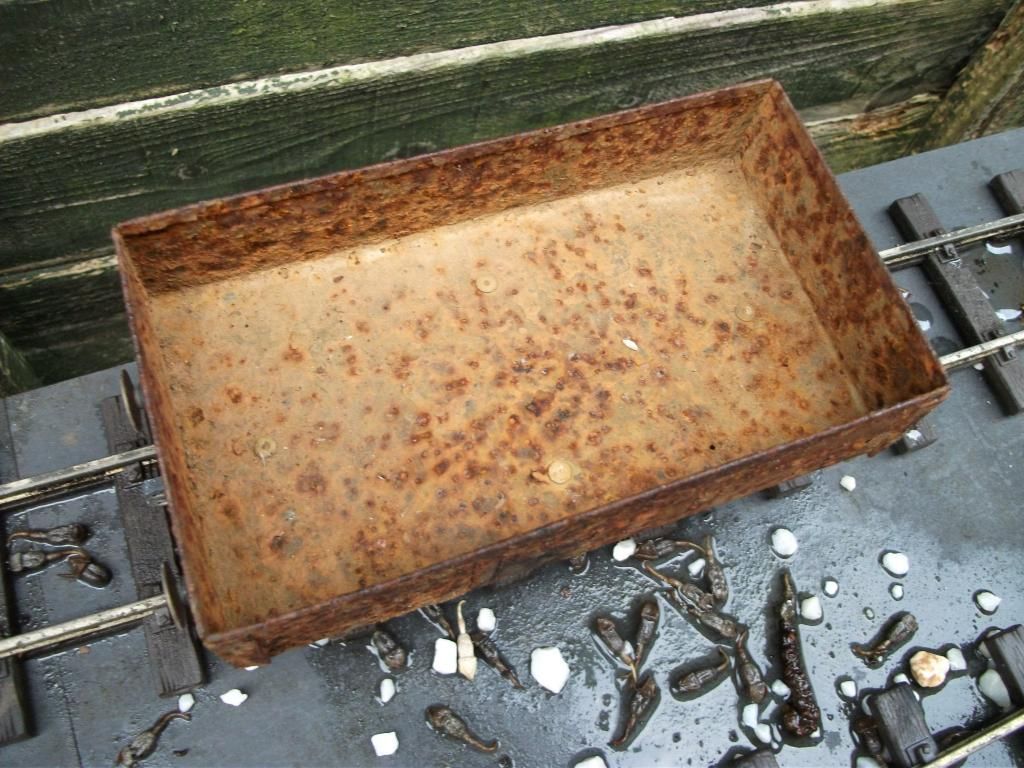
When I went to Pauly's Woodrow Light Railway, he had a present for me in the form of a cardboard box. In that box was a wagon.

This wagon was the most crappy rusty run down, barely recognisable as a Mamod wagon at all.

I LOVE IT!

Many a time I have commented on this wagon when Pauly takes photos of it on his railway, and I really want to 'save it for the nation' as the NRM would say.

Here she is in Pauly's 'No trains today' thread on the other forum:

http://modelsteam.myfreeforum.org/about66429.html
pauly:974930 wrote:No trains today

Image
and
ace:977697 wrote:Here are some of the photos I took at the WLR.

I don't know how many times I have said it, I still want to save the wagon... :(

Image
You see this little wagon and me go back a little way. I want to save his factory loco next. :)

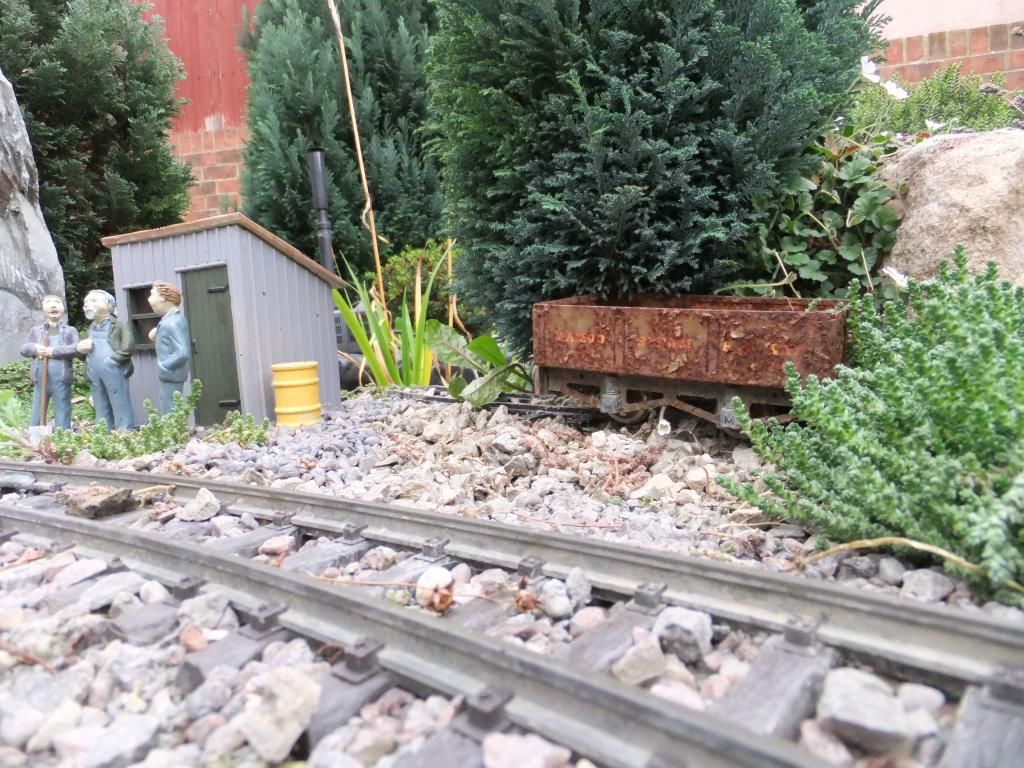
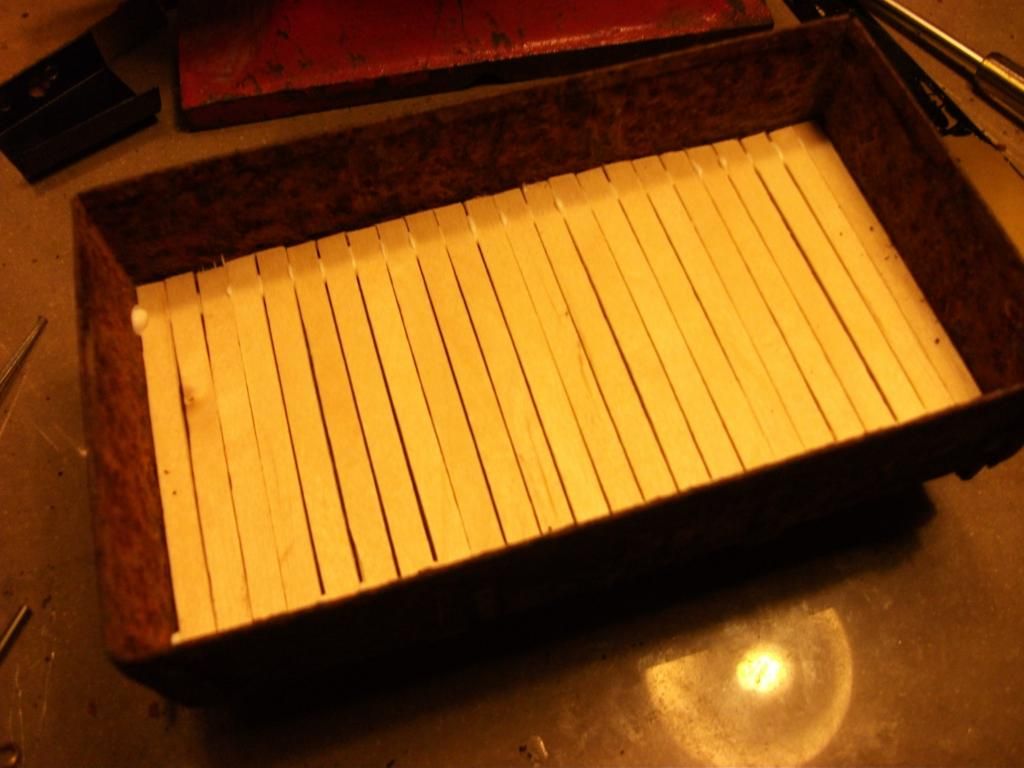
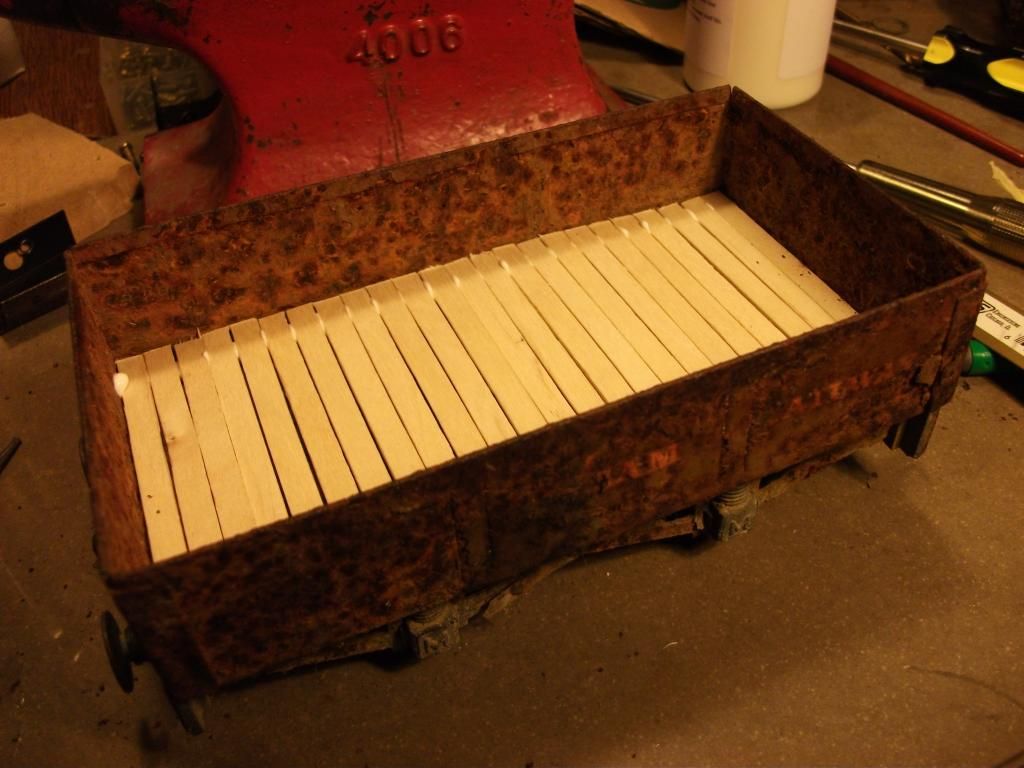
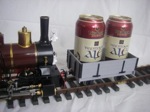
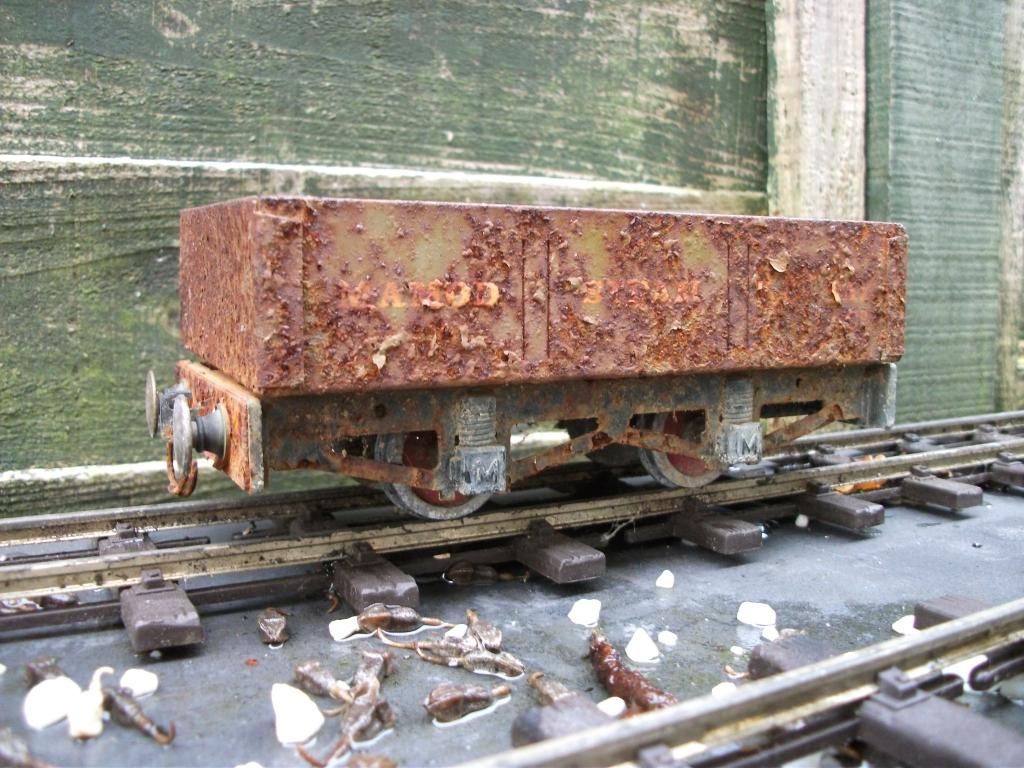
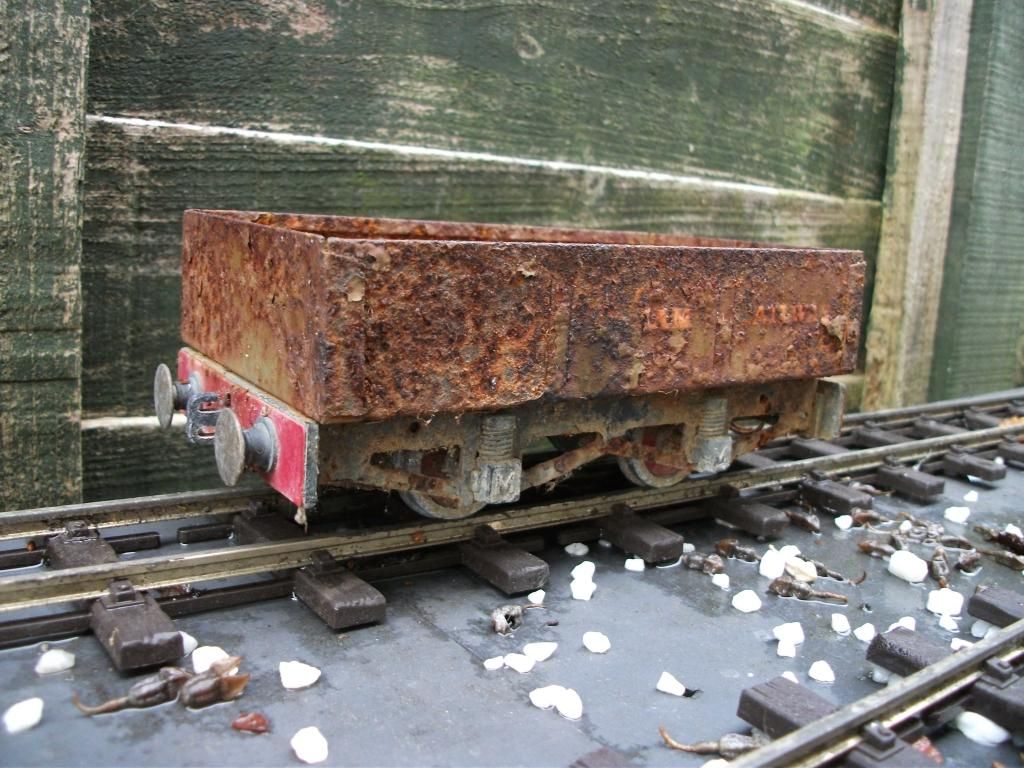
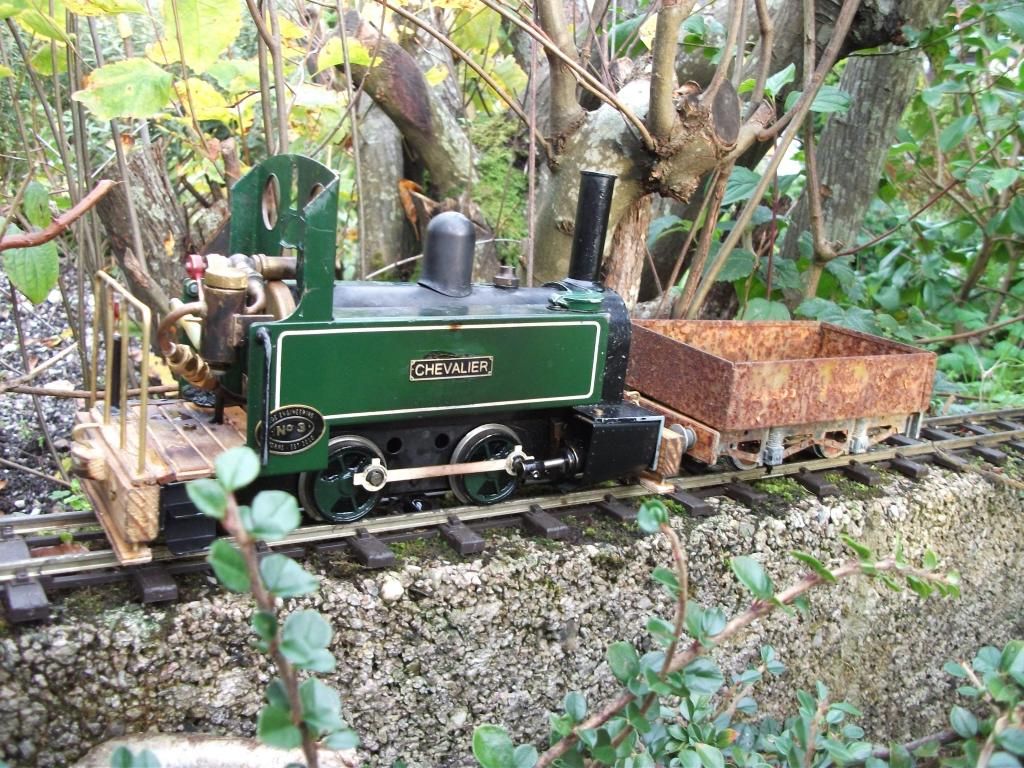
Anyway, here is 'rusty's' début on the Ridgemont Hills Light Railway
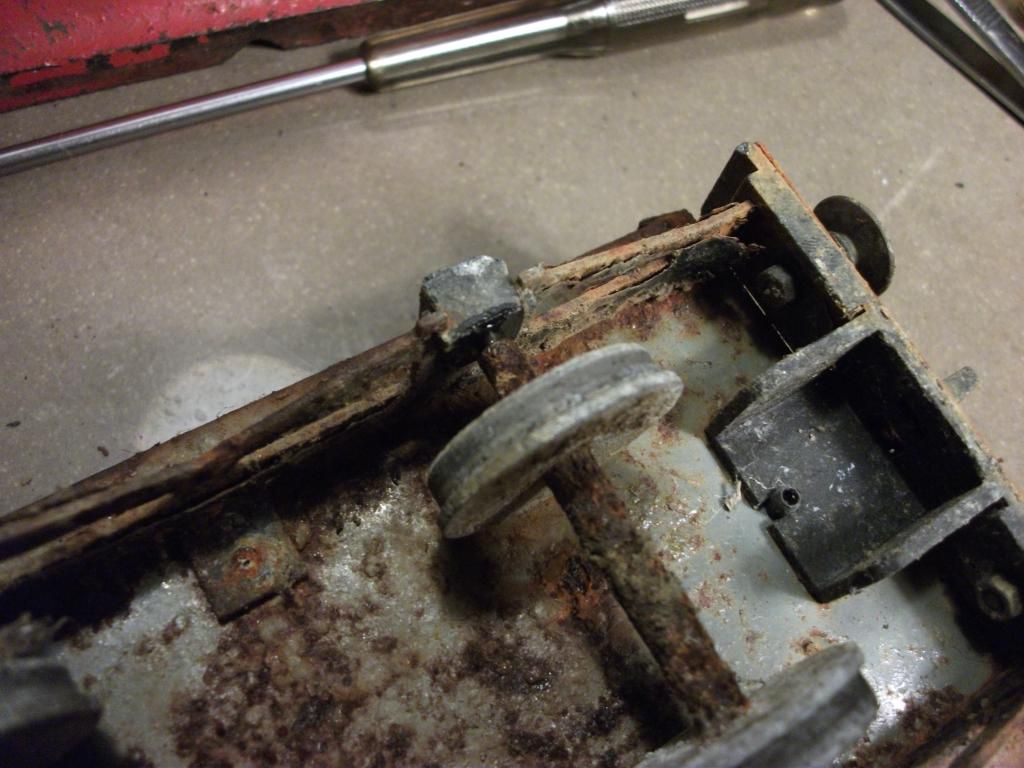
One side

Image

Other side

Image

Image

Image

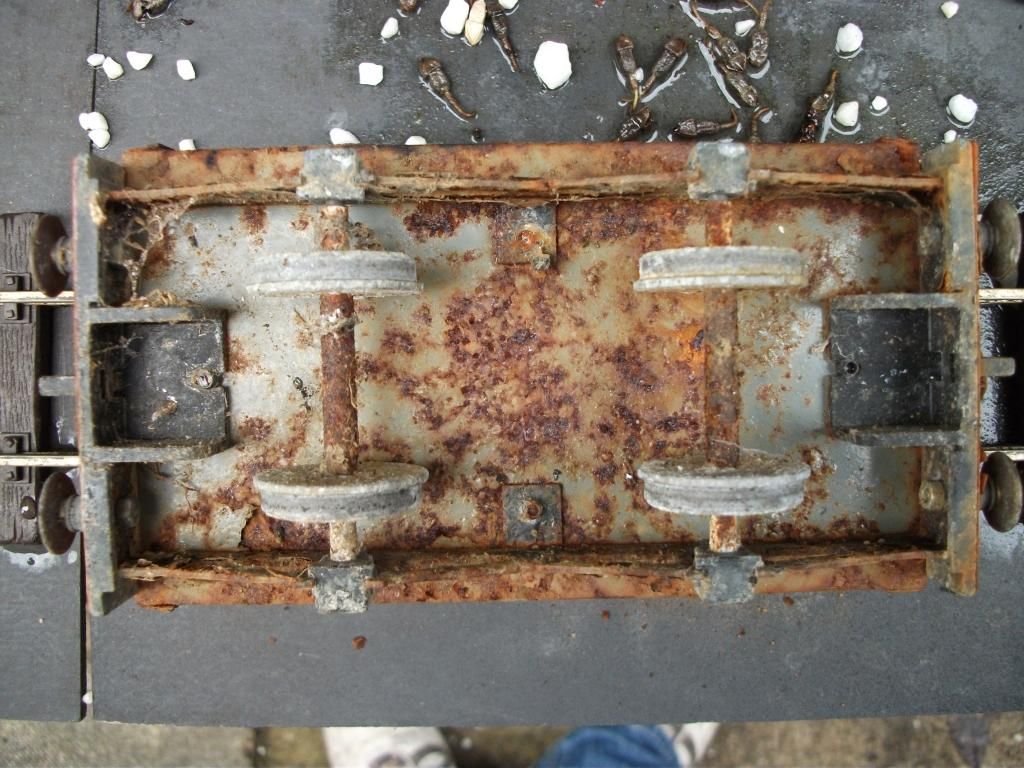
Chevalier bedding in the axles again, it bloody screams when being pulled along! I AM NOT GOING TO DO IT. You bloody will........  :twisted:

Image

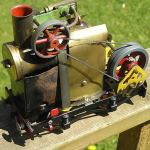
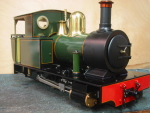
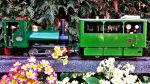
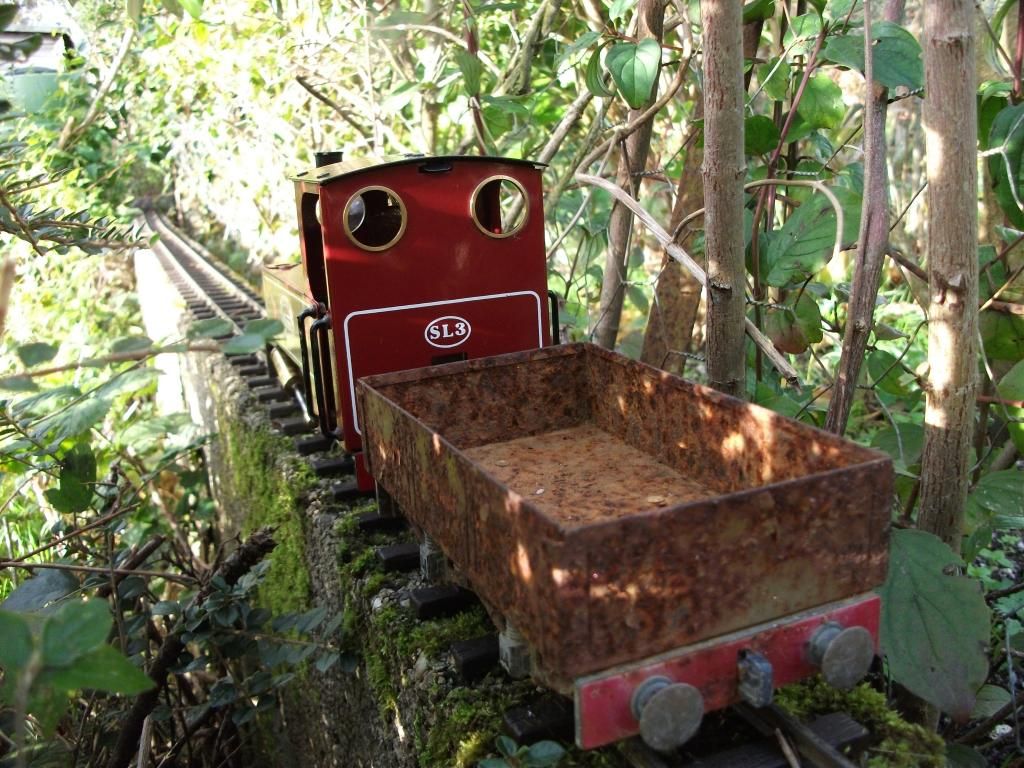
Here she is behind the newly aquired 'Northern Monkey' Mamod SL3

Image

What I would really like to know is this.

Option 1

Do I leave Rusty as is and use it amongst my other Mamod wagons and just oil the axles.

Option 2

Leave rusty as a static wreck and leave it for the elements

Option 3

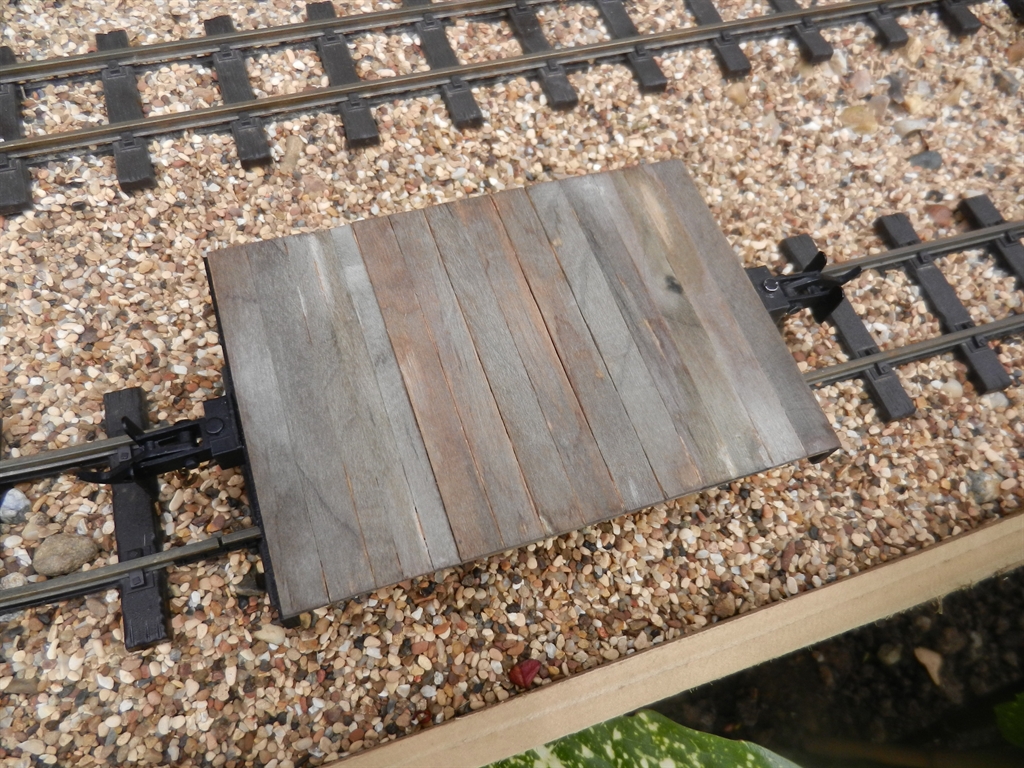
Restore Rusty to as close to new as possible. Shot blast, lead load, weld, paint and put in to full commission service with the others


I could really do with some opinions here, I like the looks but the panel beater inside me says 'RESTORE', I am a little torn with what to do..... :?

Big Al
Fireman
Fireman
Posts: 496
Joined: Wed Apr 04, 2012 3:43 pm
Location: Romford,Essex.

Post by Big Al » Sat Nov 09, 2013 9:21 pm

Restore, looks like a good project to show of your modelling skills, It's to good to leave to rust away. :lol:
Allen Hopper - early retirement can't beat it !

User avatar
MDLR
Driver
Driver
Posts: 4027
Joined: Thu Jan 15, 2009 10:38 pm
Location: Near Ripley, Derbyshire, UK
Contact:

Post by MDLR » Sat Nov 09, 2013 9:48 pm

Conserve it. Oil the axles, stop the rust getting any worse (dare I suggest storing it in the dry under cover?) and just put it into normal service. Some of the people on here take AGES to get a wagon looking like that - you've got it done, so touch it as little as possible!
Brian L Dominic
Managing Director
Flagg Fluorspar Co
www.mdlr.co.uk/ff.html

User avatar
Chris Cairns
Driver
Driver
Posts: 2366
Joined: Mon Oct 29, 2007 7:25 pm
Location: Glasgow, Scotland

Post by Chris Cairns » Sat Nov 09, 2013 10:08 pm

It is a runner and the corrosion has not gone too far yet so use it as a working wagon.

I'd be tempted to clean up the chassis and stop the rust causing any damage (the axles are steel which rusts but the wheels are turned mazak which should clean up with some fine sandpaper and lots of polishing with Brasso or Simichrome - if they've been stored close to an open box of solid fuel that has got damp in the past then the mazak castings can breakdown & crumble).

As Brian has suggested I'd stop the rust affecting the body any more - it still looks intact, and in better condition than others I've seen where the rust has eaten through the body (Mamod never used any primer).

Chris Cairns.

User avatar
Gremlin
Trainee Driver
Trainee Driver
Posts: 695
Joined: Sun Feb 08, 2009 2:46 pm
Location: Kent

Post by Gremlin » Sat Nov 09, 2013 10:57 pm

Hell just oil and use, people go to great lengths to simulate that effect and you've got the real thing. Looks brilliant as it is.

LnBmad
Trainee Driver
Trainee Driver
Posts: 884
Joined: Fri May 31, 2013 10:17 pm
Location: North Devon

Post by LnBmad » Sat Nov 09, 2013 11:16 pm

Gremlin:91546 wrote:Hell just oil and use, people go to great lengths to simulate that effect and you've got the real thing.  Looks brilliant as it is.
Gotta agree here
If it can be made full scale it can be made 16mm

My line: http://gardenrails.myfreeforum.org/about7200.html

User avatar
steamie1
Trainee Driver
Trainee Driver
Posts: 685
Joined: Tue Nov 13, 2012 11:04 pm

Post by steamie1 » Sun Nov 10, 2013 12:07 am

leave it but oil the wheels use it as intended. when it holes, then leave it for decrepitude as Tag says.

Bandit
Trainee Fireman
Trainee Fireman
Posts: 133
Joined: Tue Oct 15, 2013 10:25 am

Post by Bandit » Sun Nov 10, 2013 2:21 pm

MDLR:91539 wrote:Conserve it. Oil the axles, stop the rust getting any worse (dare I suggest storing it in the dry under cover?) and just put it into normal service. Some of the people on here take AGES to get a wagon looking like that - you've got it done, so touch it as little as possible!
Absolutely right !

User avatar
tom_tom_go
Driver
Driver
Posts: 4824
Joined: Wed Feb 23, 2011 3:08 am
Location: Kent, UK
Contact:

Post by tom_tom_go » Sun Nov 10, 2013 5:05 pm

Leave it as it is rusting away in a siding or just on ballast with no wheels.

That's the great thing about this scale. You can use real world materials and stuff rusts ;)

I would like one to rust next to my Mamod traction engine :twisted:

Bandit
Trainee Fireman
Trainee Fireman
Posts: 133
Joined: Tue Oct 15, 2013 10:25 am

Post by Bandit » Sun Nov 10, 2013 7:30 pm

Make what you really want, but please post a few photos!

User avatar
The Denying Dutchman
Cleaner
Cleaner
Posts: 85
Joined: Thu Aug 08, 2013 10:27 am
Location: Assen, the Netherlands

Post by The Denying Dutchman » Sun Nov 10, 2013 7:48 pm

Use a wire brush to get rid of the flakes and use an oily rag after that.
Paul

User avatar
ace
Fireman
Fireman
Posts: 294
Joined: Sun Jul 14, 2013 9:03 am

Post by ace » Mon Nov 11, 2013 5:36 pm

Thank you for your inputs guys. With your help I have come to a conclusion as to what I am going to do with Rusty.

I have had a good look around the wagon to asses its overall condition and strength and despite its looks, Rusty is in good structural order.

I have found that there is a small hole in the floor pan. I believe this to may have possibly been put there on purpose as it is almost perfectly round and the metal does not appear to be thinner in this area. A sure sign of rusting through. The floor does bear witness to some impact at one point or another because it is hallowed or dented and as a result is a little twisted. I will have a go at straightening the floor without any disassembly and twisting the chassis to make Rusty level again.

I will for now oil the axles and run up and down the line to check for any other problems.

I will then hand Rusty over to the Ridgemont Hills Light Railway maintenance team for them to use for carrying tools and themselves around in. I have already had word that they would like to fit a wooden floor and possibly a small seating area. There was talk of making a roof. We shall see what happens.

I will update the progress when I get home and indeed attach some photos.

I have thought about this quite a bit. Given some of your comments I feel that if I leave Rusty as is for now I have something unique. The idea is that if I decide to repair and fix him up then I can do that at any time. And yes he will be preserved in this current state and looked after like any other piece of rolling stock, e.g. brought inside and maintained.

I must say, Rusty makes Chevalier look quite immaculate. I always considered Chevalier to be the scrappiest looking thing on my line!

The hole...

Image

User avatar
Chris Cairns
Driver
Driver
Posts: 2366
Joined: Mon Oct 29, 2007 7:25 pm
Location: Glasgow, Scotland

Post by Chris Cairns » Mon Nov 11, 2013 10:45 pm

Glad we helped you with your decision Ace.

The latest Mamod open wagon went for £42 on eBay this evening, in good condition but no box & missing one coupling ring (Seller listed these as only coming from the railway sets which according to the "Bible" is not correct - they were sold separately as well).

Chris Cairns.

User avatar
ace
Fireman
Fireman
Posts: 294
Joined: Sun Jul 14, 2013 9:03 am

Post by ace » Mon Nov 11, 2013 11:55 pm

Ok as promised I have the photos uploaded.

First of all I decided to run the axles dry for a while to break up any corrosion and create a smooth running surface. I then oiled and ran some more, feeling smooth now and not quite so noisy.

I expect this oil is the first this wagon has seen in many years.

A little light machine oil.

Image

Image

When I went to the NRM, it goes without saying that Dad and I stopped at a few service stations on the way to replenish our thirst and hunger requirements. Conveniently there was a starbucks at almost every stop. We both decided to grab a small handful at every stop to generate some 'free' building materials.

Image

Also Dad potted the possibility of using the cardboard cup sleeves for a corrugated sheet effect. Maybe used on this project. It goes without saying that the card will need protecting from water by means of paint or similar, so we grabbed a few.

Image

By means of requirement, it was decided to reinforce the floor of the wagon with a false wooden one. Here we are with the first slats going in.

Image

Because I am lazy and hate cutting wood, I decided to improvise and cut many pieces at once. A little tape and pop it through the band saw.

Image

Image

This show assembly in progress, laying the slats onto the longitudinal members with a dob of wood glue.

Image

All done

Image

Image

I will build a bench and tool store area for the guys to work with and weather the whole lot so it doesn't stick out like a sore dick. :)

User avatar
Chris Cairns
Driver
Driver
Posts: 2366
Joined: Mon Oct 29, 2007 7:25 pm
Location: Glasgow, Scotland

Post by Chris Cairns » Tue Nov 12, 2013 12:13 am

Brilliant, and I'm impressed with your gusto to all these projects.

I don't drink coffee so my stirrers come from a raid or two on McD's. I also kept a couple of those corrugated microwave wrappers so look forward to seeing the results with painting yours.

Chris Cairns.

User avatar
tom_tom_go
Driver
Driver
Posts: 4824
Joined: Wed Feb 23, 2011 3:08 am
Location: Kent, UK
Contact:

Post by tom_tom_go » Tue Nov 12, 2013 12:28 pm

The wood will look great if you weather it with a solution of white vingear and wire wool (leave it overnight to go brown).

Here was my first go at using the above solution:

Image

User avatar
MDLR
Driver
Driver
Posts: 4027
Joined: Thu Jan 15, 2009 10:38 pm
Location: Near Ripley, Derbyshire, UK
Contact:

Post by MDLR » Tue Nov 12, 2013 3:40 pm

I actually cheated with the coffee stirrers, and bought a HUGE bag for about 3 squid on Ebay...............
Brian L Dominic
Managing Director
Flagg Fluorspar Co
www.mdlr.co.uk/ff.html

User avatar
ace
Fireman
Fireman
Posts: 294
Joined: Sun Jul 14, 2013 9:03 am

Post by ace » Tue Nov 12, 2013 3:51 pm

Thanks for the tip tom_tom_go, I will be sure to apply it. So I leave a piece of wire wool to go brown, then dab on the wood?
MDLR:91677 wrote:I actually cheated with the coffee stirrers, and bought a HUGE bag for about 3 squid on Ebay...............
Haha, it makes it all the better when the materials are free. :D

Half the fun was walking out with handfuls of them without getting caught. :)

User avatar
Dannypenguin
Trainee Driver
Trainee Driver
Posts: 632
Joined: Tue Feb 26, 2013 9:57 am
Location: Forest of Dean, UK
Contact:

Post by Dannypenguin » Tue Nov 12, 2013 4:05 pm

Off topic but the coffee people at the NEC must hate the railway show (which incidentally is coming up). They must always replenshing the coffee stirrers pot! Whilst we were there (filling our bags ;)) two other guys were filling theirs too. :lol:
Dan

Visit the PFLR website - http://poultonfarmlightrailway.webs.com/
Dean Forest Railway Society website - http://dfrsociety.org/

User avatar
Keith S
Driver
Driver
Posts: 1628
Joined: Thu Feb 24, 2011 11:44 pm
Location: Canada

Post by Keith S » Tue Nov 12, 2013 8:42 pm

Ace, I saw a method once to make wood look very scale-looking and aged. A fellow took some pieces of wood like that, and took a wire brush, like the kind you would clean car battery terminals with, and used it to score the wood with the grain. It had the effect of making the grain look a bit coarser. Then he did the old soak in vinegar with steel wool, and finally when the wood was dry from that, lightly coated it with a very thin wash, I believe of alcohol with a drop of india ink. It turned the wood a very satisfying dirty grey colour. If you did that, the wood floor would look just as weather-beaten as the rest of the wagon. It would look very realistic.

The wood floor is a great idea BTW. it doubles the appeal of that wagon.

Post Reply

Who is online

Users browsing this forum: No registered users and 0 guests