Due to the unavailability of outdoor lineside buildings here in Denmark, i have decided to build my own out of cement.
Has anyone attempted this before, any tips will be appreciated.
Lineside buildings in cement
-
MDLR

- Driver

- Posts: 4027
- Joined: Thu Jan 15, 2009 10:38 pm
- Location: Near Ripley, Derbyshire, UK
- Contact:
You might like to consider Jigstones.
See http://www.jigstones.info/ for your local (German) distributor and http://www.trainweb.org/girr/tips/tips6 ... _tips.html for more information.
Making the blocks can be time consuming (unless you do casting runs whilst you're doing something else in the workshop) and you have to take care not to over fill the moulds, else the sections won't fit together well. You cast doors and windows out of car filler.
-
St.Michael

- Fireman

- Posts: 343
- Joined: Tue May 08, 2012 9:13 pm
- Location: Norway
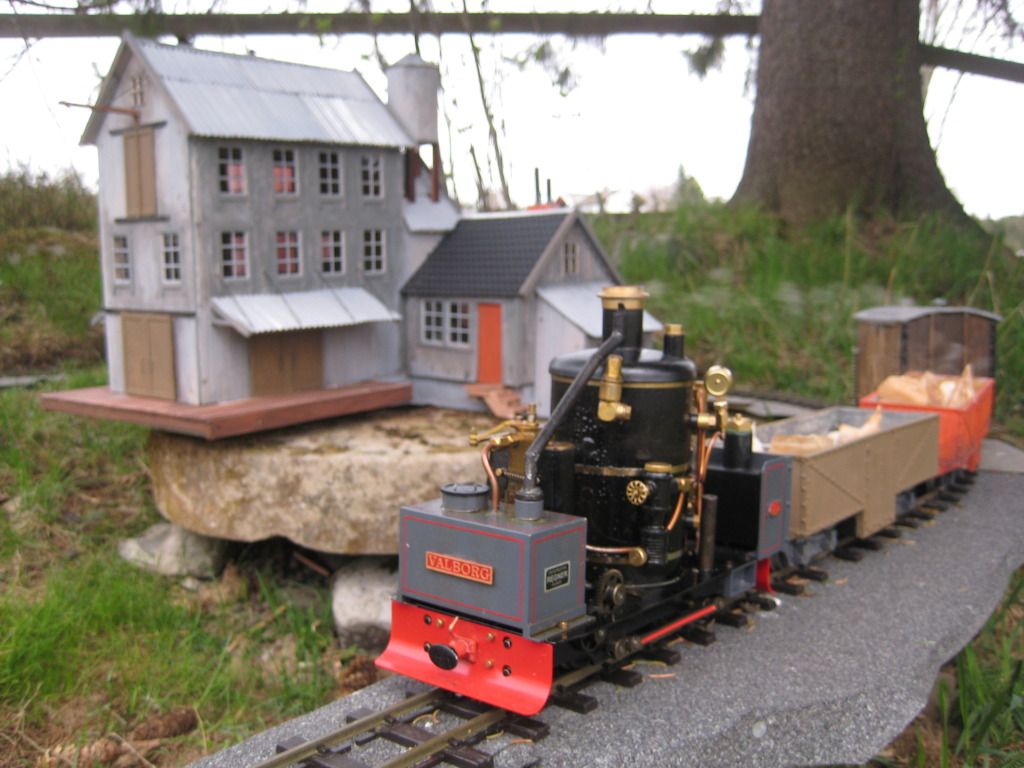
Very interesting! There is no more in Norway, so it constantly occupies my thinking, and planning about what to do next, and HOW!!
 π
π
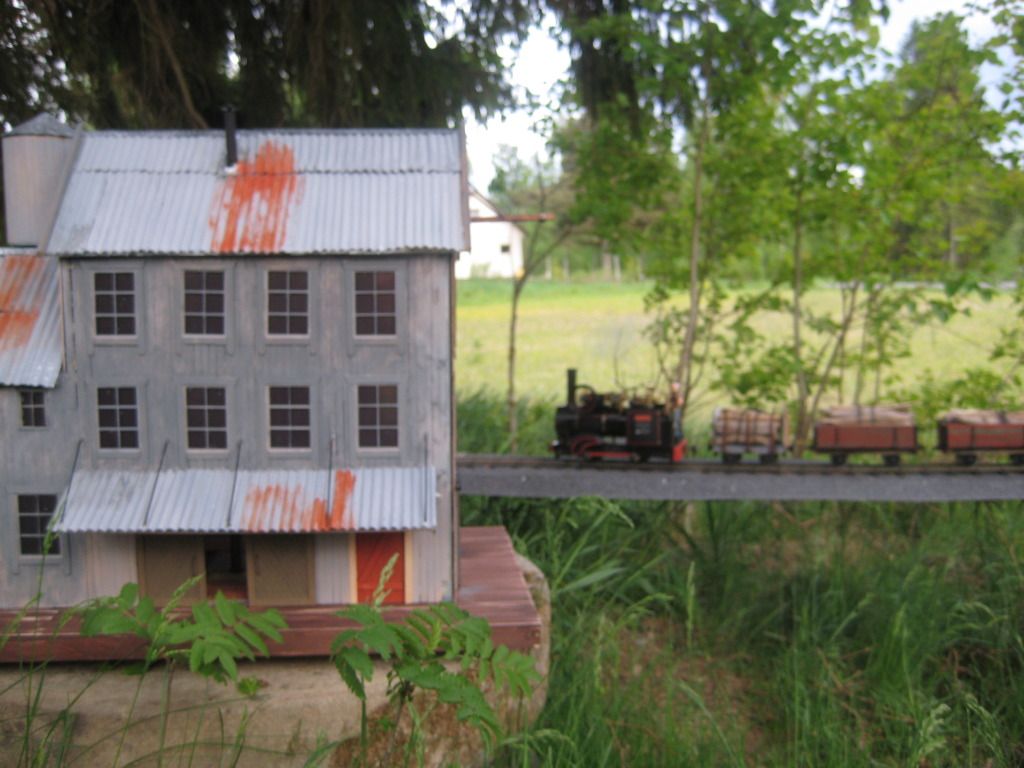
These are houses made in wood (coffestirrers on plexi) from american drawings, bought on ebay.
 π
π
 π
π
And the last one is a "real" norvegian station. Wich now can be found on the Norvegian railway museum in Hamar
 π
π
 π
π
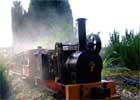
I do think of trying concrete, Jigstones or some kind of styrofoam..It seems like there always is a train passing when I´m taking pictures Michael
πThese are houses made in wood (coffestirrers on plexi) from american drawings, bought on ebay.
ππAnd the last one is a "real" norvegian station. Wich now can be found on the Norvegian railway museum in Hamar
ππI do think of trying concrete, Jigstones or some kind of styrofoam..It seems like there always is a train passing when I´m taking pictures

-
Mrs F Controller
- Fireman
- Posts: 433
- Joined: Sat Mar 05, 2011 11:19 pm
- Location: Essex, England
- Contact:
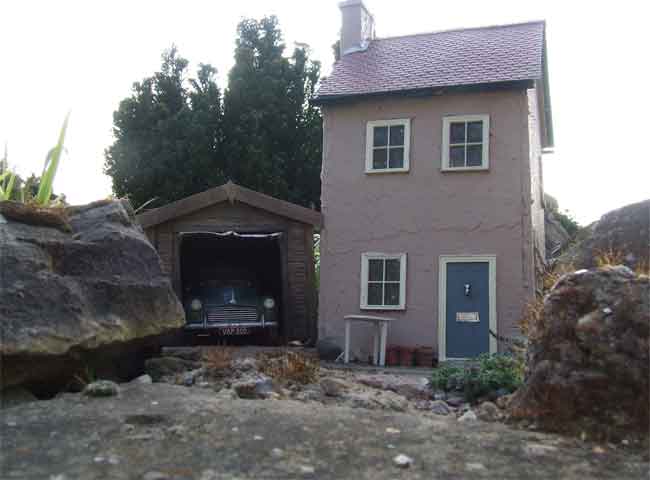
I don't know about jigstones or anything sounds a bit fiddly to me but we made our very first station building in wood then 'rendered' it with PVA and cement dust! It so far has lasted for 7 years outside all the time. We made the cottage the same way about 3 years ago and just used window frames and doors from a dolls house parts supplier. I then really slapped on the 'render' thick and heavy and gave it 2 coats of exterior masonry paint!
I like the coffee stirrer 'weather boarding'.
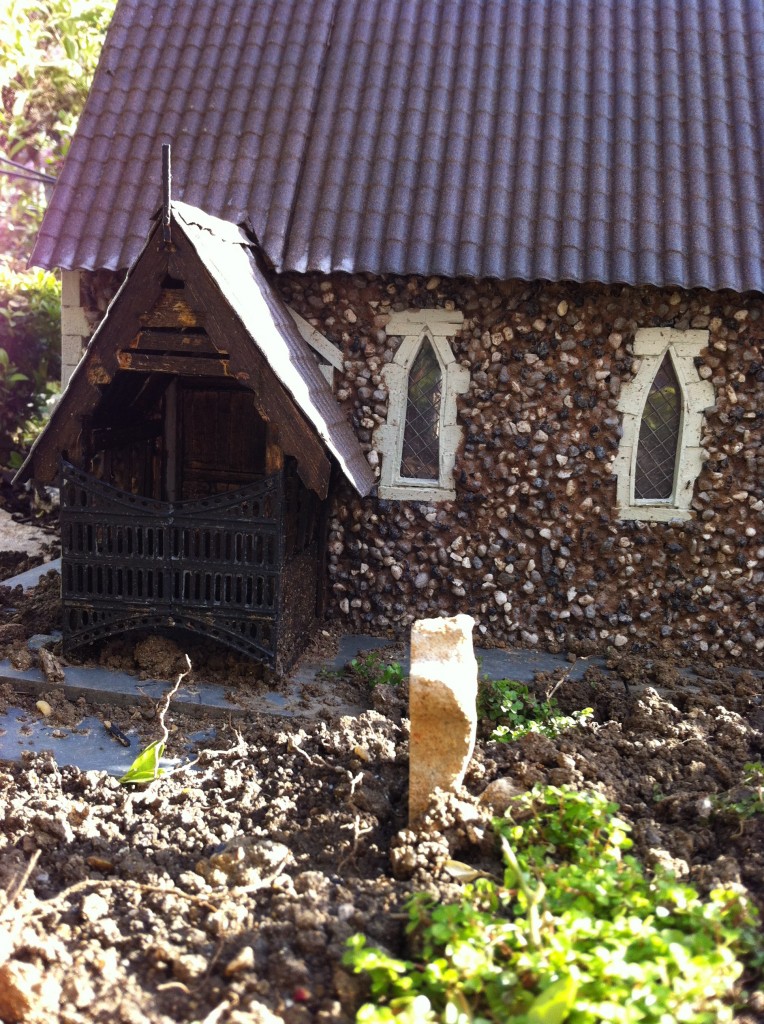
We also recently tried another method we think is really going to work well and we are very enthused about it. We've just made a little stone chapel which has been made by the same wood structure (thin marine ply) and then we applied a thick layer of PVA and pressed in aquarium gravel ( to get the right size and colour). When that was dry we made up a runny mixture of PVA water and cement dust and daubed that over the stones wiping off the excess as we went.
I am going to be putting this in the 'How we did it' section of the MPLR website soon!
I like the coffee stirrer 'weather boarding'.
We also recently tried another method we think is really going to work well and we are very enthused about it. We've just made a little stone chapel which has been made by the same wood structure (thin marine ply) and then we applied a thick layer of PVA and pressed in aquarium gravel ( to get the right size and colour). When that was dry we made up a runny mixture of PVA water and cement dust and daubed that over the stones wiping off the excess as we went.
I am going to be putting this in the 'How we did it' section of the MPLR website soon!
Hi,benchmark:71979 wrote:Thanks for the link to the Jigstone website Brian, is it the same material used to make this stone wall in Husra's picture below?
'fraid not - the components for this wall were bought ready-made from Cain Howley Structures, all I've had to do was mortar it in place (with a paving slab behind for good luck).
Richard Huss
in sunny Solihull
in sunny Solihull
-
DaveWatkins

- Cleaner

- Posts: 86
- Joined: Wed Nov 10, 2010 1:06 am
- Location: UK Midlands
- Contact:
The bridge in the picture below was cast in a mould made from plywood for the sides and metal from an old vacuum cleaner for the arch. Mortar courses on the mould were made with a hot melt glue gun. The result looks reasonably like a stone bridge to me.
I have also used the same technique for buildings, casting each wall seperately then glueing the building together with PVA. With care the mould can be reused after repairing any of the glue mortar courses that have pulled off when the casting is removed.
 [/img]
I have also used the same technique for buildings, casting each wall seperately then glueing the building together with PVA. With care the mould can be reused after repairing any of the glue mortar courses that have pulled off when the casting is removed.
[/img]Dave
-
Narrow Minded
- Driver
- Posts: 4650
- Joined: Wed Dec 30, 2009 2:27 pm
- Location: Forgotten Realms
- Contact:

-
DaveWatkins
- Cleaner
- Posts: 86
- Joined: Wed Nov 10, 2010 1:06 am
- Location: UK Midlands
- Contact:


-
Narrow Minded
- Driver
- Posts: 4650
- Joined: Wed Dec 30, 2009 2:27 pm
- Location: Forgotten Realms
- Contact:
-
DaveWatkins
- Cleaner
- Posts: 86
- Joined: Wed Nov 10, 2010 1:06 am
- Location: UK Midlands
- Contact:
For the side of a building the mould takes the form of a shallow tray. The base of the mould, in this case was a piece of melamine faced chipboard left over from installing shelves in the house. It could be plywood or hardboard or whatever else you have to hand.
The sides of the mould were lengths of timber 19mm thick. I had some 38 x19 timber, again left over from a job around the house. The sides were screwed to the chipboard to make rectangular tray. Blocks of wood 19mm thick were screwed on to fill the places where I wanted window and door openings.
Then I used a glue gun to sqeeze beads of hot melt glue along the lines where I wanted mortar courses, including up the sides of the mould where these would be visibe ends to the wall section.
I used a mixture of sharp sand (concreting sand) and cement at around a 4:1 ratio. To get the right quantity I filled the mould with sand then tipped this out to mix with the cement. I added water to make a thickish mix and pressed this into the mould. The top of the mix was smoothed off. It is best left for 24 hours to set, longer if you are not in a hurry.
The last step was to undo the screws,release the mould sides and the window and door blocks, then turn the casting and mould over onto a flat surface. Finally the base of the mould was lifted off the cast wall.
Most of the hot melt glue stayed stuck to the chipboard so with a bit more ttention with the glue gun the mould can be used again.
Dave
Dave
-
St.Michael
- Fireman
- Posts: 343
- Joined: Tue May 08, 2012 9:13 pm
- Location: Norway
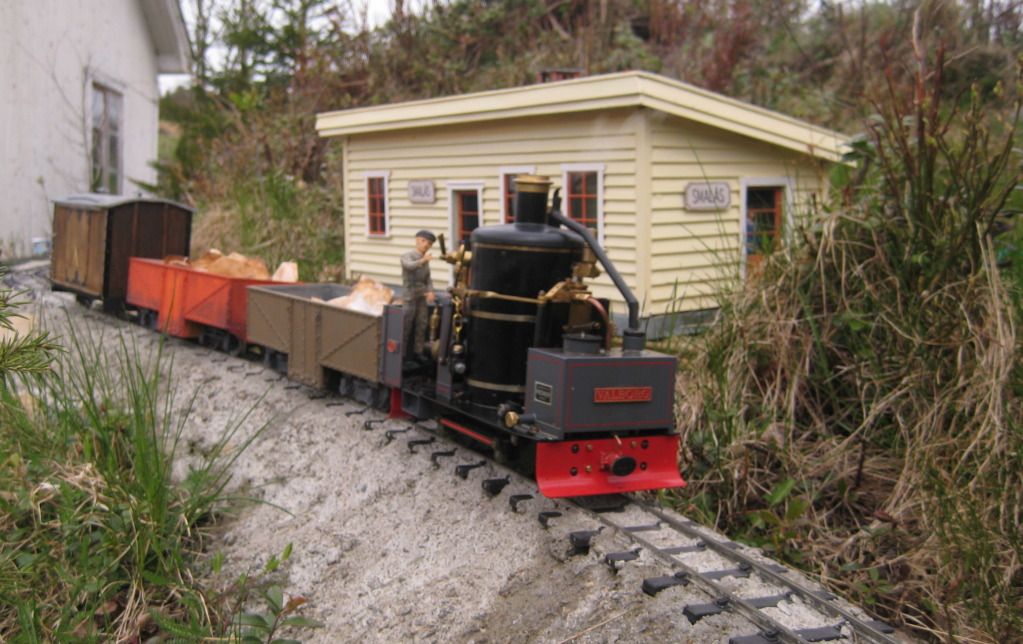
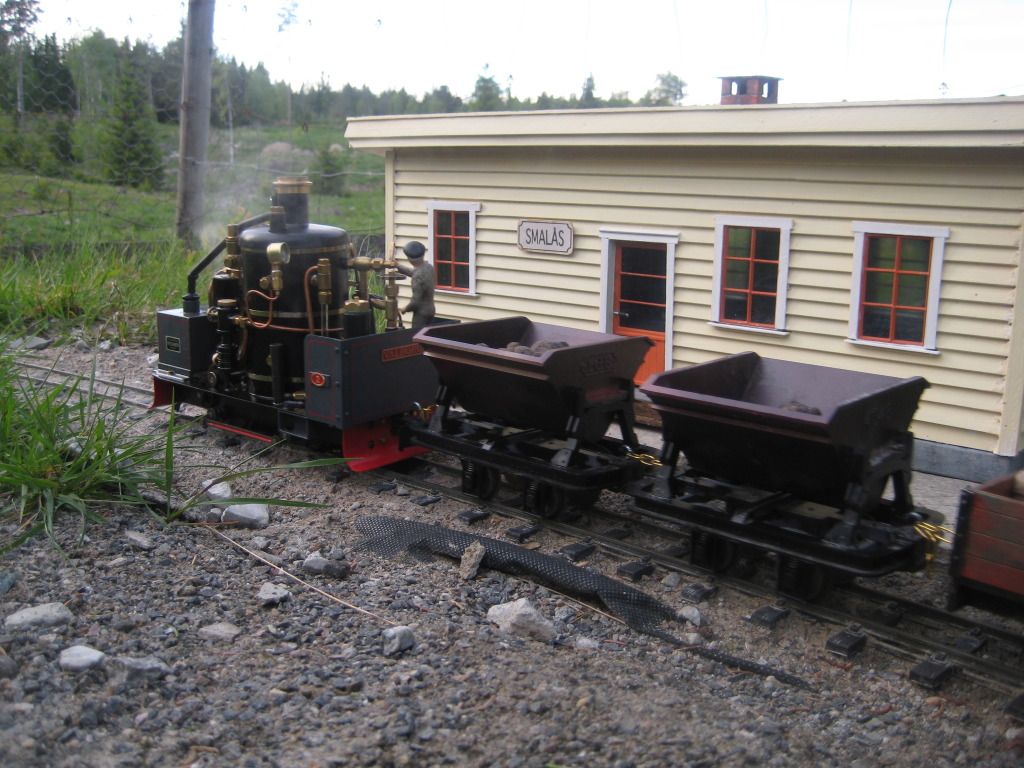
Hi. It´s been some time since this thread started, but I´m still in the same thinking, and prodction modus.. I´have built theese during the last weeks:
 π
π
When finished it shall be a rake of three buildings, You can see the last unfinished building in the rear of the photo. Theese houses are not ment to stay out for the whole year, but I´ll shall try them during my running season (that´s until the winter stops me)
Another thing about the buildings, and the beginning of this thread: This is in no way nordic arcitecture, the model is actually a photo from a for me, unknown contry in South America.
Regards, Michael
πWhen finished it shall be a rake of three buildings, You can see the last unfinished building in the rear of the photo. Theese houses are not ment to stay out for the whole year, but I´ll shall try them during my running season (that´s until the winter stops me)
Another thing about the buildings, and the beginning of this thread: This is in no way nordic arcitecture, the model is actually a photo from a for me, unknown contry in South America.
Regards, Michael
-
andymctractor
- Trainee Driver

- Posts: 705
- Joined: Fri Feb 01, 2013 12:03 am
- Location: Suffolk, UK
- Contact:
Re: Lineside buildings in cement
Hi, I have a photo of my part built jigstones cottages but i don't know how to display photos in this forum.benchmark:71950 wrote:Due to the unavailability of outdoor lineside buildings here in Denmark, i have decided to build my own out of cement.
Has anyone attempted this before, any tips will be appreciated.
Could someone let me know?
Regards
Andrew McMahon
Crowfoot Light Railway
Regards
Andy McMahon
If it moves, salute it. If it doesn't move, paint it. (RN sailors basic skills course 1968)
Andy McMahon
If it moves, salute it. If it doesn't move, paint it. (RN sailors basic skills course 1968)
-
MDLR
- Driver
- Posts: 4027
- Joined: Thu Jan 15, 2009 10:38 pm
- Location: Near Ripley, Derbyshire, UK
- Contact:
OK - if you click on "reply", when you get the box where you type the text in (like I'm doing now) there's some tiny writing underneath that says "Attach File". Click on this and you'll open up a dialogue box where you can select a file from your computer to upload. You can do this more than once if you need to..............
-
Chris Cairns
- Driver
- Posts: 2366
- Joined: Mon Oct 29, 2007 7:25 pm
- Location: Glasgow, Scotland
See this Topic for various ways to post photos in your Topic/Reply - http://gardenrails.myfreeforum.org/about5505.htmlandymctractor wrote:but i don't know how to display photos in this forum.
Could someone let me know?
Chris Cairns.
-
andymctractor
- Trainee Driver
- Posts: 705
- Joined: Fri Feb 01, 2013 12:03 am
- Location: Suffolk, UK
- Contact:
I'm building a terrace of cottages using Jigstones. This photo shows how the castings make up a building.
Since this photo I have grouted the joints, scratchbuilt windows and doors and am working on the roof which will be fibreglass tile sheets.
Thanks Brian (MDLR) re how to attach photos.
PS My photo is being checked by the moderator so I don't know if it will appear here.
Try again

Since this photo I have grouted the joints, scratchbuilt windows and doors and am working on the roof which will be fibreglass tile sheets.
Thanks Brian (MDLR) re how to attach photos.
PS My photo is being checked by the moderator so I don't know if it will appear here.
Try again
Regards
Andy McMahon
If it moves, salute it. If it doesn't move, paint it. (RN sailors basic skills course 1968)
Andy McMahon
If it moves, salute it. If it doesn't move, paint it. (RN sailors basic skills course 1968)
-
andymctractor
- Trainee Driver
- Posts: 705
- Joined: Fri Feb 01, 2013 12:03 am
- Location: Suffolk, UK
- Contact:
Lineside buildings in cement
Hi,
my attempts at getting a photo on here of my jigstones cottages have not been very successful. I have managed to get a photo into the gallery but the message that went with it has vanished into the ether.
Regards
Andrew McMahon
my attempts at getting a photo on here of my jigstones cottages have not been very successful. I have managed to get a photo into the gallery but the message that went with it has vanished into the ether.
Regards
Andrew McMahon
Regards
Andy McMahon
If it moves, salute it. If it doesn't move, paint it. (RN sailors basic skills course 1968)
Andy McMahon
If it moves, salute it. If it doesn't move, paint it. (RN sailors basic skills course 1968)
-
Chris Cairns
- Driver
- Posts: 2366
- Joined: Mon Oct 29, 2007 7:25 pm
- Location: Glasgow, Scotland

-
St.Michael
- Fireman
- Posts: 343
- Joined: Tue May 08, 2012 9:13 pm
- Location: Norway
Who is online
Users browsing this forum: No registered users and 0 guests