Page 23 of 46
Re: Llewellyn Loco Works #1
Posted: Sun Sep 22, 2019 10:51 pm
by Hydrostatic Dazza
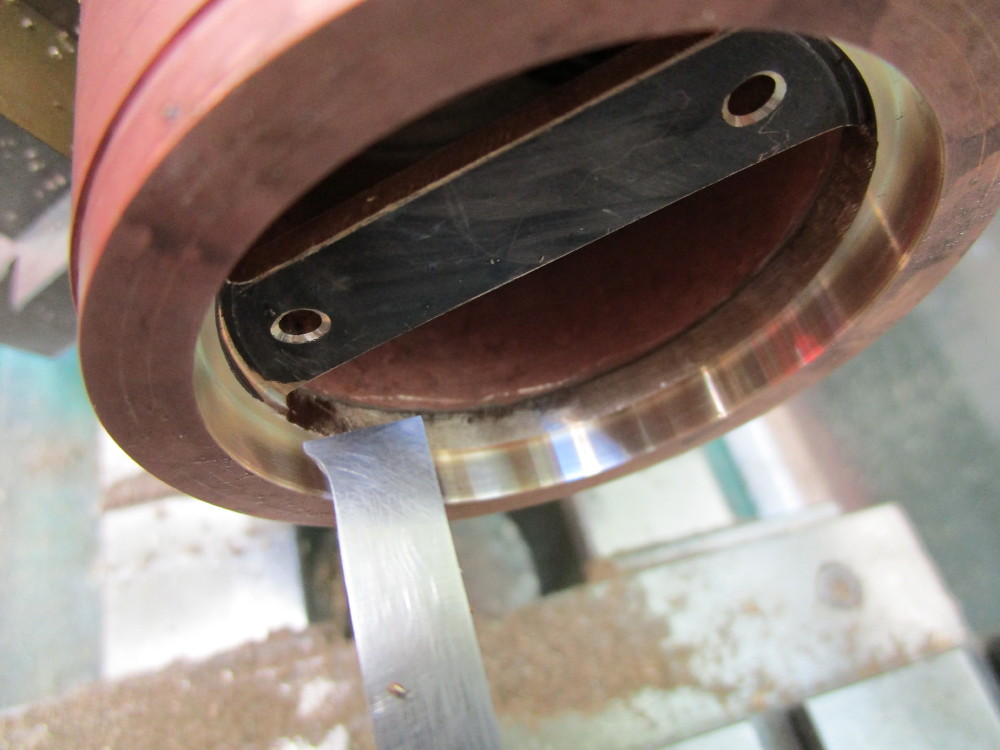
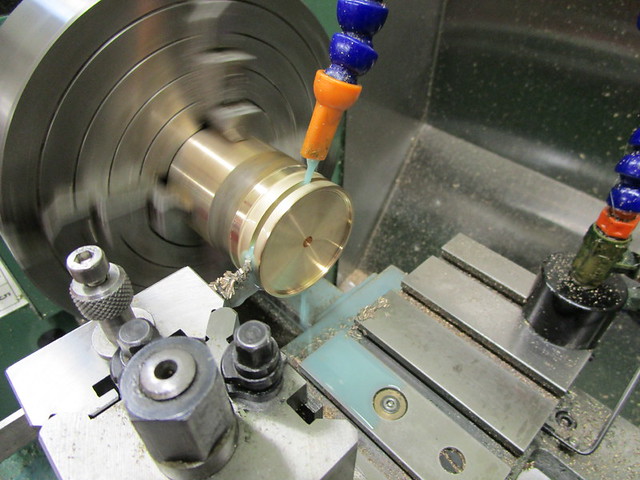
Chain drill the cab foot plate via DRO
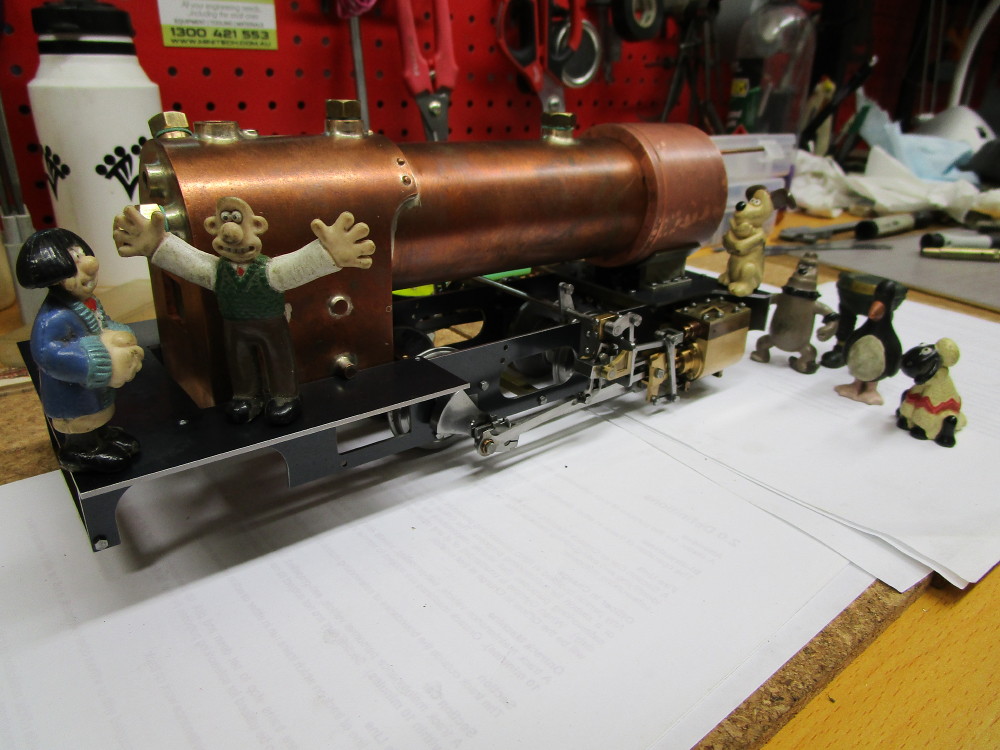
 The loco crew called into the erection shop and had a look over the loco and made some comments about how some of servos will get under foot when they are fitted.

Re: Llewellyn Loco Works #1
Posted: Mon Sep 23, 2019 8:04 am
by DonW
And finding somewhere to place the Gas tank as well as the servos.
Lovely work. I assume you find chain drilling a better option than milling a slot.
Don
Re: Llewellyn Loco Works #1
Posted: Mon Sep 23, 2019 11:21 am
by tom_tom_go
This little dragon will be coal fired Don.
Re: Llewellyn Loco Works #1
Posted: Mon Sep 23, 2019 9:58 pm
by Hydrostatic Dazza
DonW wrote: ↑Mon Sep 23, 2019 8:04 am
And finding somewhere to place the Gas tank as well as the servos.
Lovely work. I assume you find chain drilling a better option than milling a slot.
Don
This fella will be coal fired for the full experience and atmosphere. 
I have a servo under the front foot plate for the cylinder drains. The reverser one will be in the half length R/H tank. The throttle one will have to be on the foot plate. I am also contemplating a servo to flip the fire door, to have better control of firing, cool the fire when standing or shunting. (in the cab) Not sure if it will be of any use but heaps of fun. Also one servo for the whistle which I hope to mount under the right side of the cab and the whistle is a pretend WHB air reservoir under the running board and tank.
I could mill, but the corners will still need a file unless you use a very small diameter cutter. I drilled and then filed it with the largest Mill files I had and checked it for dimensions and got all to 0.10mm . Filing is my daily work. It did not take long.
Re: Llewellyn Loco Works #1
Posted: Mon Sep 23, 2019 10:14 pm
by Hydrostatic Dazza
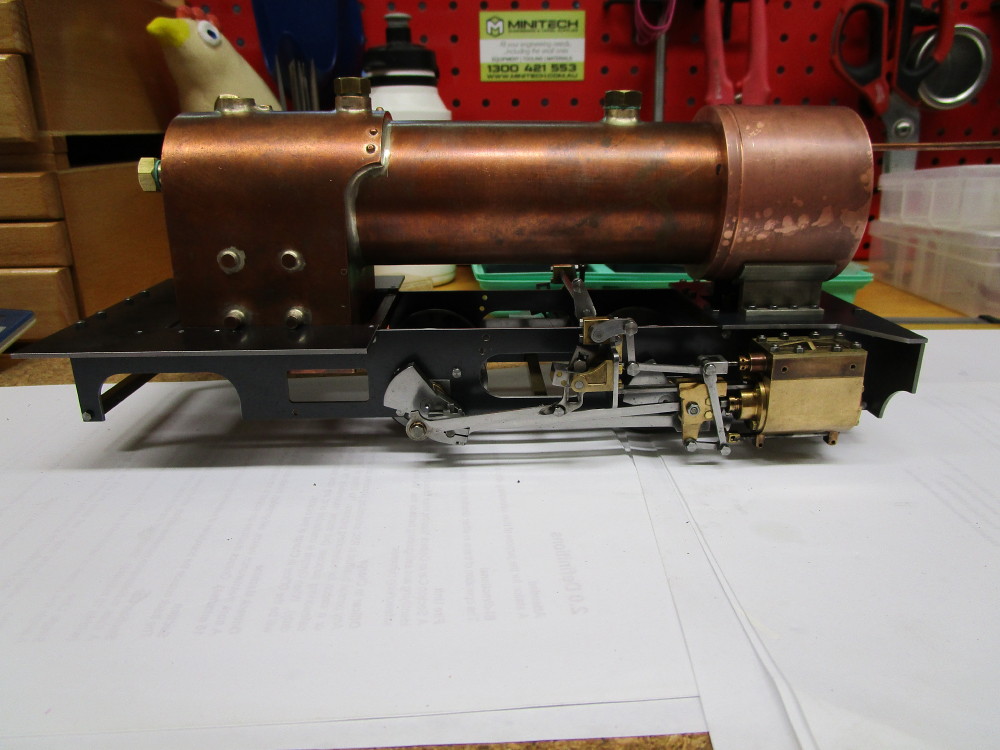
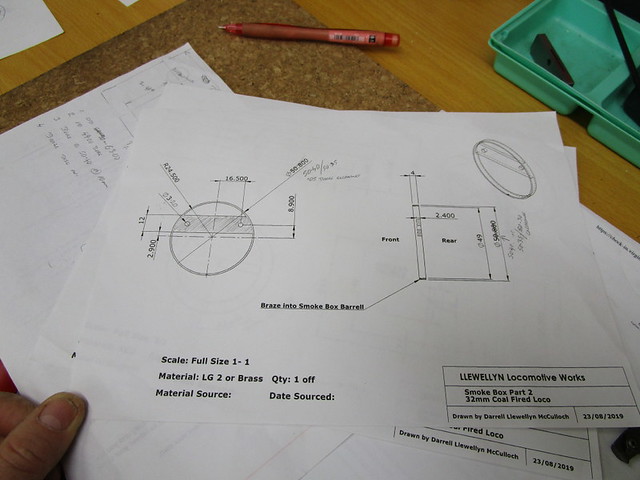
In hindsight I would have recessed the front tube plate deeper into the boiler barrel so the smoke box could be attached in a more traditional method, of rivets, screws etc but ................... So I have have hatched a plan to use the super heater attachments to pull and secure the smoke box to the barrel. Unlike the original (vague) drawings I am going for a fixed smoke box/boiler to the saddle and allow the expansion back wards in the frames, as like full size locos. Fixed at the rear and expansion movement forwards into the fixed smoke box/saddle seems a strange way to do it ? ! Considering that joint will foul up, even seize with the muck in the box and or keeping the joint air tight for good steaming, it just did not make sense. A reminder it is all a design and metal working exercise for the locos to come. The material is LG2 bronze a friend had left over, in payment for this material I brazed up some more full size loco motion oil pots that were needed as spares for the Rattler's 974 and 967.

Re: Llewellyn Loco Works #1
Posted: Thu Sep 26, 2019 3:15 pm
by bambuko
I wish there was
"like" button on this forum, to show appreciation for your posts

...
so here it is instead:

Re: Llewellyn Loco Works #1
Posted: Thu Sep 26, 2019 10:09 pm
by Hydrostatic Dazza
bambuko wrote: ↑Thu Sep 26, 2019 3:15 pm
I wish there was
"like" button on this forum, to show appreciation for your posts
...
so here it is instead:

Re: Llewellyn Loco Works #1
Posted: Fri Sep 27, 2019 8:25 pm
by tom_tom_go
Beautiful soldering!
Re: Llewellyn Loco Works #1
Posted: Sat Sep 28, 2019 9:00 am
by Hydrostatic Dazza
tom_tom_go wrote: ↑Fri Sep 27, 2019 8:25 pm
Beautiful soldering!
Thanks, it is what I do every week while making Llewellyn frames.
If the fit is good, all is clean, bring up the temperature slowly and all is evenly cooked , bingo
Re: Llewellyn Loco Works #1
Posted: Sat Sep 28, 2019 9:07 am
by Hydrostatic Dazza
Re: Llewellyn Loco Works #1
Posted: Sat Sep 28, 2019 9:10 am
by Hydrostatic Dazza
Re: Llewellyn Loco Works #1
Posted: Sat Sep 28, 2019 10:09 am
by tom_tom_go
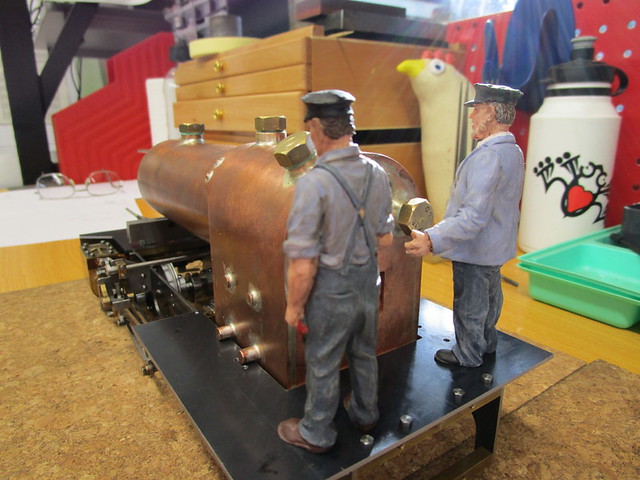
Love the colouring of the copper, seems a shame to paint it.
Re: Llewellyn Loco Works #1
Posted: Sat Sep 28, 2019 10:09 pm
by Hydrostatic Dazza
tom_tom_go wrote: ↑Sat Sep 28, 2019 10:09 am
Love the colouring of the copper, seems a shame to paint it.
Yes, it has a nice aesthetic, steam punkish comes to mind, which I don't mind.
The stage I fear most is "Painting" I detest painting.
Re: Llewellyn Loco Works #1
Posted: Sat Sep 28, 2019 10:36 pm
by tom_tom_go
Have you considered chemical blackening?
Re: Llewellyn Loco Works #1
Posted: Sat Sep 28, 2019 11:02 pm
by DonW
I am rather in Awe or your machine work, you seem to be able to just set it up and go.
Don
Re: Llewellyn Loco Works #1
Posted: Sun Sep 29, 2019 5:38 am
by Hydrostatic Dazza
tom_tom_go wrote: ↑Sat Sep 28, 2019 10:36 pm
Have you considered chemical blackening?
All things will be considered, yes, for blackening for some parts. No idea of what colour this loco will be. I want to paint it myself and do some lining. I have few books on the subject, however at my current rate of progress is will be a few years till I get there.
Re: Llewellyn Loco Works #1
Posted: Sun Sep 29, 2019 5:47 am
by Hydrostatic Dazza
DonW wrote: ↑Sat Sep 28, 2019 11:02 pm
I am rather in Awe or your machine work, you seem to be able to just set it up and go.
Don
Yeah, it is nice to have the materials in stock and when I don't I order other sizes with what I need. I set up the tools for tomorrow in mind and so they are on hand. I sort of went to Town a few years ago when I finally set up the Red Room. It had to be a separate room from the bike workshop and more airy and natural light. After 35 years of ready ME magazines I was read to spend $20 K aud on the tools etc. I rather buy a second hand car and have a nice workshop rather than the other way.
I work to live.
To reiterate, I am using the garden railway and this loco build to learn and aquire skills, tools and materials for the magnum opus build. QR C17 class #253 as it was delivered in 1921 and in 5" gauge.
If I live long enough I would like to build a Foden Steam Lorry in 4" scale and then a 5" QR Beyer Garratt. One has to dream.


 \
\