Page 1 of 2
Ragleth; adding radio control
Posted: Thu Mar 09, 2017 8:16 am
by Boustrophedon
Having successfully converted the RC on my Samson to Deltang based RC, which results in a much neater and more hidden installation, I am now looking to add similar RC to my Ragleth.
Forward and reverse is catered for in the design, it is obvious where the servo goes, no problem.
But the regulator? I am keen not to have a servo in the cab, I hate that, but where else to put it and how to connect it to the throttle?
How have other people done it?
Posted: Thu Mar 09, 2017 9:27 am
by tom_tom_go
When I did a RC conversion on a Ragleth I got the battery, Rx, on/off switch and regulator servo all in the compartment under the cab floor. As you are using Deltang this will be easier as I used a Ripmax Saturn Rx which is huge compared to the Deltang Rx102.
You will need to drill the cab floor though for the servo linkage to the regulator.
Re: Ragleth; adding radio control.
Posted: Thu Mar 09, 2017 11:27 am
by Superbiker_uk
Boustrophedon:123345 wrote:
How have other people done it?
This page by Chris Bird is very interesting and could be useful for you to have a look at
http://www.gardenrailwayclub.com/locos/ ... ft-ragleth
Posted: Thu Mar 09, 2017 4:58 pm
by Boustrophedon
tom_tom_go:123347 wrote:When I did a RC conversion on a Ragleth I got the battery, Rx, on/off switch and regulator servo all in the compartment under the cab floor. As you are using Deltang this will be easier as I used a Ripmax Saturn Rx which is huge compared to the Deltang Rx102.
You will need to drill the cab floor though for the servo linkage to the regulator.
Any chance of a picture of that?
Posted: Thu Mar 09, 2017 6:58 pm
by -steves-
If you dont get any photo's drop me a PM and I will take some of my install, the hardest thing is getting the hole through the cab floor, I did mine with a Dremel and it makes a very neat job, but means a strip down of loads of bits to get it it.
Posted: Thu Mar 09, 2017 7:06 pm
by Snailrail
When I did my L & B style Ragleth I put the servo and battery under the floor. RX, reverse servo in the side tank and the switch just inside the cab window. Pictures here : -
http://gardenrails.myfreeforum.org/abou ... h&start=15
Posted: Thu Mar 09, 2017 7:30 pm
by Boustrophedon
Thank you.
You confirm my sneaking suspicion that fitting the on/off switch in the designed place will get in the way of things in the under cab box.
Posted: Thu Mar 09, 2017 9:00 pm
by tom_tom_go
Posted: Fri Mar 10, 2017 8:12 am
by Boustrophedon
Thanks.
Posted: Fri Mar 10, 2017 11:28 am
by MikeD
This is my Ragleth that was bought with R/C fitted, when I had the cab off to replace the burner:
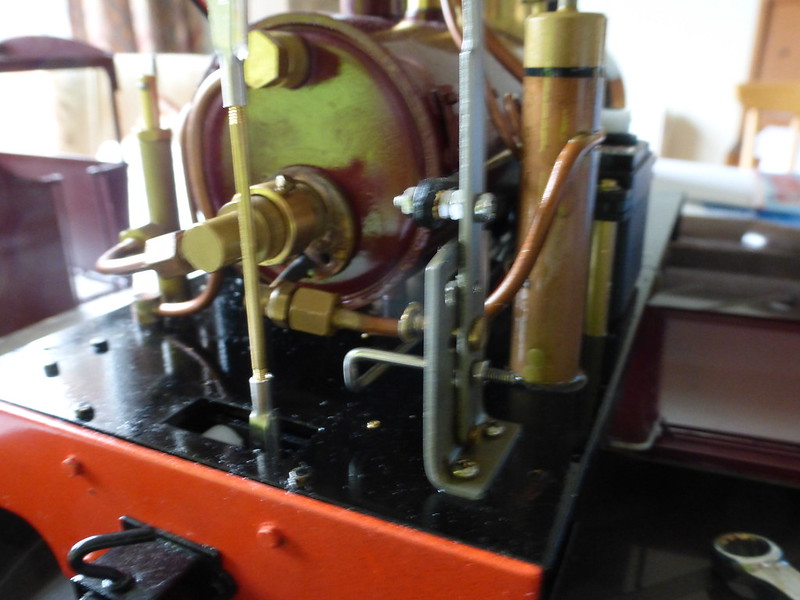
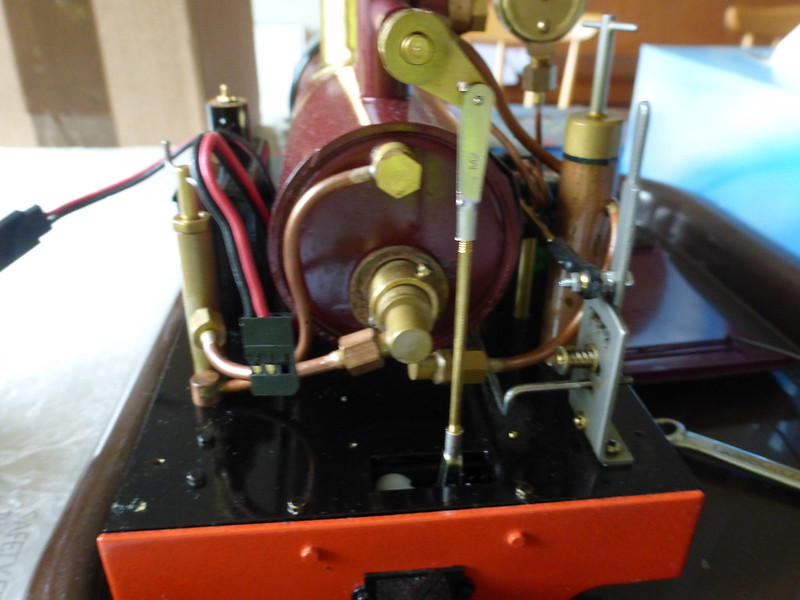
The battery pack is attached inside the side tank (and unplugged when the bodywork is removed), the reversing servo in the side tank, and the regulator servo under the cab floor.
Mike D
Posted: Sat Mar 11, 2017 11:14 am
by Chris Cairns
Just to make things clearer, Don (
Boustrophedon) is talking about a 2015 style Ragleth (
Mark II), which is fitted with revised side tanks to allow more room for fitting Radio Control (not looked over one that closely, but presumably there is something R/C in the left side tank?), and has a vertical gas tank in the cab.
My 2013 Ragleth Mark I has the same rectangular cutout in the cab floor as
MikeD's, although I just run mine single channel on the reverser, with power switch, Orange RX receiver & 4 x AA battery holder under the cab floor.
Boustrophedon wrote:You confirm my sneaking suspicion that fitting the on/off switch in the designed place will get in the way of things in the under cab box.
I have a 2nd hand Edrig which has the regulator servo mounted under the cab floor, plus a large power switch (now replaced with a smaller version). There is insufficient space left below the cab floor to fit an Orange RX receiver plus a 4 x AAA battery holder. Looks like I have no option other than to fit the receiver or battery holder inside one of the side tanks to keep everything R/C on-board (been previously running it with the battery holder in an attached wagon).
Posted: Tue Mar 14, 2017 9:37 pm
by mikewakefielduk@btinterne
There is insufficient space left below the cab floor to fit an Orange RX receiver plus a 4 x AAA battery holder. Looks like I have no option other than to fit the receiver or battery holder inside one of the side tanks to keep everything R/C on-board (been previously running it with the battery holder in an attached wagon).
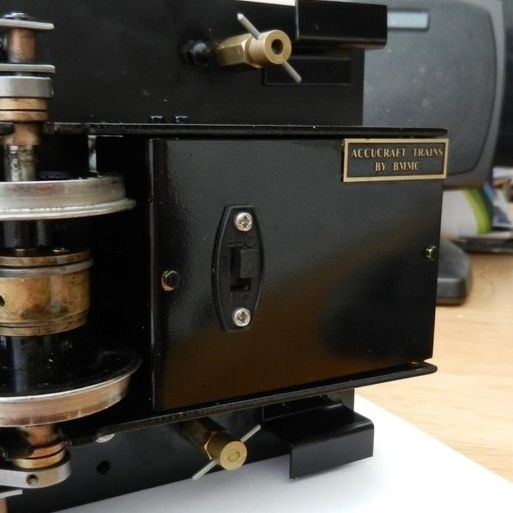
It can be done fairly easily Chris. Here's a photo of under the cab floor of my 2011 Ragleth.

There's a 5 cell rechargeable battery pack, a FlySky receiver and the on/off switch utilising the Accucraft provided holes. The holes on the other side allow the battery recharging connection.
Personally I seriously recommend FlySky radio control. Not only is it fairly cheap but the small size receiver can be set to close the servo automatically should it loose signal from the transmitter. (Very important in my case as, when the transmitter failed on an earlier radio control setup, the Ragleth shot off at full speed and took a dive into the pond).
Posted: Thu Mar 16, 2017 3:27 pm
by Chris Cairns
Hi Mike,
Think you might have missed Don's (
Boustrophedon) point of having the regulator servo mounted under the cab floor (do not see one in your Ragleth above).
I have a preference to use loose cells for battery packs where possible. Here's my Accucraft 0-4-0T set ups -
Caradoc - Fitted by original owner with servo control on reverser & regulator using 40 MHz AM system - power switch & receiver with crystal under cab floor, Ripmax NiCad receiver pack carried in cab.

40 MHz receiver & aerial (including brass plate on cab roof as Roundhouse did) and Ripmax NiCad removed, Orange RX R615 receiver & 4 x AAA battery box fitted under cab floor. Regulator servo in cab is unobtrusive (we tend not to run our models at standing adult eye level), and I added an Accucraft regulator lever to allow easier manual control if required.
 Ragleth Mark 1
 - Manual version to which I added single channel R/C on the reverser. Power switch, Orange RX 610 receiver & 4 x AA battery pack fitted below cab floor. The battery pack is slightly too big, so I have to remove the cover's chassis strut to get it in or out, and the cover presses against the battery pack when screwed in. When I get time I will fit an 4 x AAA battery pack instead (needs a power lead soldering to it).
 Edrig
Edrig - Had a bit of surgery down by previous owner, and came fitted with servo on regulator fitted below cab floor, plus a large power switch & choc block on power cable. Fitted a new power switch and Orange RX 615 receiver under floor and initially ran with battery pack carried in cab (45mm) or in attached wagon (32mm). Still have the conundrum of where to fit a battery holder on-board, rather than using a sealed battery pack.

I've just picked up some Orange RX R610V2 receivers which are smaller than the R610 & R615 above - bulk buy of 5 from Hobby King for less than £6 each (including delivery)!
Failsafe - several radio control systems offer failsafe, not just FlySky. The popular Planet T5 system (now discontinued) has failsafe on the throttle channel, which is set up every time you switch on the transmitter. The Orange RX receivers come with no manual/instructions, but also have a failsafe on the throttle channel. This is set up on the initial binding process (throttle can be in any position), and if you do not have the throttle control in the same position when you switch the transmitter on again the receiver will not bind - normally I set the throttle channel failsafe to the minimum (closed) position, but when using it with a combined reverser/regulator valve I set it to the mid position (i.e. reverser & regulator closed).
Chris Cairns
Posted: Thu Mar 16, 2017 4:10 pm
by -steves-
Best placements for RC on a Ragleth are as follows:
Switch, in holes already made my Accucraft under floor
Reverser servo, under right hand side of body where most people mount them
AAA battery pack under left hand side of body, in front of the gas tank
Regulator servo and RX, under the floor provided by Accucraft. (you will need to make a neat hole in the floor, but well worth it long term.)
All fits perfectly and works exceptionally well.
Steve
Posted: Thu Mar 16, 2017 7:16 pm
by mikewakefielduk@btinterne
I started off by having a servo for the regulator as well as the reverser but, as mine was one of the older Ragleths with the smaller side tanks (so no room for batteries in front of the gas tank) and also because I'm not a great fan of extra holes in the cab floor, I fashioned a bracket to hold a small servo mounted on the footplate. Using longer screws it was possible to make use of the existing holes for attaching the footplate step.
The down side of course is the servo is visible as it sits in the cab doorway.
I removed it because, as the loco has a piston valve reverser, I found it easier to simply to control it with the single reverser servo. Some of the other members of the local 16mm group aren't impressed by this and feel you ought to be able to control the regulator separately to the reverser (like I do with my Roundhouse locos) but everyone to their own.


Posted: Fri Mar 17, 2017 10:10 am
by -steves-
A word of advice for everyone.
Be very very careful of using nylon geared small servo's as the slightest snag on them and they will strip those tiny little gears quicker than you can blink and you will be replacing the entire servo. I have totally given up on them now and will only use metal geared servos of an identical size, which are also dirt cheap to buy.
I honestly hope this helps a few people

.
Posted: Fri Mar 17, 2017 7:01 pm
by Boustrophedon
I am using metal geared servos.
Posted: Fri Mar 17, 2017 7:11 pm
by mikewakefielduk@btinterne
I totally agree, servos with nylon gears are a failure waiting to happen. The blue servo I showed (with the bracket I'd made) was just a broken one of the right size I'd had kicking around. The metal geared servo I used originally had been moved on and installed in a Bertie.
Posted: Fri Mar 17, 2017 7:38 pm
by Boustrophedon
I have used smaller servos than the size that would be indicated by the spacing of the bolt holes on the running plate. The spec shows they have more than enough power.
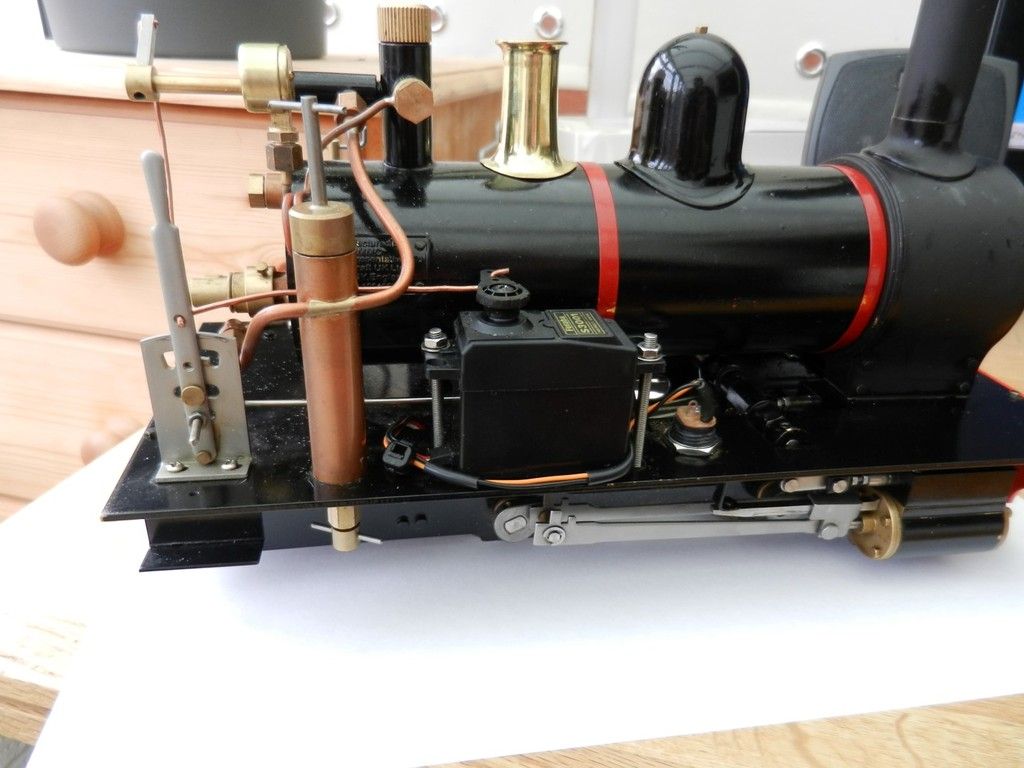
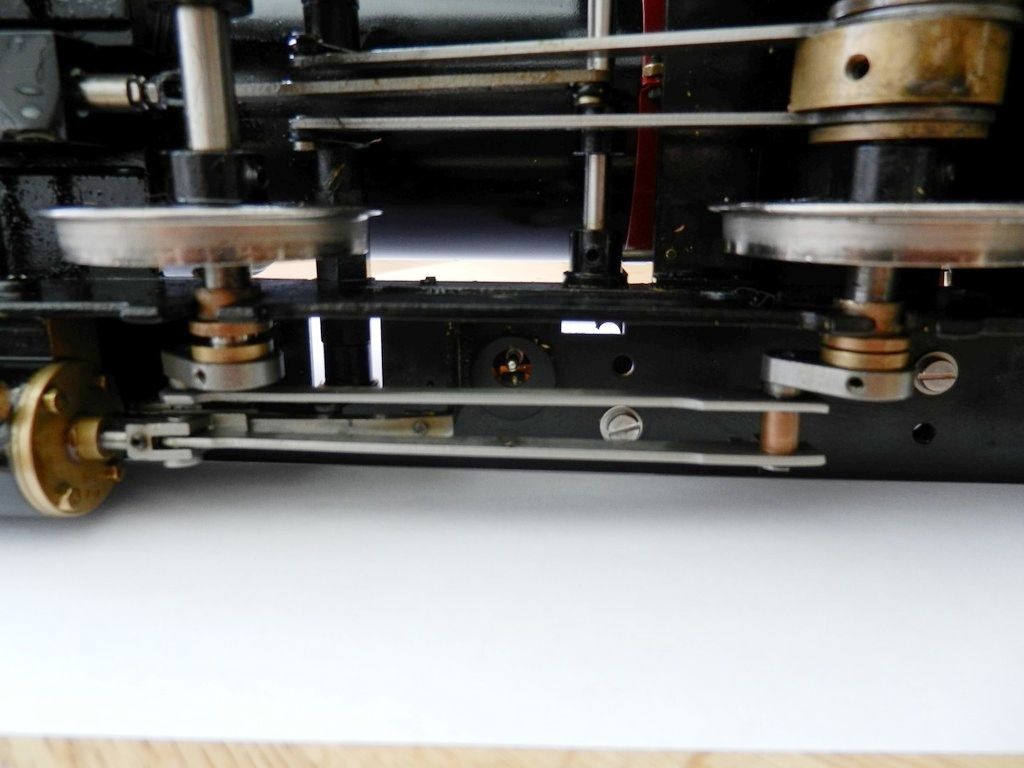
I have ground some sharp edges off the reverser that were causing a notchy motion and fitted a much lighter friction spring, just enough to hold the lever against the stand.
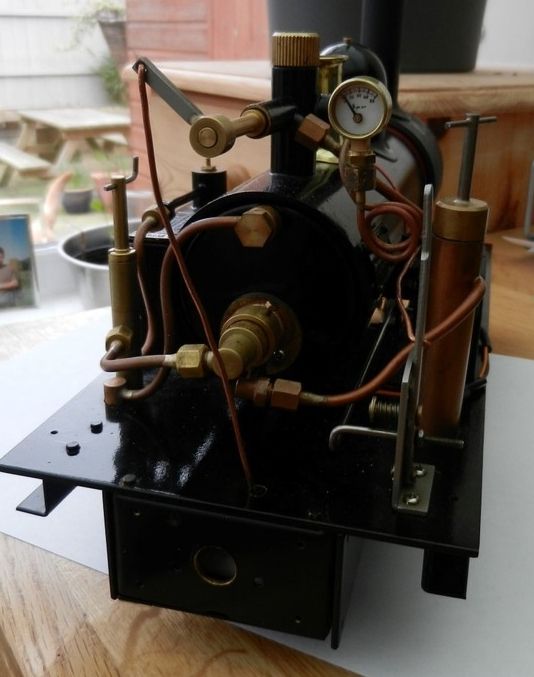
So far I have only fitted the reverser servo.
Photos to follow.
Posted: Fri Mar 17, 2017 8:15 pm
by mikewakefielduk@btinterne
and fitted a much lighter friction spring
Do you need one at all? I discard mine and rely on the servo to hold the reverser in position.