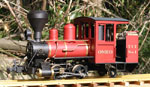


The project I started early this year was taking longer than planned and I decided I needed something quick and simple.
The plan was to use a Roundhouse chassis kit and a boiler kit to build a small tank engine suitable to work trains on the TVT branch line.
The initial design drawn up was for a simple 0-4-0 saddle tank, loosely based on the Baguley Kangaroo class. This slowly morphed into a 0-4-2ST based on the old Roundhouse Dylan design, which is shown in the sketch below.

This was back in late June, in the middle of a cold wet southern winter and so the requisite Katie chassis and boiler kits were ordered from Argyle Loco. to make a start. At this point my prototype modeller gene cut in and the project started to drift.......
With the boxes of Roundhouse bits sitting in the workshop whispering 'build me, build me', it didn't take long looking through my library to find there weren't that many suitable locos that matched the chassis and boiler dimensions.

Eventually the project settled into the form of the first TGR G class, which were 2' gauge Sharp Stewart 0-4-2T tank engines used on the North East Dundas Tramway on the West Coast of Tasmania. There was a good drawing and a few photos available, which was enough to work out how to wrap one around Roundhouse underpinnings and the die was cast.
Similar locos were built for use in India and Ceylon and some features of the model came from these. As it happened, building a Tassie G class had been my original intent when I took up garden size steam, so the wheel had finally turned full circle.
The first step was to modify the kit side frames from 0-4-0 to 0-4-2. This was done by silver soldering a piece of steel sheet at the rear and profiling it to a suitable shape. A trailing truck was fabricated, the headstocks were reprofiled and rivets were added. The results are shown below. The joint in the frames is just behind the stretcher over the trailing truck.

The next step was fitting the cylinders and motion, which was the only quick and easy part as it turned out. It was all done and the chassis was running on air in an afternoon. The photo shows it in the process of valve setting.

The following photo was taken much later and shows a valve gear modification suggested by Grant. The star washers RH supplied to retain the expansion link have been replaced by small bushes with grubscrews. Much easier to fit and remove........

The next step was fabricating and fitting the double slidebars, motion bracket, crosshead and dummy combination lever, as shown below.

The footplate, reverser and gas tank were next. The gas tank and reverser have been changed to opposite sides of the cab, as the G class were r/h drive like most other Tassie steam locos. Further complicated by the boiler mounting spacer running under the gas tank.

The Roundhouse smokebox looked nothing like the Sharp Stewart variety, so a new one was fabricated, with a new chimney and a working door.

Next up was mounting the boiler and modifying various bits, as the longer chassis means the boiler needs to be mounted further back. The smoke box extends back some distance under the boiler cladding. Another issue is the Katie boiler has the dome mounted well back, so the dome was mounted as far forward as possible by offsetting the recess in the dome where it mounts on the boiler filler plug. The boiler also had to be mounted lower, so the boiler mounting foot had to be milled down to suit.
If I had changed my mind about the prototype early enough, I would have built a bespoke boiler instead of using a Roundhouse one.

The air tanks were fitted under the footplate and the last part of the motion bracket fitted. The next step was installing the cab pipework and modifying the arrangement to suit the relocated gas tank. A new lubricator was also needed as I dislike the Roundhouse arrangement where it is mounted in the doorway and dribbles on the cab floor when being drained. The gas valve has also been relocated and more or less disguised as a handbrake.

Next project was making a dome shade, which was a major exercise on it's own, as it had to be turned, milled and bored out of a solid chunk of brass. The oil lamps were also made and fitted at this time. Much easier to make than the dome..... They are arranged in the normal VR positions for a country train, as head codes were only used on suburban trains to indicate the destination.

At this point the loco was able to be steamed, but this was left until after painting, to save having to clean up residual steam oil. The cab has been fabricated, riveted and is sitting in place to check clearances. The tank sides have had the rivets punched, but have yet to be formed.

The side tanks have now been fabricated and fitted, as well as other bits and pieces of detailing such as the toolbox, air pump and retailing jacks. By now spring had sprung and it was possible to take photos outside in the sunshine (sometimes).


Final details have been added and it is ready for the paint shop. It took about 10 weeks to get to this point. So much for quick and easy projects........


Once upon a time I used to enjoy painting models, but between Hornby losing the plot with Humbrol and the EU screwing around with changing paint formulations it has become a real trial. The photos shows the final results of a couple of weeks in the paint shop and much swearing.


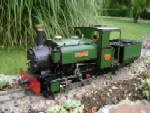
The final photo. shows the new loco. with a very short branchline train (or maybe a railmotor replacement service) in the late afternoon sun yesterday. It is now being run in on the test stand over the next few days.

The name on the model comes from the dreaming of the Gunaikurnai people of East Gippsland where the TVT is located. Borun the pelican was the dreamtime ancestor of the Gunaikurnai.
The lined black colour scheme on the model is the one used by the TGR when the North East Dundas Tramway was built in the late 1890's. The TVT passenger locos are red, but it didn't really suit this Sharp Stewart loco. and plain goods black didn't cut it either. In the context of the TVT I have assumed that when it was bought from Tasmania, someone like the lining enough to keep it in lined black, instead of repainting it.
Because it had to be wrapped around a Roundhouse gas tank and boiler, the model ended up with the more chunky proportions of the Sharp Stewart 2'6" locos that ran in Ceylon on the CGR ng lines as the L1 class. By UK 2' gauge standards the G class locos were fairly large, being about the same weight and tractive effort as Russell on the WHR. They needed to be, as they were expected to work trains on a line with 1:25 grades and 1.5 chain curves.
The other appearance issue is that the dome is further back on the model than it should be for these Sharp Stewart locos., due to using a Roundhouse #1 boiler. The dome position can be easily explained by it requiring reboilering for TVT service.
Using Roundhouse running gear results in a model with predictable performance and running qualities. This one has only steamed twice so far, but bench testing performance is already up to expectation.
Regards,
Graeme