Time to build a railway...but where?

A place for the discussion of garden railways and any garden style/scale portable and/or indoor layouts
Post Reply
User avatar
Peter Butler
Driver
Driver
Posts: 5712
Joined: Sun Sep 09, 2012 10:33 pm
Location: West Wales

Post by Peter Butler » Wed Jan 28, 2015 10:36 pm

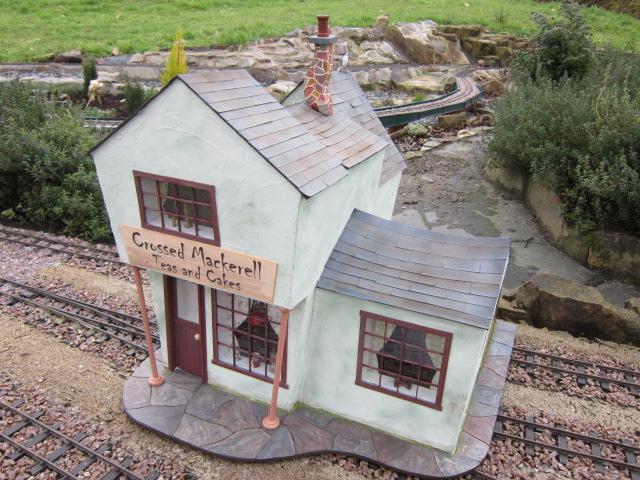
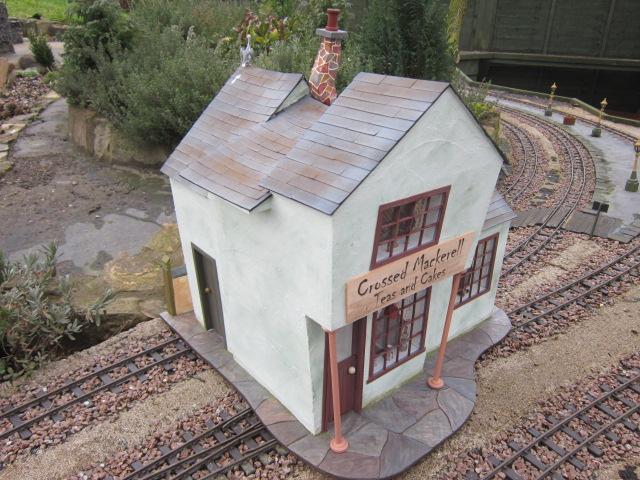
Tea Room now attached to its base. Stuck down with PVA, green foam scenic scatter material put onto the adhesive whilst still wet. This helps to conceal the join and adds detail where weeds and moss might grow.

Image

Image

Image
The best things in life are free.... so why am I doing this?

kandnwlr

Post by kandnwlr » Thu Jan 29, 2015 8:57 am

Good to see an authentic sagging roof :shock:

User avatar
KNO3
Cleaner
Cleaner
Posts: 80
Joined: Mon Dec 31, 2012 10:30 pm
Location: Vienna

Post by KNO3 » Thu Jan 29, 2015 10:20 pm

That's a really nice tea house.

jim@NAL
Driver
Driver
Posts: 1142
Joined: Sun Sep 23, 2012 11:01 am
Location: haverhill suffok

Post by jim@NAL » Thu Jan 29, 2015 10:55 pm

looking quite wonderful peter I love the roofs with the dip/bend it looks very good

SpudUk
Fireman
Fireman
Posts: 329
Joined: Thu Feb 27, 2014 4:25 pm
Location: Bridgend

Post by SpudUk » Fri Jan 30, 2015 8:30 am

The title Master Model Maker gets banded about a lot these days, but that is something else!
Chris Auckland

Joe

Post by Joe » Tue Feb 10, 2015 10:37 am

Just read through this thread and its fascinating and very impressive!
could you upload a trackplan with measurements please as its hard to grasp the scale of the line

cheers
Joe

User avatar
Andrew
Moderator
Moderator
Posts: 3422
Joined: Tue Jul 03, 2012 1:33 pm
Location: Bristol, UK
Contact:

Post by Andrew » Tue Feb 10, 2015 2:16 pm

Joe:108101 wrote:Just read through this thread and its fascinating and very impressive!
could you upload a trackplan with measurements please as its hard to grasp the scale of the line

cheers
Joe
Did you spot this that Peter posted further up the thread Joe? No dimensions, but the photos give an idea of scale... I've always enjoyed a trackplan, a great starting point for a good daydream...

Image

Peter, I was wondering how your SBR ballasting was faring over the winter? I'm slowly undertaking winter track work on the (WH)WHR and reckon this method of ballasting could work quite well on the timber bits of my line. Any observastions so far would be most welcome...

Cheers,
Andrew.

Joe

Post by Joe » Tue Feb 10, 2015 2:20 pm

Yeah i saw that but i ment a plan with measurements as i cant imagine how much land it takes up properly

User avatar
Peter Butler
Driver
Driver
Posts: 5712
Joined: Sun Sep 09, 2012 10:33 pm
Location: West Wales

Post by Peter Butler » Tue Feb 10, 2015 9:18 pm

Many thanks for posting my track-plan Andrew, it has improved slightly since then and more work is envisaged. I will attempt to add dimensions soon to show what space it covers.
The ballast is holding up extremely well and I will certainly complete the whole railway in the same way. The only problem encountered has been when I tried to re-use a syringe (minus needle) to apply the SBR. Unfortunately the plunger became stiff inside the housing and when the stuff came out it gushed into puddles rather than spreading evenly over the ballast. This has the effect of showing as white coating following heavy rain which so far hasn't gone away! Where it went smoothly and evenly it has stuck the ballast and has no discolouration even when wet...... lesson learned.
Thanks for your continued interest in my attempts to re-invent the wheel! I know others have a different approach to many of my schemes, but I love to experiment.
The best things in life are free.... so why am I doing this?

User avatar
Peter Butler
Driver
Driver
Posts: 5712
Joined: Sun Sep 09, 2012 10:33 pm
Location: West Wales

Post by Peter Butler » Wed Feb 11, 2015 11:10 pm

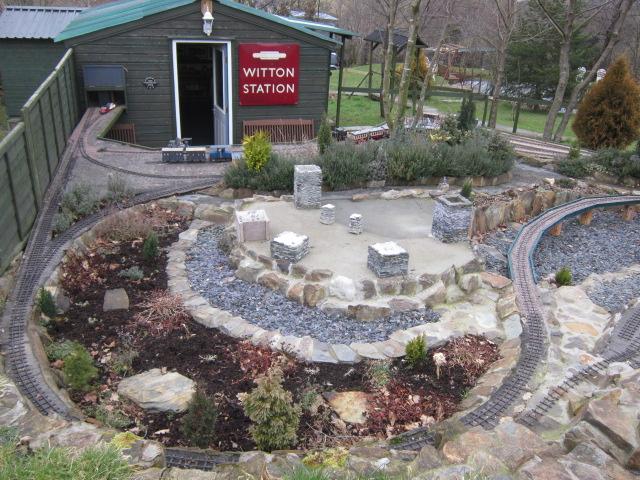
Just for you Joe..... I have ventured out today with my tape measure and camera and hope to show more detail of how the railway appears in the landscape.
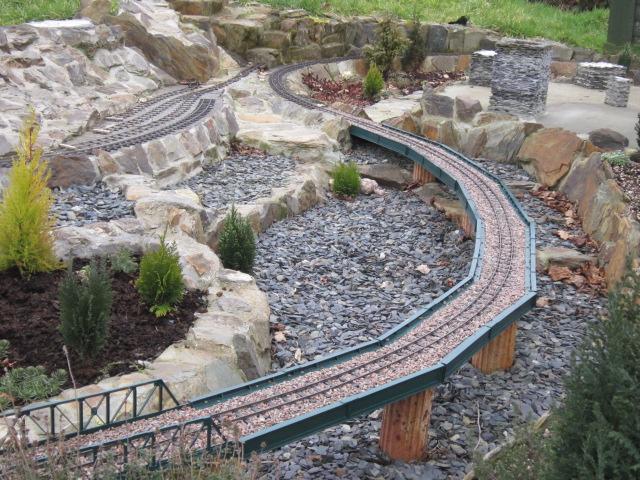
Firstly, after the line leaves the shed it joins the main circuit and continues to the furthest point of the first loop which is a distance of 7.5m.
Image

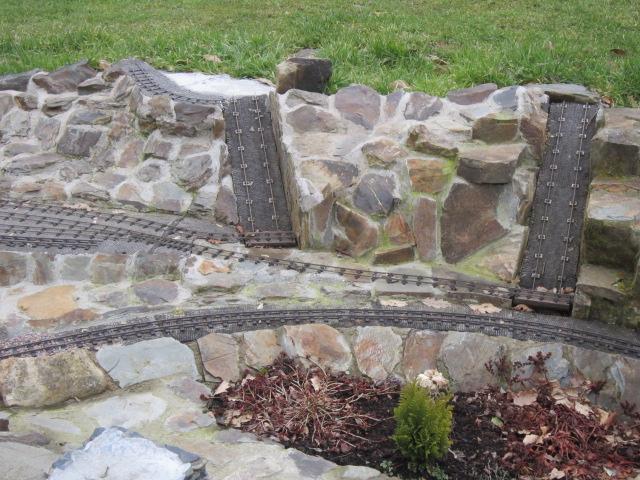
At this point the line passes the twin inclines which feed the disused quarry sidings... I have a new point to fit here so that the siding can be an alternative through route.
Image

It then crosses the viaduct

Image

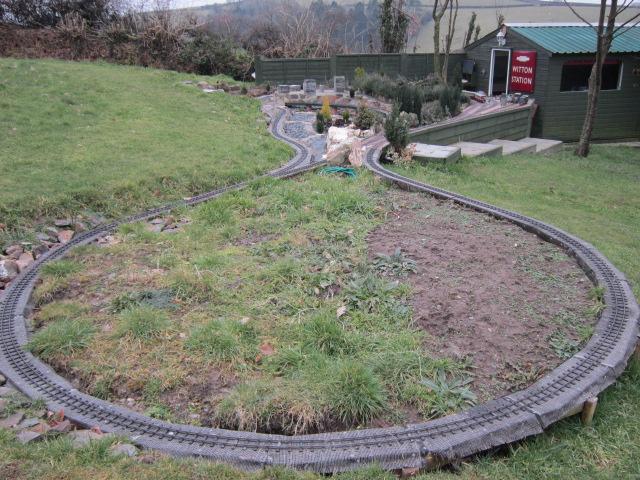
and continues to the furthest point on the return loop, 14m away..
Image

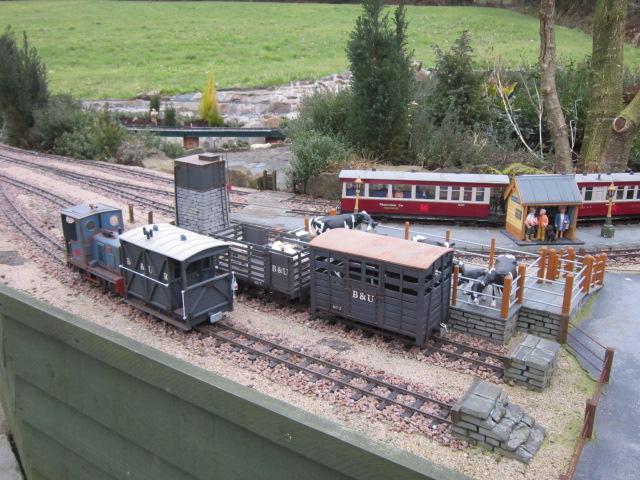
On the return a point can either continue the circuit or take the train to the terminus station and goods yard/steam-up area with cattle dock...
Image

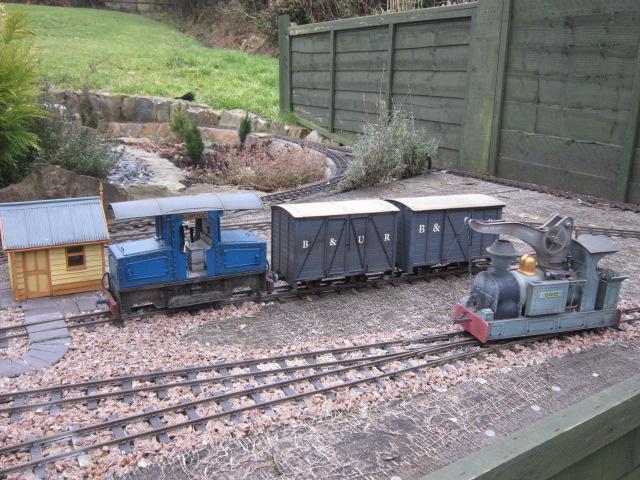
At the end of the line there is a run-round with sidings and site for engine shed.
Image

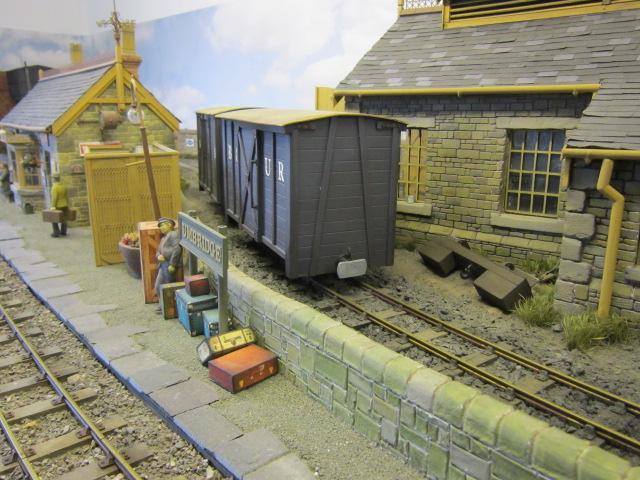
An alternative route can take the train back into the shed where there is another terminus station with run-round for the locomotive which passes the loco shed very closely, much like the Welshpool line when it ran through the houses...
Image

As you can see there is room to extend the line but I have enough to satisfy my needs as I rarely operate the trains which I much prefer to build than run.
The best things in life are free.... so why am I doing this?

Joe

Post by Joe » Thu Feb 12, 2015 7:51 am

Thank you very much, a very interesting layout, it gices me an idea on how much I can fit into my garden

User avatar
Soar Valley Light
Driver
Driver
Posts: 1490
Joined: Sun Dec 08, 2013 5:18 pm
Location: North West Leicestershire

Post by Soar Valley Light » Thu Feb 12, 2015 9:04 pm

Thanks for sharing that Peter, it's a lovely tour of a lovely line. I'm most impressed and once again, inspired by your work.
"Smith! Why do you only come to work four days a week?
"'cause I can't manage on three gaffer!"

User avatar
ge_rik
Administrator
Administrator
Posts: 7960
Joined: Sun Oct 25, 2009 10:20 pm
Location: Cheshire
Contact:

Post by ge_rik » Fri Feb 13, 2015 8:47 am

Looking good Peter. I don't think I've seen the inclines before.

Rik
------------------------
Peckforton Light Railway - Blog Facebook Youtube

User avatar
Andrew
Moderator
Moderator
Posts: 3422
Joined: Tue Jul 03, 2012 1:33 pm
Location: Bristol, UK
Contact:

Post by Andrew » Fri Feb 13, 2015 3:35 pm

I really like the station shots, just the right amount of bustle and busyness...

Thanks for the ballast update too, I may well give it a shot myself over the next few weeks...

Cheers,

Andrew.

User avatar
Snailrail
Trainee Fireman
Trainee Fireman
Posts: 156
Joined: Thu Dec 05, 2013 5:49 pm
Location: Essex

Post by Snailrail » Fri Feb 13, 2015 5:37 pm

Thanks for those photos. Close up shots are great but I always like it when someone posts one or two shots of the whole thing. It helps to see how the individual scenes fit together and integrate into the space available, which I find very useful in getting ideas for my own embryonic line.

Also I know many people long for a flat garden, which is great if you're working at ground level, but I actually envy someone with a sloping plot like this so that you can arrange a lot of it near ground level for ease of construction but with a section at a convenient working height. The short section I've started so far is about a foot above ground level which I will have to maintain wherever the line ends up going.

Brian

User avatar
Peter Butler
Driver
Driver
Posts: 5712
Joined: Sun Sep 09, 2012 10:33 pm
Location: West Wales

Post by Peter Butler » Thu Mar 05, 2015 7:27 pm

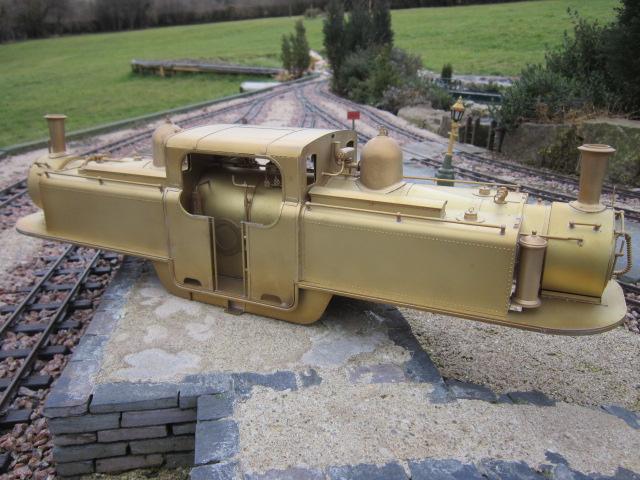
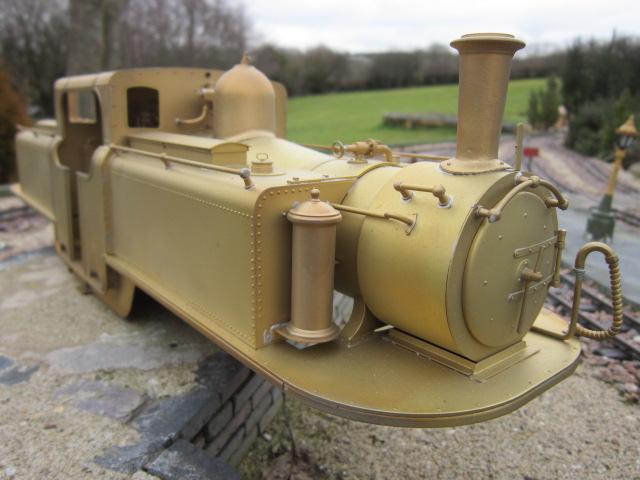
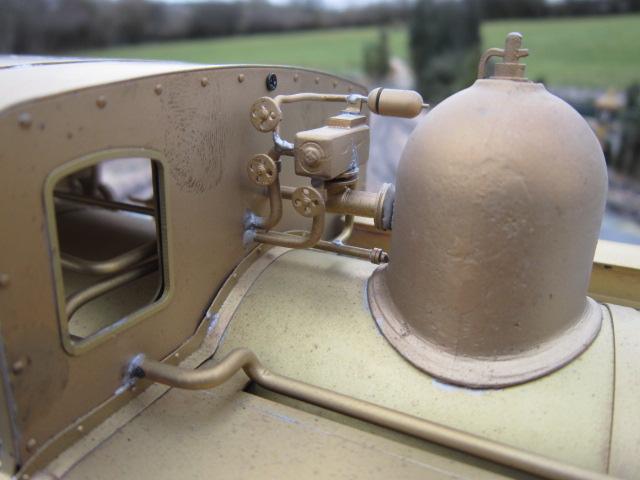
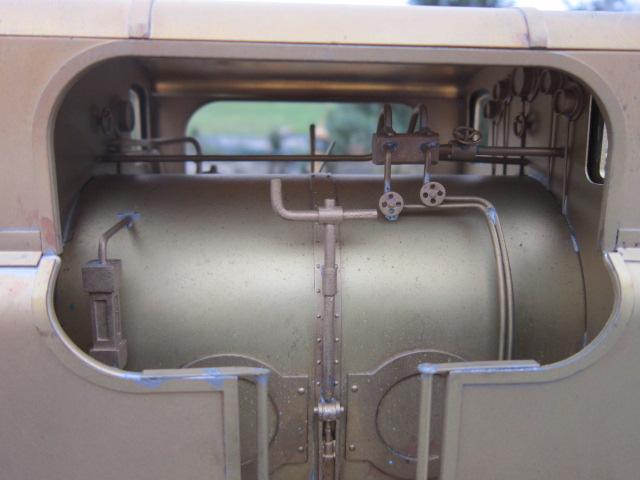
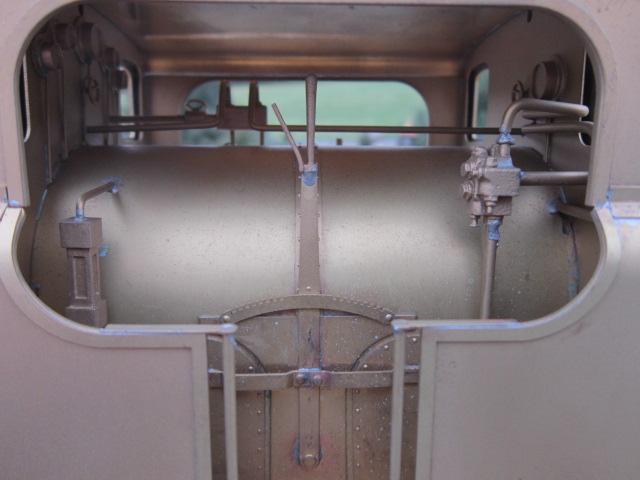
A new locomotive (body) arrived at the B.U.R.P.S. today..... This is one I spotted on the dreaded ebay but couldn't resist the temptation. For the price I can't believe the amount of detail; everything made from brass.

Image
Image
Image
Image
Image

I will attempt to make power bogies myself. This will be a labour of love as I have little previous experience of such an undertaking, although I have made simple chassis before.
In order to achieve this I will be seeking advice from all you experts out there..... beginning with.... wheels, cranks, pistons and slide-bars, and finally... motor with three stage gearbox (this is so that it can be mounted high above the pivot point of the bogie). I have seen a picture of the one normally used in this loco.
If anyone can help with these points I would be most grateful.
The best things in life are free.... so why am I doing this?
Big Jim

Post by Big Jim » Thu Mar 05, 2015 9:38 pm

Looks very nice Peter. Happy to advise or help in anyway I can. I don't think a chap of your skill will have many problems.

PS Happy Birthday?

jim@NAL
Driver
Driver
Posts: 1142
Joined: Sun Sep 23, 2012 11:01 am
Location: haverhill suffok

Post by jim@NAL » Thu Mar 05, 2015 9:41 pm

wow that's a lovly looking loco peter

User avatar
Peter Butler
Driver
Driver
Posts: 5712
Joined: Sun Sep 09, 2012 10:33 pm
Location: West Wales

Post by Peter Butler » Fri Mar 27, 2015 11:07 pm

I now have a full set of wheels of the correct design, two motors with gearboxes, cylinders and connecting rods etc.... all I need now is the skill and patience to find a way of making it all work!

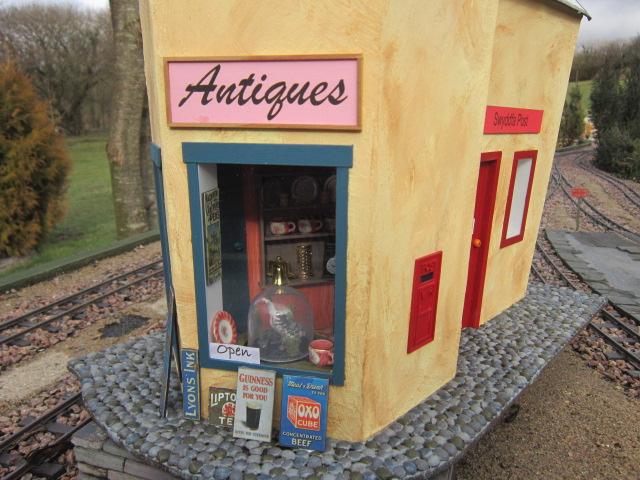
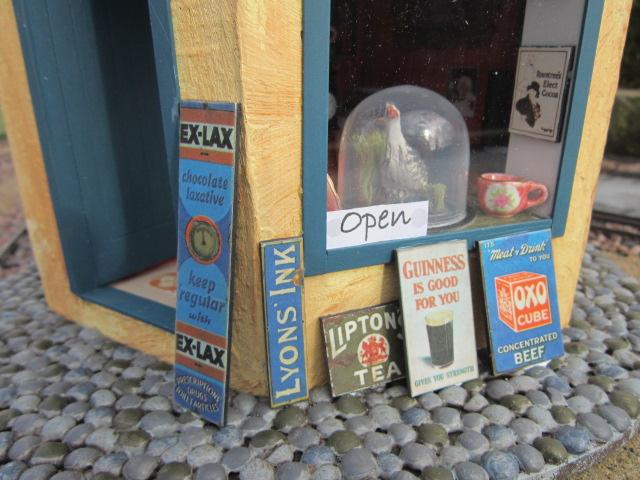
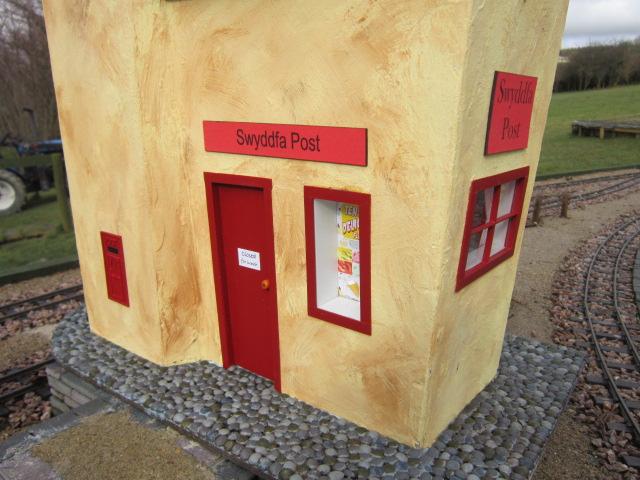
Meanwhile, I have been busy with more Emett building construction.

Image

Image

Image
The best things in life are free.... so why am I doing this?

kandnwlr

Post by kandnwlr » Sat Mar 28, 2015 6:41 am

Like the buildings!

Post Reply

Who is online

Users browsing this forum: No registered users and 9 guests