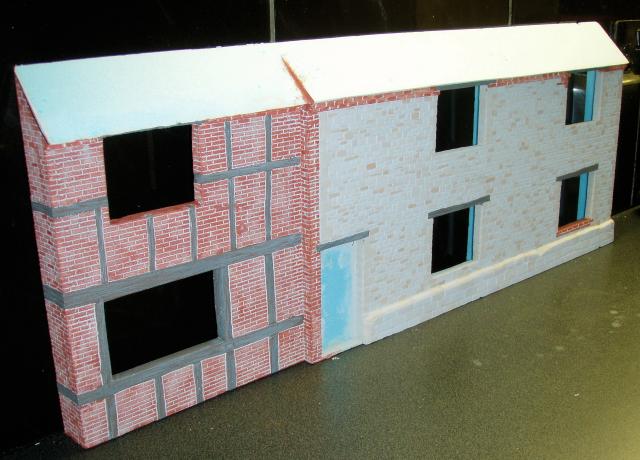
Unfortunately, I forgot to take pictures of the next couple of stages, but basically it was a question of cleaning up and glazing the resin window castings, and gluing them in place, making the one odd window ( the LH shop window) and the door. Making the front door and canopy and letting the postbox into the front wall.
The building itself was then essentially finished apart from the roof and the fiddly finishing details, which I really enjoy doing and which bring everything to life.
The roof was clad in some vac formed tile sheets, from Ebay. They really are dolls house slates and are a bit big, but it doesn't really show in the narrow low-relief, at the back. Interestingly, the pre-1903 photo indicates that there were no gutters installed, ( I pretty sure that the building was originally thatched) although they were there in the 1920's photo. I took the easy way out and omitted them!
Although, the building will be sited at the back of a raised section, having 'something' behind the windows, is very important in my view, it transforms a dead shell into a living building, even if you can't really see what is there. Walk down any street and glance at a window, you may not be able to clearly see what is inside but you can see that there is SOMETHING there.
In the photo, the larger ground floor window seems to contain packets, etc, of groceries. Ages ago, somewhere on line, I came across a copy of a vintage advertising poster of shelves of groceries. I knew it would come in handy one day so it was duly printed out the correct size, wrapped in clear sticky-backed plastic in true Blue Peter style and fitted to a piece of styrene sheet about 15mm back from the glazing. I then trawled the net and found similar pictures of a reproduction Victorian post office and drapers, followed by domestic rooms, which were installed behind the other windows. To complete the effect I obtained some small pattern cotton fabric to use for curtains in the upper rooms.
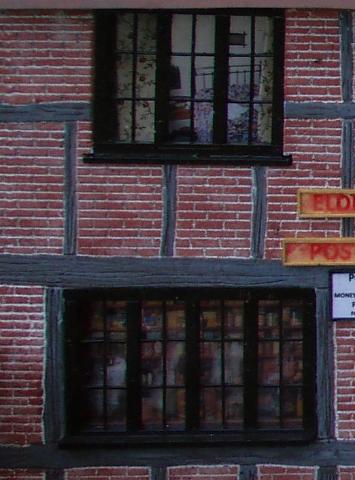
The various signs were produced as best I could using a printer and encapsulating the paper in clear epoxy. Unfortunately this isn't as weatherproof as I had hoped and the ink is running already, so this will have to be redone somehow - I really don't want to hand paint them if it can be avoided! - Any ( polite) suggestions gratefully received!
Finally, the front wall to the yard was constructed in a similar way to the main building and the whole lot glued together.
As a finishing touch, I found some dolls house flower pots and filled them with moss and put them on the porch roof, as seen in the early photo. Whether the moss will last I don't know!
I am really quite pleased with the overall result, although it now needs another building to the LH side to hide the rest of the summerhouse!