Sorry about the photo upload problem. Text for now,will try again...
The four front tank rivets and rear cab two, release the body combined with the two screws either side of the sight glass. One can ease the tank sides out a tad at the front, to lift. The wheels simply slot out when the chassis spaces are undone. 4 screws only unlike the MSS chassis apart efforts of old. To change wheels or add twiddly bits, it is easy. I have just added some hand rails changed buffers etc. Three words of caution, any drilling creates swarf so mask round and clean up well. Don't force anything ease it you could bend the panel work. Dont push with the drill and hit the boiler or parts beyond, start with a smaller bit.
I have not tried wheels these could alter the stream port timing I'm not sure just yet but will try soon, ie this week. I realy like this new model it is so much better than the MSS or older types. Infact the burner and boiler are better than the big boys. It is an oscillator and in the market holds its head high for what it is.
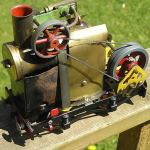
lifting up New Mk2 Mamod body to detail
-
steamie1
lifting up New Mk2 Mamod body to detail
Last edited by steamie1 on Wed Nov 21, 2012 12:19 am, edited 1 time in total.
-
Chris Cairns
- Driver

- Posts: 2372
- Joined: Mon Oct 29, 2007 7:25 pm
- Location: Glasgow, Scotland
-
Chris Cairns
- Driver
- Posts: 2372
- Joined: Mon Oct 29, 2007 7:25 pm
- Location: Glasgow, Scotland
With regards to drilling out rivets the drill bit needs lubricating, either with oil or bees wax, and I find it best to use a hand drill so you do not go too far and cause any damage.
Take care with playing around with the wheel sets. If you look closely (magnifying glass) you will see the axle ends have a lot of splines onto which the mazak cast wheels are pressed, and there is some form of liner between the wheels and the axles. In the 16mm Yahoo group John Rogers has suffered wheel slip on the leading axle of his Mark I locomotive (an early model that was given to Garden Rail for evaluation) which he has now successfully sorted using the recommended Loctite 603.
Looking at your combustion chamber you are getting some flame drift from your burner through the 3rd hole. The ceramic material that Mamod use is roughly cut and so I have just sealed the edges around this material on my William II burner using high temperature gasket sealant. The other problem I've experienced is the gas jet fitting is a loose fit into the burner allowing an air leak where I've suffered a blow back. So I now wrap the gas jet with PTFE tape on the outside making it a snug fit into the burner.
Also looks like you have been short changed with your exhaust pipe. There is a hole in the footplate in front of your exhaust pipe, and the pipe does not even reach up into the chimney through the boiler.
Chris Cairns.
Take care with playing around with the wheel sets. If you look closely (magnifying glass) you will see the axle ends have a lot of splines onto which the mazak cast wheels are pressed, and there is some form of liner between the wheels and the axles. In the 16mm Yahoo group John Rogers has suffered wheel slip on the leading axle of his Mark I locomotive (an early model that was given to Garden Rail for evaluation) which he has now successfully sorted using the recommended Loctite 603.
Looking at your combustion chamber you are getting some flame drift from your burner through the 3rd hole. The ceramic material that Mamod use is roughly cut and so I have just sealed the edges around this material on my William II burner using high temperature gasket sealant. The other problem I've experienced is the gas jet fitting is a loose fit into the burner allowing an air leak where I've suffered a blow back. So I now wrap the gas jet with PTFE tape on the outside making it a snug fit into the burner.
Also looks like you have been short changed with your exhaust pipe. There is a hole in the footplate in front of your exhaust pipe, and the pipe does not even reach up into the chimney through the boiler.
Chris Cairns.
-
Spule 4
Two observations...
With the gas burner issue, these locos may be a good candidate for Peter/superbiker UK's use of the ceramic blanket?
http://www.djbengineering.co.uk/c-blanket.html
I used these in Janmod, and it does keep things a bit cooler. Line the inside of the tanks. Peter taped his, mine I folded and they seem to stay in place.
Second, so I assume the "chimney" is just an open tube through the boiler that the exhaust pipe enters from the bottom? Due to the amount of emulsified (SP?) oil and water that come out of my SLs, I would consider enclosing the area under the smokebox (more prototypical anyhow) and then drilling a drain hole in the front plate to allow the stuff to flow to the bottom. I have drilled out the bottoms of my SL smoke boxes, seems to aid in draining.
With the gas burner issue, these locos may be a good candidate for Peter/superbiker UK's use of the ceramic blanket?
http://www.djbengineering.co.uk/c-blanket.html
I used these in Janmod, and it does keep things a bit cooler. Line the inside of the tanks. Peter taped his, mine I folded and they seem to stay in place.
Second, so I assume the "chimney" is just an open tube through the boiler that the exhaust pipe enters from the bottom? Due to the amount of emulsified (SP?) oil and water that come out of my SLs, I would consider enclosing the area under the smokebox (more prototypical anyhow) and then drilling a drain hole in the front plate to allow the stuff to flow to the bottom. I have drilled out the bottoms of my SL smoke boxes, seems to aid in draining.
-
Chris Cairns
- Driver
- Posts: 2372
- Joined: Mon Oct 29, 2007 7:25 pm
- Location: Glasgow, Scotland
Yes we can see all the photos that you have linked here in Picasa.
Can you tell us where you got your detailing from, in particular the Westinghouse pump and the gauges in the cab? Thank You.
Certainly changes the appearance of the Mark II. But can you find a driver model the right size to fit?
Chris Cairns.
Can you tell us where you got your detailing from, in particular the Westinghouse pump and the gauges in the cab? Thank You.
Certainly changes the appearance of the Mark II. But can you find a driver model the right size to fit?
Chris Cairns.
 I agree, gives the MkII a whole different look.
-
steamie1
Firstly Thank you for your advice and help folks
Secondly answers:-Brandbright and Djb do detailing bits. The pump is Lead costing 11 pounds! I added the Copper with wire drilled into place. The cab detail is a bit embarrasing. It is just some scrap bits of brass and the gauges are model aircraft Intruments printed on to paper cut out and backed onto plastic, painted gold. I think Brandbright do brass casting gauges but it all adds up, so scrap does for me. Tank Caps and hand rails are Dream steam as are buffers. Chain to cab is jewelry scrap,rusted up. I filled the rivets holes with glue and then painted so they were not too obvious as rivets. The lining was masked off car paint with a brush application. Loco name plates Roundhouse I had in my draw. That's it. I will glaze with Mike Ousby specticles and am awaiting a dart from DjB. Should I weather it up though?????????????
-
Spule 4
Re: Firstly Thank you for your advice and help folks
No embarrasment should be felt. As in the old 16mm days, use household and other model bits to get something done. For example, my IP carriage kit does not have roof/light vents. I could buy some, or just make some using .22 shell casings.steamie1:76998 wrote: I think Brandbright do brass casting gauges but it all adds up, so scrap does for me. Tank Caps and hand rails are Dream steam as are buffers. Chain to cab is jewelry scrap,rusted up. I will glaze with Mike Ousby specticles and am awaiting a dart from DjB. Should I weather it up though?????????????
I have found assorted jewlery chain can be used for all kinds of railway applications. I even found some brown-ish ones, pre rusted.
Mike and someone else have done glazing for Mamod specticles, I want some for my SLs, but I gotta solve the "puking flare" effect and resulting footplate fires out of the meths tank filler pipe on Major Hitchcock's burner!

Weathering....people tend to overdue it on steam engines. They go off of photos taken at the end just before breaking and deadlines when maintenance was stopped, forgetting that steam locos were wiped down daily in their heyday as any useful expensive machine for work.
-
Chris Cairns
- Driver
- Posts: 2372
- Joined: Mon Oct 29, 2007 7:25 pm
- Location: Glasgow, Scotland
Sadly they are another of the growing list of Brandbright items which are no longer available.steamie1 wrote:I think Brandbright do brass casting gauges
Cannot help wondering what a potential buyer of Brandbright is actually going to get as their stock seems to be running down at a gallop.
I like the water tank overfill stains - nicely done.
As to getting spectacle glazing, I recall being told that these are not really suitable for an externally fired pot boiler as they melt into a rather awkward blob which is difficult to remove.
Chris Cairns.
-
steamie1
specticles for Mamods
A chap called Mike Ousby (01254 664433 does thick specticles and the 19mm ones can be sanded to fit. Ihad them in my MSS and they were fine.This may help. Mine are on order soI'll let you know how they cope soon..
-
Superbiker_uk

- Fireman

- Posts: 371
- Joined: Wed Apr 01, 2009 7:36 am
Who is online
Users browsing this forum: No registered users and 12 guests