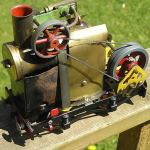
Another Mamod to the fold, nice SLK1 from the UK

A very popular starting point for Live Steam. With their low cost comes a number of problems which can be discussed here
Post Reply
Spule 4

Another Mamod to the fold, nice SLK1 from the UK

Post by Spule 4 » Wed Aug 01, 2012 3:48 am

All-

I eluded to this in two other posts, but thought I should start another thread as JanMod is about 99% complete (photos and update to follow...I am happy how it turned out).

Anyhow, I have been on the lookout for another Mamod for a while now, and after passing a lot of rough stuff on eBay, a post and website update by Chris Bird (Summerlands) about PPS folding put me in touch with Simon Whenmouth (Anything Narrow Gauge).  I was looking for Jane/Janet bits, but Simon politely informed me that he did not take on that part of PPS's business.

Later, checking Simon's site, it showed "modified mamod" in the listing for GBP 130.

After a few e-mails and waiting for each other to get through our respective holidays, I purchased the loco and in 48 hours later, the Man in The Big Brown Van came with a box from the UK, all for around $250 US, which buys not much Mamod on eBay these days! :shock:

Modifications included builders plates (1998), handrails, uprated safety, Goodall, upgraded cylinders, IP deadleg lubricator and a meths burner.

After opening the very well double-packed box, I added water, meths and oil and had it running on blocks shortly.  It was very quiet and smooth.

I have since stripped it to perform some minor tasks, most will be mechanical in nature.  Cosmetically, the loco is in fine shape, MUCH better shape than I had anticipated.  

Judging by a few differences, it is newer than my SL3, and the difference in quality is amazing.  I did find out why it ran quiet and smooth, it has no power whatsoever!  Tear down of the mechanics showed that one could see daylight through the backing plate/cylinder joint (bad machining), and it appeard that some of the plate/cylinder holes were of DIFFERENT SIZES?  One of the cylinders also had a hairline crack on the far end and it suffers from some slight driver slop.

No worries, I have a set of IP Jane drivers (the old ones with holes) and the SL3 cylinders that I had polished the faces of and these actually worked well sans upgrades, so I can swap the upgrade bits from the two cylinder sets.

I did crack the dome bung in the boiler, I fixed it using the solder method posted here, and have since stripped all the paint (and thick meths residue) off of the boiler.  See the leaking steam dome thread for this tip.  A spare sight glass came with the loco, but I replaced the cloudy one with the glass from the SL3.

The deciding point of Mamodification will be the regulator (I hate to hack a hole the body, why I am asking about the Mike Chaney type regulators, and Dream Steam no longer have the bung monted type anyhow) and if I am going to keep the deadleg lubricator or get a Roundhouse one instead.

Cosmetic changes will be 16mm buffer beam conversion, some paint tocuh up, a DJB smokebox dart, roundhouse dummy whistle on the cab roof (done tonite) and probably a set of name plates.  Being black with red markings, something Penrhyn-esque?

Hopefully, this project won't take 27 years like JanMod! :D
Last edited by Spule 4 on Wed Aug 01, 2012 3:59 am, edited 2 times in total.

Spule 4

Post by Spule 4 » Wed Aug 01, 2012 3:55 am

Pre-export photos, taken by Simon:

Image

Image

Image

Image

Someone was proud of this little model and it was actually well built. Why I will be doing less cosmetic modifications than I had planned. A fellow local steam enthusiast said it would be bad karma to modify it much! :lol:

User avatar
Sir Clothem Cap
Driver
Driver
Posts: 1708
Joined: Sun Sep 26, 2010 8:45 pm
Location: Hampshire
Contact:

Post by Sir Clothem Cap » Wed Aug 01, 2012 9:14 am

Forget the karma it already has been modified to out perform a standard mamod, many railways radically change their engines so it is up to you, Do as you like to make it fit with your rolling stock and enjoy it.

User avatar
Chris Cairns
Driver
Driver
Posts: 2372
Joined: Mon Oct 29, 2007 7:25 pm
Location: Glasgow, Scotland

Post by Chris Cairns » Thu Aug 02, 2012 12:24 am

Welcome to the World of the Mamod SL1K Garrett.

Many enthusiasts starting in Garden Railways crave after the SL1K as it is the easiest old style Mamod to take apart several times, but the reality is it was the worst quality SL loco produced by the original Mamod Steam Railway Company, and was introduced by the BTP (Ascot) Limited owner of Mamod, and continued by the Jedmond (Engineers) Limited owner.

I've previously posted about the poor quality of the reverser/regulator valves fitted to these SL1K locos (incidentally yours has a replacement pivot bolt fitted to stop fouling the T piece of the dead leg lubricator).

And Douglas has also posted on the poor quality of the cylinder back plates which you have found out first hand.

The Mike Chaney/IP Eng/Dream Steam Dead Leg lubricator can be made to work properly with one simple trick - make sure you prime the steam pipe coming into the lubricator with steam oil each run - I use a syringe to force the steam oil down this pipe. All mine now work (I have at least 1 copy of each version) and they use much less oil than the Roundhouse displacement lubricator where in my experience all the oil gets displaced in one steam run.

I'm off to Czech Republic for some steam - I'll scan the instructions for the IP Eng & Dream Steam lubricators on my return. Yours is either an IP Eng one as it has no drain screw, or an early Dream Steam one before they reintroduced the drain screw as first used by the Mike Chaney model.

Your cylinders are Mamod ones which have been upgraded with an 'O' ring piston kit - looks like one of the IP Eng kits.

Chris Cairns.

Spule 4

Post by Spule 4 » Thu Aug 02, 2012 1:05 am

Chris Cairns:73434 wrote:Welcome to the World of the Mamod SL1K Garrett.

1) Many enthusiasts starting in Garden Railways crave after the SL1K as it is the easiest old style Mamod to take apart several times, but the reality is it was the worst quality SL loco produced by the original Mamod Steam Railway Company, and was introduced by the BTP (Ascot) Limited owner of Mamod, and continued by the Jedmond (Engineers) Limited owner.

2) I've previously posted about the poor quality of the reverser/regulator valves fitted to these SL1K locos (incidentally yours has a replacement pivot bolt fitted to stop fouling the T piece of the dead leg lubricator).

3) And Douglas has also posted on the poor quality of the cylinder back plates which you have found out first hand.

4) The Mike Chaney/IP Eng/Dream Steam Dead Leg lubricator can be made to work properly with one simple trick - make sure you prime the steam pipe coming into the lubricator with steam oil each run - I use a syringe to force the steam oil down this pipe. All mine now work (I have at least 1 copy of each version) and they use much less oil than the Roundhouse displacement lubricator where in my experience all the oil gets displaced in one steam run.

5) I'm off to Czech Republic for some steam - I'll scan the instructions for the IP Eng & Dream Steam lubricators on my return. Yours is either an IP Eng one as it has no drain screw, or an early Dream Steam one before they reintroduced the drain screw as first used by the Mike Chaney model.

6) Your cylinders are Mamod ones which have been upgraded with an 'O' ring piston kit - looks like one of the IP Eng kits.

Chris Cairns.
Hello Chris, hope all is treating you well!

I added #s to your post above to aid in reply.

1) Yes, screws in lieu of rivets, but then rivets are no match to the drillpress. One thing that always perplexed me was my SL3's boiler backplate was bolted, whilst many others were riveted.

As I have posted before, I came close to getting a kit as a youngster back in the 1980s, the SL3 was what I got instead tho.

2) YES, it is different than the SL3 reverser. One thing I finally did on the SL3 (after years) was reverse the screw and nut. On the SL3, the reverser ports are not threaded, and as built, the nut was on the sprign end, finally after 27 years I had the sense to revers it, MUCH easier to re-assemble.

The SLK1 reverser is threaded, so the screw just goes into the reverser. Needs a good polishing of the faces for sure.

3) Again, miles different than the SL3, the SLK ports are about as hap-hazard as if I had tried to drill them. :D

4) I read your priming tip here. Unfortunately, many of your photos do not show up for me anymore (some strange message from the hosting company) I fear it may be switching browsers perhaps? Anyhow, I will try that, wish it did have a drainscrew, but then it would make a mess. How many boiler fills are you getting per lubricator fill? My Roundhouse lubricator does use some oil, but has never actually emptied.

5) Thanks, but I think I found those too Chris, here on this forum's files list.

6) Agreed, I have already removed them from the SLK cylinders and they will be mated to the SL3 cylinders shortly.

As always, good to hear from you Chris! :)

Spule 4

Post by Spule 4 » Wed Aug 22, 2012 2:39 am

An update.....   :lol:

The chassis has been taken back to bare metal and we have a rebuilt rolling chassis now.  I have done the following:

Set of IP Engineering drivers (old ones with holes).  They were bought S/H off of eBay.  Unfortunately, they were taken off of whatever model by the seller with a hammer by the looks of it!  :shock:     Some cleanup work and re-gauging (45mm -> 32mm)and re-quartering and all is well.

The SL3 cylinders and backing plates were used wth the IP cylinder upgrade.  THe upgrade end caps did not even press fit in these cylinders (tight fit in the wonky SLK1 set, but fell right out of these) so I sweat-soldered them in place.  Retained the lower profile screws from the SLK1 cylinders to clear the deadleg lubricator.....IF I keep it?

Alingment of the frame.  The loco had a bind, but when I put the two frames side by side, one could see why, some hole alingment issues from the factory!  Enlarging the holes for the IP driver retaining nuts seems to have helped as it allows for adjustment.

Lapped the reverser and worked on it a bit: added a nut to lock the screw to keep things tight.  I may do the enlargement of the exhaust port trick in the Dutch 16mm group's Handbook to improve control, and clear out the reveser itself as it is not even symetrical!

Right now, it runs well on air, but then it will be time to tear it down and re-paint.  :oops:

Other bits will include some main rods by RWM and modification for....

....an early 1980s Shirley twin tank meths burner!

Comparing the IP/Dream type burner to my old Sidestreet burner, I can see why there is an issue of spills and fires.  The open bung and small tank on the IP/Dream burner are its downfalls compared to the Shirley and Sidestreet types.  Into the bits bin it will go :evil: .

I also have a regulator coming in the mail from the UK, but not the boiler bung type, more to come on that later....

I promise some photos of this and JanMod soon!

User avatar
dougrail
Driver
Driver
Posts: 1535
Joined: Mon Mar 14, 2011 5:11 pm
Location: Salopia; on the edge of Arcadia

Post by dougrail » Wed Aug 22, 2012 9:00 pm

Looking forward to them, Spule. Always do like to see a 'Mamod' come back to life good as new. :)

Spule 4

Post by Spule 4 » Thu Aug 23, 2012 12:25 am

dougrail:73973 wrote:Looking forward to them, Spule. Always do like to see a 'Mamod' come back to life good as new. :)
True, but I try to build them to "as they should have been". :D

Spule 4

Post by Spule 4 » Thu Aug 23, 2012 2:54 am

Photos as promised, on my infamous kitchen counter (no photos in the shop for a reason! :lol: ).

Photo 1, test fit of the body on the chassis.  
 
Image

Note the Shirley burner below the footplate, IP drivers and upgraded cyldiners.  Also appears I need to stop and get some sugar! :shock:

Photo 2,  body removed, smokebox removed, top down view.

Image

The Shirley burner requires some chassis modification with a file.  Press fit (yeah, right), I will work out a holder from the footplate to fill the hole between the side tank panels.

You can just make out some of the "scars" on the drivers, glad I got them, but I think my youngest daughter could have done a better removal job than the seller, plus coming from Flori-duh, they were a bit rusty.

The high-pressure cylinder caps were soft-soldered into the cylinders, didn't really want to do it, but the gap was too big for Loctite, plus I can sweat them back off if need be. Good clean job and it they polished right up. Take care if you try this method, the cylinders are solf-soldred in the saddles, too much heat and you WILL have bad results! :shock:

Note the DJB Engineering smokebox dart, at GBP 4 a pair, they are a nice cheap dress-up modification. Frames and smokebox were stripped with Methylene Chloride based stripper, made here in good ole Tennessee. 8)

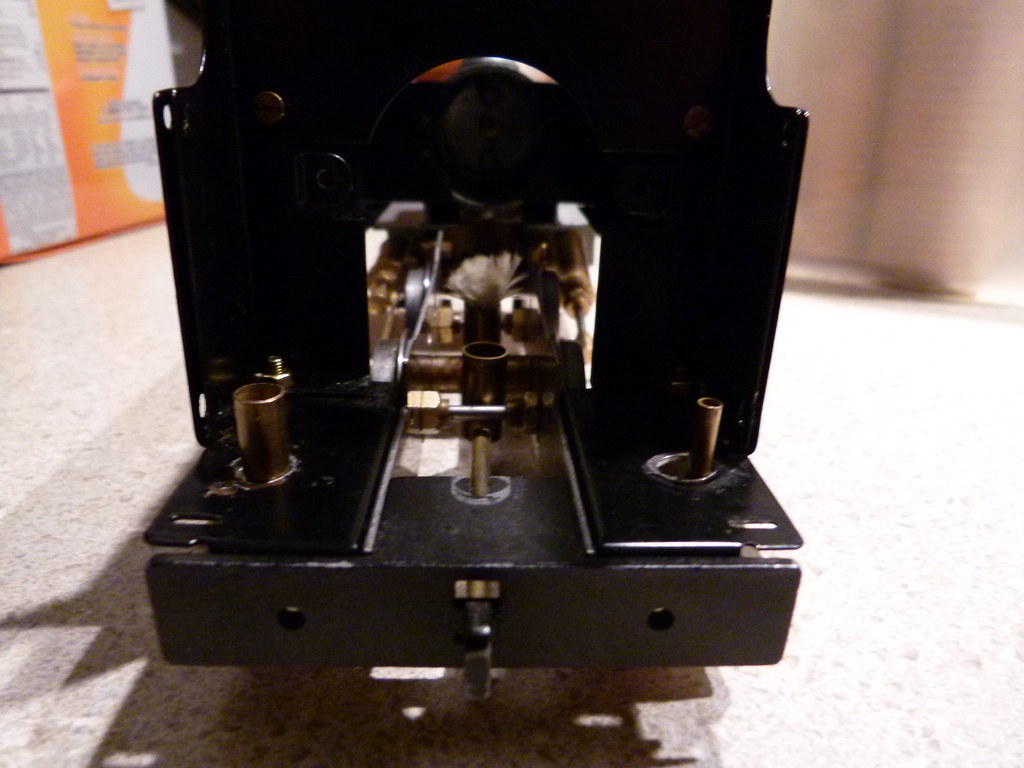
Photo 3, footplate, vent and filler tube on the Shirley tank.

Image

Note the holes for the filler and vent. The "Filler" is supposedly the larger of the two, however, I may partially cap this bung as it is rather large and I have actually filled it (playing with wicks) with the smaller tube, it uses the same tubing as my Sidestreet burner in Jan-Mod.

IMO, smaller openings, less chance of spill or flash fire.   The IP burner design is....well, maybe I can modify it?

I am going to next come up with a plate to fit between the two sideframes and firebox hole that also retains the burner.

I also need to start on the regulator mounting, if and when it ever gets here. :?

The only other item is I may have a name for the loco:  "MAJOR HITCHCOCK", after Terry Thomas' character on "I'm All Right Jack"

http://www.tcm.com/mediaroom/video/1862 ... k-Him.html

Spule 4

Post by Spule 4 » Sat Sep 15, 2012 6:49 pm

Major update on Major Hitchcock....photos when I get a chance.

Loco is together, what is left is to figure out a permanent fix to the burner.

I got the chassis together once I got a set of con rods from Roy Wood Models (they are nice, both in apperance and the total lack of slop that the brass Mamod ones have).  

The other item from Roy was a standard Mamod chassis spacer.  I use these in lieu of the nuts on the back-bottom of the cylinder backing plates, helps keep the frames inline.

Once everything was together and true, I ran the loco chassis on compressed air (20PSIG) with frequent oiling for about an hour both directions.  Really loosened it up.   It will tick over slowly now with only the odd bubble.

Regulator.  Roy Wood did not have any of the boiler bung regulators and DreamSteam no longer have them either, but I wanted to do something else anyhow to use the existing system.

So poking around looking at other regulators for stationary models and the like, I found this on eBay:

http://www.ebay.com/itm/Model-live-stea ... 7675.l2557

Not sure of the maker, bit it is nice and fits a Mamod well, the handle is right in the door opening and easy to reach even with the cab back on the loco.

It took some plumbing work as it was 3/32 Vs. 1/8, but some KS brass tubing was fabricated and silver soldered together.  No leaks! :D

A few punchlist items left to finsh the Major, but I hope to steam it yet this weekend.

Post Reply

Who is online

Users browsing this forum: No registered users and 22 guests