My Flashforge Printer Journey.

Re: My Flashforge Printer Journey.
Yes, from a company called Box via Amazon - but they are currently out of stock.

Re: My Flashforge Printer Journey.
Flipping heck they are a bit expensive aren't they. I thought they would just be like most of the others you see on Amazon. Small brass nozzles with are screwed in. Still if that's what is needed one has to pay for them. 
Hopefully I won't get many or any blockages
Also what do you guys use to clean the bed. I have Isopropanol in a large bottle I use for cleaning my brushes and paint pots. Is that ok to use...
Hopefully I won't get many or any blockages
Also what do you guys use to clean the bed. I have Isopropanol in a large bottle I use for cleaning my brushes and paint pots. Is that ok to use...
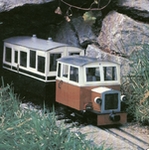
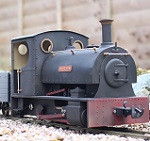
ROD
Life is so easy when I run my trains.


https://gardenrails.org/forum/viewtopic ... 41&t=11364
https://www.youtube.com/@fairywoodlightrailway
Life is so easy when I run my trains.


https://gardenrails.org/forum/viewtopic ... 41&t=11364
https://www.youtube.com/@fairywoodlightrailway
-
Trevor Thompson
- Trainee Driver

- Posts: 994
- Joined: Fri Oct 05, 2018 6:30 pm
- Location: South West Wales
Re: My Flashforge Printer Journey.
The extruder unit for this printer isn't just the nozzle - which is the cheap brass bit. Its the whole extruder with heating element feedback thermistor and perhaps other bits. It is easy to replace - you just press a button and it pops out. That is why it costs about £25. I have replaced one - but it was linked to changing filament type. I don't expect to change another soon - but I have 2 of them as spares. I am mindful that it might not always be possible to get spares, and they are cheaper if you get them from china or hong kong direct - and wait 4 weeks for them to arrive.
Cleaning the bed is important. Particularly if you are printing using the outer edges of the bed. small components which just use the middle don't seem to be so sensitive to the bed being clean. If a large print lifts at the ends then clean the bed.
Firstly I clean the bed with an alcohol soaked piece of kitchen towel. Well not soaked but enough on it to wet the bed as I rub it over the bed.
Eventually that will not have the desired effect. Then I use acetone in the same way. Bear in mind I am using ABS, and acetone is the solvent for it - so you may have to choose a solvent for PLA. Limonene is the solvent you will need. I understand it is used in the catering trade as a cleaning agent.
If I really have a problem I use acetone with ABS disolved in ti in the same way again - but this leaves a thin film of ABS on the bed. ABS sticks like ..... on that! So be careful if going this far, you will then have difficulty getting the model off the bed. Or at least if you use a raft the model comes off the raft easily enough - but getting the raft off the bed is another issue.
In the end you will need a new flexible bed plate. Again can be had from China etc for about £15. I am on the third. You can buy replacement build plate film, from uk sources for around £10. Look to make sure it is 3M branded. They are not easy to use. You need to get the original film off - and clean the plastic bed thoroughly. Then you need to fit the sticky film on WITHOUT getting air bubbles trapped underneath. It took me two of these before I got it right. It is successful - so don't throw a used flexible bed away.
I suppose I should say that I ruined 2 of these bed plates by being too generous with the ABS acetone mixture - so much so that getting rafts off removed pieces of film from the plate. That is why I urge caution in using extreme efforts to achieve bed plate adhesion!
Trevor

Re: My Flashforge Printer Journey.
If you want to use Limonene, be careful
Although not toxic or carcinogenic, and is found as a flavouring in many foods, in its concentrated form it isn't very nice. Also, care must be taken with disposal, don't just pour it down the drain for example.
"Material may be irritating to the mucous membranes and upper respiratory tract.
May be harmful by inhalation, ingestion, or skin absorption.
May cause an allergic skin reaction.
May cause eye or respiratory system irritation.
Very toxic to aquatic life with long lasting effects."
Philip
Re: My Flashforge Printer Journey.
For what it's worth, despite my printer being in quite a cold environment (and bed adhesion being a serious problem for ABS) I have relatively little issue with PLA adhering. I just clean with 99% IPA after every print or two.
I haven't tried the acetone approach described by Trevor, partly because it won't cure the cracking issue (I need a warmer environment - roll on the spring!) and partly because I am mostly printing with PLA at the moment.
I haven't tried the acetone approach described by Trevor, partly because it won't cure the cracking issue (I need a warmer environment - roll on the spring!) and partly because I am mostly printing with PLA at the moment.
Re: My Flashforge Printer Journey.
Thanks Trevor, Phillip and Simon.
I am using PLA for the moment, so I think a new nozzle will have to wait I think. Hopefully I don't get any foul ups in the meantime.
I know that a clean bed is very important and the issues of sticking or uneven prints can be one of the main reasons builds come out wrong. I will use a weak solution of the Isopropanol, meaning very little on a towel.
I have now also nearly come to the end of the reel of PLA filament that came with my machine, about 8 turns left on it. My question is, how do I now take that off. ?The loading is pretty easy, I have a new reel ready and waiting to be used up...
ROD
Life is so easy when I run my trains.
https://gardenrails.org/forum/viewtopic ... 41&t=11364
https://www.youtube.com/@fairywoodlightrailway
Life is so easy when I run my trains.
https://gardenrails.org/forum/viewtopic ... 41&t=11364
https://www.youtube.com/@fairywoodlightrailway
Re: My Flashforge Printer Journey.
For what it's worth I use 99.9% IPA in relatively generous quantity.
Using the touchscreen on the printer, choose 'Filament' and then 'Change'. On screen instructions will guide you through it but the process is essentially - the extruder is heated and the machine then automatically withdraws the filament. Once this is done it will instruct you to remove the spool, replace it with the new one, and once that is fed in tap on 'OK'. It will then feed in the new one - and same process as before, you hit 'ok' once the new filament starts extruding.I have now also nearly come to the end of the reel of PLA filament that came with my machine, about 8 turns left on it. My question is, how do I now take that off. ?The loading is pretty easy, I have a new reel ready and waiting to be used up...
-
-steves-
- Administrator

- Posts: 2445
- Joined: Thu Jul 28, 2011 1:50 pm
- Location: Cambridge & Peterborough
Re: My Flashforge Printer Journey.
If adhesion is an issue with PLA there is a very simple solution. Forget cleaning the bed, I only clean mine after about 20 prints or when it gets toorough, then I have to dirty it up for the first print or it will lift. I use Pritt Stick (well Tesco equivalent) on the bed, just a very thin layer, (after layer one) then it sticks like you won't believe. I also use this method on my little MonoPrice printer and I really struggle to get the prints off it as it isn't a magnetic flexible base, but at least I don't get any warpage these days  Many people use this, I read it online and it was the most used adhesion method I found.
The buck stops here .......
Ditton Meadow Light Railway (DMLR)
Member of Peterborough and District Association
http://peterborough.16mm.org.uk/
Ditton Meadow Light Railway (DMLR)
Member of Peterborough and District Association
http://peterborough.16mm.org.uk/
Re: My Flashforge Printer Journey.
Thanks Simon, on looking at the screen I saw the change filament screen and did it exactly how you described it.
I haven't needed to clean the bed yet Steve, I was just asking about it. But it's good to know that even experienced 3d users need some sort of a cleaning regime and the Pritt stick is mentioned a lot online has you say.
I haven't needed to clean the bed yet Steve, I was just asking about it. But it's good to know that even experienced 3d users need some sort of a cleaning regime and the Pritt stick is mentioned a lot online has you say.
ROD
Life is so easy when I run my trains.
https://gardenrails.org/forum/viewtopic ... 41&t=11364
https://www.youtube.com/@fairywoodlightrailway
Life is so easy when I run my trains.
https://gardenrails.org/forum/viewtopic ... 41&t=11364
https://www.youtube.com/@fairywoodlightrailway
Re: My Flashforge Printer Journey.
I have done lots of prints on my machine, some which have turned out good and some disasters. But I have soldered on and I have now got a little bit better, only just mind, with doing some programming with TinkerCad. I still need to master the gate and I need some hinges for it, so with that in mind I thought it would be good idea to try and make a hinge. The one that ge_rik has done on is blog shows you how to do it. Thank you Rik, you have been so patient with me. I do encourage you to play with TinkerCad, it is a brilliant bit of software and though it may have it's limitations, I really wouldn't know yet if it has, by playing around and using it you can do a lot with it, some great and some not so great. I am done some fairly average things with it. Like a couple of paint pot holders. I don't know about you, but when I use my paints, the pots I use are not really that suitable with them either being too big or too small and not very stable.
So I tried various things with TinkerCad and these are what I did with them.
I first started with these to see what different setting came out. The first one is on the left. The photos are not the best I have done sorry. It came out with a thin wall and lots of flats on it. I looked at the setting on TinkerCad and realised that there was the individual setting, so I made the wall thicker and with less flats.
The next photo is a group of 4 different print settings.
The bottom right is the setting I ended up using for the print.
Then I needed to get the inside diameter for two of the paints pot sizes I use the most, which is pretty straight forward when you find out what the outside diameter of each paint pots and then the thickness of the wall and add that on.
This is what I have now got.
Has you can see they still have the rafts on which aids with the stability of the pots. I did try one with out any raft and it just came off the printer just by the slightest touch..So I ended up with just a ring.
It's not a problem, I can always find a use for it...
So I tried various things with TinkerCad and these are what I did with them.
I first started with these to see what different setting came out. The first one is on the left. The photos are not the best I have done sorry. It came out with a thin wall and lots of flats on it. I looked at the setting on TinkerCad and realised that there was the individual setting, so I made the wall thicker and with less flats.
- B90CCCAE-A8FD-4874-A95E-0750CD86BFF8.jpeg (1.65 MiB) Viewed 3905 times
- 57B882F9-7136-41FB-824F-C526D3BE0110.jpeg (1.81 MiB) Viewed 3905 times
The bottom right is the setting I ended up using for the print.
Then I needed to get the inside diameter for two of the paints pot sizes I use the most, which is pretty straight forward when you find out what the outside diameter of each paint pots and then the thickness of the wall and add that on.
This is what I have now got.
- 37E4D7A4-7B31-4381-9118-3947E73D6070.jpeg (2.1 MiB) Viewed 3905 times
It's not a problem, I can always find a use for it...
- 563FEEE7-5747-41A3-91F7-ED0C65646E0C.jpeg (1.79 MiB) Viewed 3905 times
ROD
Life is so easy when I run my trains.
https://gardenrails.org/forum/viewtopic ... 41&t=11364
https://www.youtube.com/@fairywoodlightrailway
Life is so easy when I run my trains.
https://gardenrails.org/forum/viewtopic ... 41&t=11364
https://www.youtube.com/@fairywoodlightrailway
Re: My Flashforge Printer Journey.
I now also have an hinge of sorts. I did try doing Rik's which he has put on the forum, but it turned out somewhat wrong. It was probably my fault with the understanding of the setting, but the rivets came out with very sharp points at the top, I know that's me  stupid....It also was a tad thin, so I played around again and this is what I have now. There is only one rivet on either side of the hinge plate, but that can be altered. The main thing is I have managed to print a hinge...
There is a decency warning with the first photo, it's just the way it printed.....
The second photo shows the one on the left, which is what I have come up with and the one on the right is Rik's setting, or my interpretation of it, sorry Rik.
Again on Rik's also, one of the rivets came off really easy, I guess though that is because I didn't have it on the main body of the print.
Anyway onwards and upwards, hopefully.
There is a decency warning with the first photo, it's just the way it printed.....
- F0EF2B38-7C8A-4F7A-A4A9-F227339A1927.jpeg (2.86 MiB) Viewed 4422 times
The second photo shows the one on the left, which is what I have come up with and the one on the right is Rik's setting, or my interpretation of it, sorry Rik.
- 8383F8F6-AC75-4DEE-83CA-C1F615015551.jpeg (2.03 MiB) Viewed 4422 times
Anyway onwards and upwards, hopefully.
ROD
Life is so easy when I run my trains.
https://gardenrails.org/forum/viewtopic ... 41&t=11364
https://www.youtube.com/@fairywoodlightrailway
Life is so easy when I run my trains.
https://gardenrails.org/forum/viewtopic ... 41&t=11364
https://www.youtube.com/@fairywoodlightrailway

Re: My Flashforge Printer Journey.
No problem Rod
Happy that you are using my tutorial and branching out on your own
Rik
Happy that you are using my tutorial and branching out on your own
Rik
Re: My Flashforge Printer Journey.
It's a bit more than achallage for me Rik, but with help from yourself and others on the forum I am making some progress, all be it slow.......
ROD
Life is so easy when I run my trains.
https://gardenrails.org/forum/viewtopic ... 41&t=11364
https://www.youtube.com/@fairywoodlightrailway
Life is so easy when I run my trains.
https://gardenrails.org/forum/viewtopic ... 41&t=11364
https://www.youtube.com/@fairywoodlightrailway
Re: My Flashforge Printer Journey.
I did get to print the Bike also Boris. Although two problems arose from them. Firstly, the original small scale print I did put supports and they were a bit of a pain to take off. 2nd, I scaled it up to 140% and it was a lot better, but the handlebars and one of the foot pedals were a bit thin, the pedal actually broke off. Also it printed with two rafts on the bike wheels, which helped with getting the print off the bed and I kept one on to aid with it standing up.
Maybe the handlebars need to have supports, so I will try it again with the supports on, although is the a way of just having supports where you need them and not covering all of the print
Close up, they do look a bit rough, well a lot. But from a distance they look ok. I don't know how much it cost to print them, I only used about 1 meter of filament and it took about 45 minutes approximately.
I forgot to write down the time and material used....
Maybe the handlebars need to have supports, so I will try it again with the supports on, although is the a way of just having supports where you need them and not covering all of the print
- 76C85521-CB0D-4AFE-9AC3-A2FD090B61AE.jpeg (2.24 MiB) Viewed 4391 times
- 0059118D-0747-439F-9951-4DC9496A032C.jpeg (2.5 MiB) Viewed 4391 times
Close up, they do look a bit rough, well a lot. But from a distance they look ok. I don't know how much it cost to print them, I only used about 1 meter of filament and it took about 45 minutes approximately.
I forgot to write down the time and material used....
ROD
Life is so easy when I run my trains.
https://gardenrails.org/forum/viewtopic ... 41&t=11364
https://www.youtube.com/@fairywoodlightrailway
Life is so easy when I run my trains.
https://gardenrails.org/forum/viewtopic ... 41&t=11364
https://www.youtube.com/@fairywoodlightrailway
Re: My Flashforge Printer Journey.
2 options for this in Flashprint that I'm aware of:
Put supports in manually by going into 'supports' and instead of clicking on the "A" for Auto Supports (at the top) use the '+' for Add (on the left) to add individual supports - once you have selected this you can click on your model wherever you want to add supports.
Put supports in automatically in the usual way, then use the 'x' for Delete (on the left) to remove individual supports - once you have this selected then any supports you click on will be removed.
Re: My Flashforge Printer Journey.
Thanks Simon.
I will give it ago after I have done the Grandsons phone case. It's taking 6hrs to do...Mind you it's 6.5 inches, so it has to be tilted....
I will give it ago after I have done the Grandsons phone case. It's taking 6hrs to do...Mind you it's 6.5 inches, so it has to be tilted....
ROD
Life is so easy when I run my trains.
https://gardenrails.org/forum/viewtopic ... 41&t=11364
https://www.youtube.com/@fairywoodlightrailway
Life is so easy when I run my trains.
https://gardenrails.org/forum/viewtopic ... 41&t=11364
https://www.youtube.com/@fairywoodlightrailway
Re: My Flashforge Printer Journey.
Now I haven't been to good lately and I am going to see the heart consultant at 1.45pm about these blooming pains I have been getting again just lately. So the 3d work has had to be put on hold, well it was curtailed somewhat. I have been far too long on the laptop, looking at things on Thingiverse and other stuff.
I have though managed to build a gate, it took me two and halve weeks. Anne was getting very upset with me, so I needed to limit my time on it. Because I haven't been working on TinkerCad much, it's slightly difficult trying to remember how things work on it.
Anyway here it is.
Finished on the printer. I haven't done the hinges though. I thought I would see how it turned out.
Now with most of the raft off.
The second photo is the bottom of the gate. You will see I made a huge "cock-up" by printing it flat. Because I haven't got the two planks that are at 45Deg level with the posts, the raft has been a bit of a pig to get off. There is still some left on, but has this is a trial it will do.
The hinges need to go on, but I will need to get the planks level with the posts. I know I think that the posts need to be the same thickness as the planks don't they.
There is the question of the infill also. You can see it really plainly. Don't know what to do about that.
This will have to do for now until I come back from the hospital later on, that's if I am up to it...
I have though managed to build a gate, it took me two and halve weeks. Anne was getting very upset with me, so I needed to limit my time on it. Because I haven't been working on TinkerCad much, it's slightly difficult trying to remember how things work on it.
Anyway here it is.
Finished on the printer. I haven't done the hinges though. I thought I would see how it turned out.
- D868142B-E7DA-478F-B8E9-7E7AFDADEFB6.jpeg (2.71 MiB) Viewed 4137 times
Now with most of the raft off.
The second photo is the bottom of the gate. You will see I made a huge "cock-up" by printing it flat. Because I haven't got the two planks that are at 45Deg level with the posts, the raft has been a bit of a pig to get off. There is still some left on, but has this is a trial it will do.
- 91734E04-2A0B-4427-AEB4-249BCB948174_1_201_a.jpeg (3.18 MiB) Viewed 4137 times
- 19967235-7FF8-480A-9F1E-AF38538E2C09_1_201_a.jpeg (3.43 MiB) Viewed 4137 times
There is the question of the infill also. You can see it really plainly. Don't know what to do about that.
This will have to do for now until I come back from the hospital later on, that's if I am up to it...
ROD
Life is so easy when I run my trains.
https://gardenrails.org/forum/viewtopic ... 41&t=11364
https://www.youtube.com/@fairywoodlightrailway
Life is so easy when I run my trains.
https://gardenrails.org/forum/viewtopic ... 41&t=11364
https://www.youtube.com/@fairywoodlightrailway
Re: My Flashforge Printer Journey.
I am also not getting notifications again. I thought it would improve with the new server. still it's no problem really. I do come on everyday without Anne knowing sometimes....
ROD
Life is so easy when I run my trains.
https://gardenrails.org/forum/viewtopic ... 41&t=11364
https://www.youtube.com/@fairywoodlightrailway
Life is so easy when I run my trains.
https://gardenrails.org/forum/viewtopic ... 41&t=11364
https://www.youtube.com/@fairywoodlightrailway
Re: My Flashforge Printer Journey.
The size of the gate is,
Length 134mm
Longest post height 92mm
Shortest post height 71mm
Plank width 5mm
Space between planks 9mm
I am thinking is the correct scale. It was all guess work for me....
Length 134mm
Longest post height 92mm
Shortest post height 71mm
Plank width 5mm
Space between planks 9mm
I am thinking is the correct scale. It was all guess work for me....
ROD
Life is so easy when I run my trains.
https://gardenrails.org/forum/viewtopic ... 41&t=11364
https://www.youtube.com/@fairywoodlightrailway
Life is so easy when I run my trains.
https://gardenrails.org/forum/viewtopic ... 41&t=11364
https://www.youtube.com/@fairywoodlightrailway
Re: My Flashforge Printer Journey.
That looks pretty darned good to me Rod. Well done!
Now you've started you'll soon be on a roll. Won't be long before you start drawing and printing your own rolling stock. How about the Flying Scotsman?
Rik
Now you've started you'll soon be on a roll. Won't be long before you start drawing and printing your own rolling stock. How about the Flying Scotsman?
Rik
Who is online
Users browsing this forum: No registered users and 0 guests