I'm just setting up my first garden railway a simple circuit at the back of my garden.
So far so good - barring a couple of incidents which have been solved. The only main issue is with an IP engineering Brake Van. It's one which has wooden axel boxes.
There is some slight inclines and some slightly rough joints which I have tried to evaluate as much as possible an due to space confines I can really just use R1 curves.
Most of my stock including the engine tend to tolerate these issue which some slightly tweaking of the wheels but this brake van is still being a bit of a nightmare. When I've checked on curves and inclines it rides up until it's only on three wheels which usually leads it to derail. I've tried to alleviate any inclines on my curves and reduce gaps and non-flush joints which helps but doesn't entirely prevent the problem.
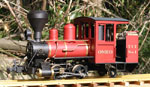
Sensitive IP engineering Brake Van.
-
Sylvian Tennant

- Fireman

- Posts: 327
- Joined: Wed Aug 10, 2011 4:48 pm
- Location: Teesside
Sensitive IP engineering Brake Van.
Last edited by Sylvian Tennant on Mon Sep 12, 2016 2:09 pm, edited 1 time in total.
Facebook - https://www.facebook.com/Area51Models/
Instagram - https://www.instagram.com/area51greumach/
Instagram - https://www.instagram.com/area51greumach/

-
Sylvian Tennant
- Fireman
- Posts: 327
- Joined: Wed Aug 10, 2011 4:48 pm
- Location: Teesside
Thank you for the advice - unfortunately I model 45mm gauge.
Facebook - https://www.facebook.com/Area51Models/
Instagram - https://www.instagram.com/area51greumach/
Instagram - https://www.instagram.com/area51greumach/

-
Dannypenguin

- Trainee Driver

- Posts: 632
- Joined: Tue Feb 26, 2013 9:57 am
- Location: Forest of Dean, UK
- Contact:
If its 45mm the back to backs should be just over 40mm if I'm correct  supposed to be about 4/5mm clearance to allow for tight curves and jolts, etc
EDIT: Grayln beat me to it by a minute!
EDIT: Grayln beat me to it by a minute!
Dan
Visit the PFLR website - http://poultonfarmlightrailway.webs.com/
Dean Forest Railway Society website - http://dfrsociety.org/
Visit the PFLR website - http://poultonfarmlightrailway.webs.com/
Dean Forest Railway Society website - http://dfrsociety.org/
-
Sylvian Tennant
- Fireman
- Posts: 327
- Joined: Wed Aug 10, 2011 4:48 pm
- Location: Teesside
cheers chaps will double check them now
Facebook - https://www.facebook.com/Area51Models/
Instagram - https://www.instagram.com/area51greumach/
Instagram - https://www.instagram.com/area51greumach/

-
Sylvian Tennant
- Fireman
- Posts: 327
- Joined: Wed Aug 10, 2011 4:48 pm
- Location: Teesside
I've set them to approx 39.58mm and see what that does.
Facebook - https://www.facebook.com/Area51Models/
Instagram - https://www.instagram.com/area51greumach/
Instagram - https://www.instagram.com/area51greumach/
-
MDLR

- Driver

- Posts: 4027
- Joined: Thu Jan 15, 2009 10:38 pm
- Location: Near Ripley, Derbyshire, UK
- Contact:
This is why it's a good idea to build the underframe using a sheet of plate glass (MUST be plate - it's better made and more accurate than window glass) - this will enable you to get your axles and axleboxes right.philipy:120035 wrote:I'd also check that (a) all wheels touch a flat surface and (b) that the axles are parallel to each other and at right angles to the frames. "Crabbing" is a prime source of the problem you describe.
Last edited by MDLR on Mon Sep 12, 2016 8:09 pm, edited 1 time in total.
-
Sylvian Tennant
- Fireman
- Posts: 327
- Joined: Wed Aug 10, 2011 4:48 pm
- Location: Teesside
I've checked the squaring of the van and it seems fine - a very slight different but nothing more than a millimetre or so.
Facebook - https://www.facebook.com/Area51Models/
Instagram - https://www.instagram.com/area51greumach/
Instagram - https://www.instagram.com/area51greumach/
-
tom_tom_go

- Driver
- Posts: 4824
- Joined: Wed Feb 23, 2011 3:08 am
- Location: Kent, UK
- Contact:
-
Sylvian Tennant
- Fireman
- Posts: 327
- Joined: Wed Aug 10, 2011 4:48 pm
- Location: Teesside
Approx 100mm
It's been round 1st radius before fairly easily and generally continues to do so. I know of the horrors of 1st radius but for the moment it's all I can really allow. The problems begin to occur when there is a hint of unevenness in track. sometimes it'll run over them okay but other times comes straight off. I have adapted the back to backs so that there is a little more clearance for the flanges and fettled the track in so there is less gaps between the joints. It seems to have given some improvement in regards to running.
The van as mentioned seems to be fairly square and there is a slight incline on the circuit which originally bag at the curves.
Facebook - https://www.facebook.com/Area51Models/
Instagram - https://www.instagram.com/area51greumach/
Instagram - https://www.instagram.com/area51greumach/
While that was absolutely true once, the gradual take-over of Float Glass has changed things.MDLR wrote:This is why it's a good idea to build the underframe using a sheet of plate glass (MUST be plate - it's better made and more accurate than window glass)
- Traditional window glass was blown, and hard to get in significant sheets anyway, let alone flat ones. Avoid like the plague.
- Industrial window glass was dawn out of a pool of molten glass, like a sheet of soap bubble, and while it could be had in large sheets, they weren't all that flat. I'm sure that's what Brian has in mind.
- Plate Glass was cast on iron tables, then polished flat mechanically at huge expense, making large thick sheets suitable for shop windows.
It used to be the best there was, comparable with polished stone, and certainly an old copy of Model Engineer etc would recommend it. An old mirror made of thick glass would probably be Plate Glass and as Brian says it would be fine.
- Float Glass is cast as a perfectly even ribbon floating on a bed of molten tin and therefore has a flatness comparable to the curvature of the earth.
These days, that's how window glass is made, but while it's very flat, modern window glass is still surprisingly bendy.
- Toughened glass is a bad idea because it becomes wavy during the forced cooling process, as one can tell just by looking through it.
I'd recommend a piece of thick Float Glass as being the best surface one can buy, yet hugely cheaper than the obsolete and hard-to-find Plate Glass.
Polished granite kitchen boards can be good too, though I've recently given one away to a cook because, although very stylish, it wasn't nearly as flat as I'd hoped.
Cast iron surface plates are good too but bulky, vulnerable to dings, heavy, and expensive unless you get lucky.
David
-
Sir Clothem Cap

- Driver
- Posts: 1707
- Joined: Sun Sep 26, 2010 8:45 pm
- Location: Hampshire
- Contact:
100mm wheelbase is longer than the Lady Anne, so the van might be more sensitive to sharp curves than the loco.Sylvian Tennant:120039 wrote:I've checked the squaring of the van and it seems fine - a very slight different but nothing more than a millimetre or so.
Be wary of narrowing the wheel back to back. It may get you out of trouble on plain track, but can bite you when you add points to your layout.
If one wheel really is 1mm high in a 100mm wheelbase that's far to much. Flange depth is only 2mm on IP wheels, so you only need a 1mm low spot on the outside of a curve and that wheel is in the dirt.
You don't need a super dooper surface plate to check a 4 wheel chassis, a piece of glass is fine, but a piece of thick MDF in good condition will be flat enough in a pinch.
If the van rocks on a flat surface, pack that wheel with slips of paper, until the van doesn't rock, then measure the packing thickness. If it's more than a couple of pieces of paper you have a problem and need to do some work on the chassis.
If the van only comes of in certain spots on the track, suspect the track at that location, there may be a low spot on the outside, or a high spot on the inside, most likely at a joint. If the van is already at it's minimum radius limit, a kink at a joint can also derail it.
If it derails at random, then the van is the likely problem. If the chassis is OK, with minimal rock and axles that are square to the centre line, check that there is no buffer lock, or insufficient coupler sideplay, etc.
Compensating the underframe would likely help if the chassis is already flat and square and the track is a bit rough. It won't make any difference though if the problem is just that the radius is too tight.
There was an article on the subject of adding simple compensation to an IP 4 wheel coach kit in Garden Rail #216. The author used the system of pivoting one sideframe, rather than the rocking axle common in 4mm scale.
The extreme fix is to convert the van to bogies if all else fails.........
Regards,
Graeme
-
Soar Valley Light

- Driver
- Posts: 1454
- Joined: Sun Dec 08, 2013 5:18 pm
- Location: North West Leicestershire
If you DO add weight (and it may well help) make sure its evenly distributed (or centrally located). Uneven loading always has been and continues to be a common caause of derailment of full sized rollimng stock of all gauges - and these benefit from the provision of suspension systems that our models don't posess. This means that our rigid vehicels are much less able to 'follow the contours' of the ups and downs (or side to sides) of our rails.Sir Clothem Cap:120049 wrote:Lubrication and adding more weight to the van may improve it's riding.
Good luck,
Andrew
"Smith! Why do you only come to work four days a week?
"'cause I can't manage on three gaffer!"
"'cause I can't manage on three gaffer!"
-
Sylvian Tennant
- Fireman
- Posts: 327
- Joined: Wed Aug 10, 2011 4:48 pm
- Location: Teesside
Thank you for everyone's advice. I have just had my first running session this morning and after a few initial suggested tweaks the van ran round nicely. I had initially considered making it a bogie wagon as I have two bogies spare but I'll see how it goes.GTB:120055 wrote:100mm wheelbase is longer than the Lady Anne, so the van might be more sensitive to sharp curves than the loco.Sylvian Tennant:120039 wrote:I've checked the squaring of the van and it seems fine - a very slight different but nothing more than a millimetre or so.
Be wary of narrowing the wheel back to back. It may get you out of trouble on plain track, but can bite you when you add points to your layout.
If one wheel really is 1mm high in a 100mm wheelbase that's far to much. Flange depth is only 2mm on IP wheels, so you only need a 1mm low spot on the outside of a curve and that wheel is in the dirt.
You don't need a super dooper surface plate to check a 4 wheel chassis, a piece of glass is fine, but a piece of thick MDF in good condition will be flat enough in a pinch.
If the van rocks on a flat surface, pack that wheel with slips of paper, until the van doesn't rock, then measure the packing thickness. If it's more than a couple of pieces of paper you have a problem and need to do some work on the chassis.
If the van only comes of in certain spots on the track, suspect the track at that location, there may be a low spot on the outside, or a high spot on the inside, most likely at a joint. If the van is already at it's minimum radius limit, a kink at a joint can also derail it.
If it derails at random, then the van is the likely problem. If the chassis is OK, with minimal rock and axles that are square to the centre line, check that there is no buffer lock, or insufficient coupler sideplay, etc.
Compensating the underframe would likely help if the chassis is already flat and square and the track is a bit rough. It won't make any difference though if the problem is just that the radius is too tight.
There was an article on the subject of adding simple compensation to an IP 4 wheel coach kit in Garden Rail #216. The author used the system of pivoting one sideframe, rather than the rocking axle common in 4mm scale.
The extreme fix is to convert the van to bogies if all else fails.........
Regards,
Graeme
Facebook - https://www.facebook.com/Area51Models/
Instagram - https://www.instagram.com/area51greumach/
Instagram - https://www.instagram.com/area51greumach/
-
cncmodeller
- Trainee Fireman

- Posts: 233
- Joined: Sat May 11, 2013 4:15 pm
- Location: lincolnshire
I had a similar experience at the weekend with my two L and B coaches they kept derailing on the slightest inaccuracy of track, I am convinced a lot of problems like this can be alleviated by burying some lead inside the stock. I know this is true because one coach weighs a lot more Than the other and was less troublesome than the other. The other issue I had not related to rolling stock is that my 'Lew' kept catching the points with its cowcatcher! I realise now that actually its slightly misshapen and pointing down and not that it needs raising ( which I thought at the time).
-
Sylvian Tennant
- Fireman
- Posts: 327
- Joined: Wed Aug 10, 2011 4:48 pm
- Location: Teesside
I've managed to weigh my stock with lead which helps lots as has been mentioned.
One of my issues not entirely unrelated to your experience is that I bought some LGB track off eBay. Generally speaking it works mostly but I'm assuming that over time in a garden it may have slightly distorted at the edges so the fitting isn't perfect which has caused some of my stock to catch the edge of the rail and come off.
I sought out the offending pieces of track and filed the edges diagonally slightly allowing the wagons to remain on the track.
Facebook - https://www.facebook.com/Area51Models/
Instagram - https://www.instagram.com/area51greumach/
Instagram - https://www.instagram.com/area51greumach/
Who is online
Users browsing this forum: No registered users and 0 guests